AWS Getting Started - Creating your VPC
- Former user (Deleted)
- Sean Hastert
- Tom Sheffield (Unlicensed)
Amazon Web Services (AWS) Installation Overview
This section describes how to set up an Amazon AWS Virtual Private Cloud (VPC) which will support either a single instance or a high availability (HA) pairing of SoftNAS instances using SoftNAS SNAP HA™. SoftNAS SNAP HA™ for EC2 now supports the use of Virtual IPs, and is our best practice recommendation. Configuration with Elastic IPs is still fully supported.
The following is required:
- Create the VPC in AWS.
- Specify the IAM User for SoftNAS®
- Create required subnets
- Configure the routing tables.
- Launch an Instance of SoftNAS® into the VPC.
- Create and Associate the Required Elastic or Virtual IPs.
- Set up SoftNAS® for HA.
If planning on deploying a private VPC, remember that a connection method to tunnel traffic into your private subnet is required. For more information about connecting to a private subnet, see AWS' guidance on the subject. Alternatively, AWS' Direct Connect solution can be configured.
Creating the VPC
A VPC is a private, isolated section of the AWS cloud that can be set up in a variety of configurations.
- To create your VPC, log into the AWS console with your AWS credentials, and select Services.
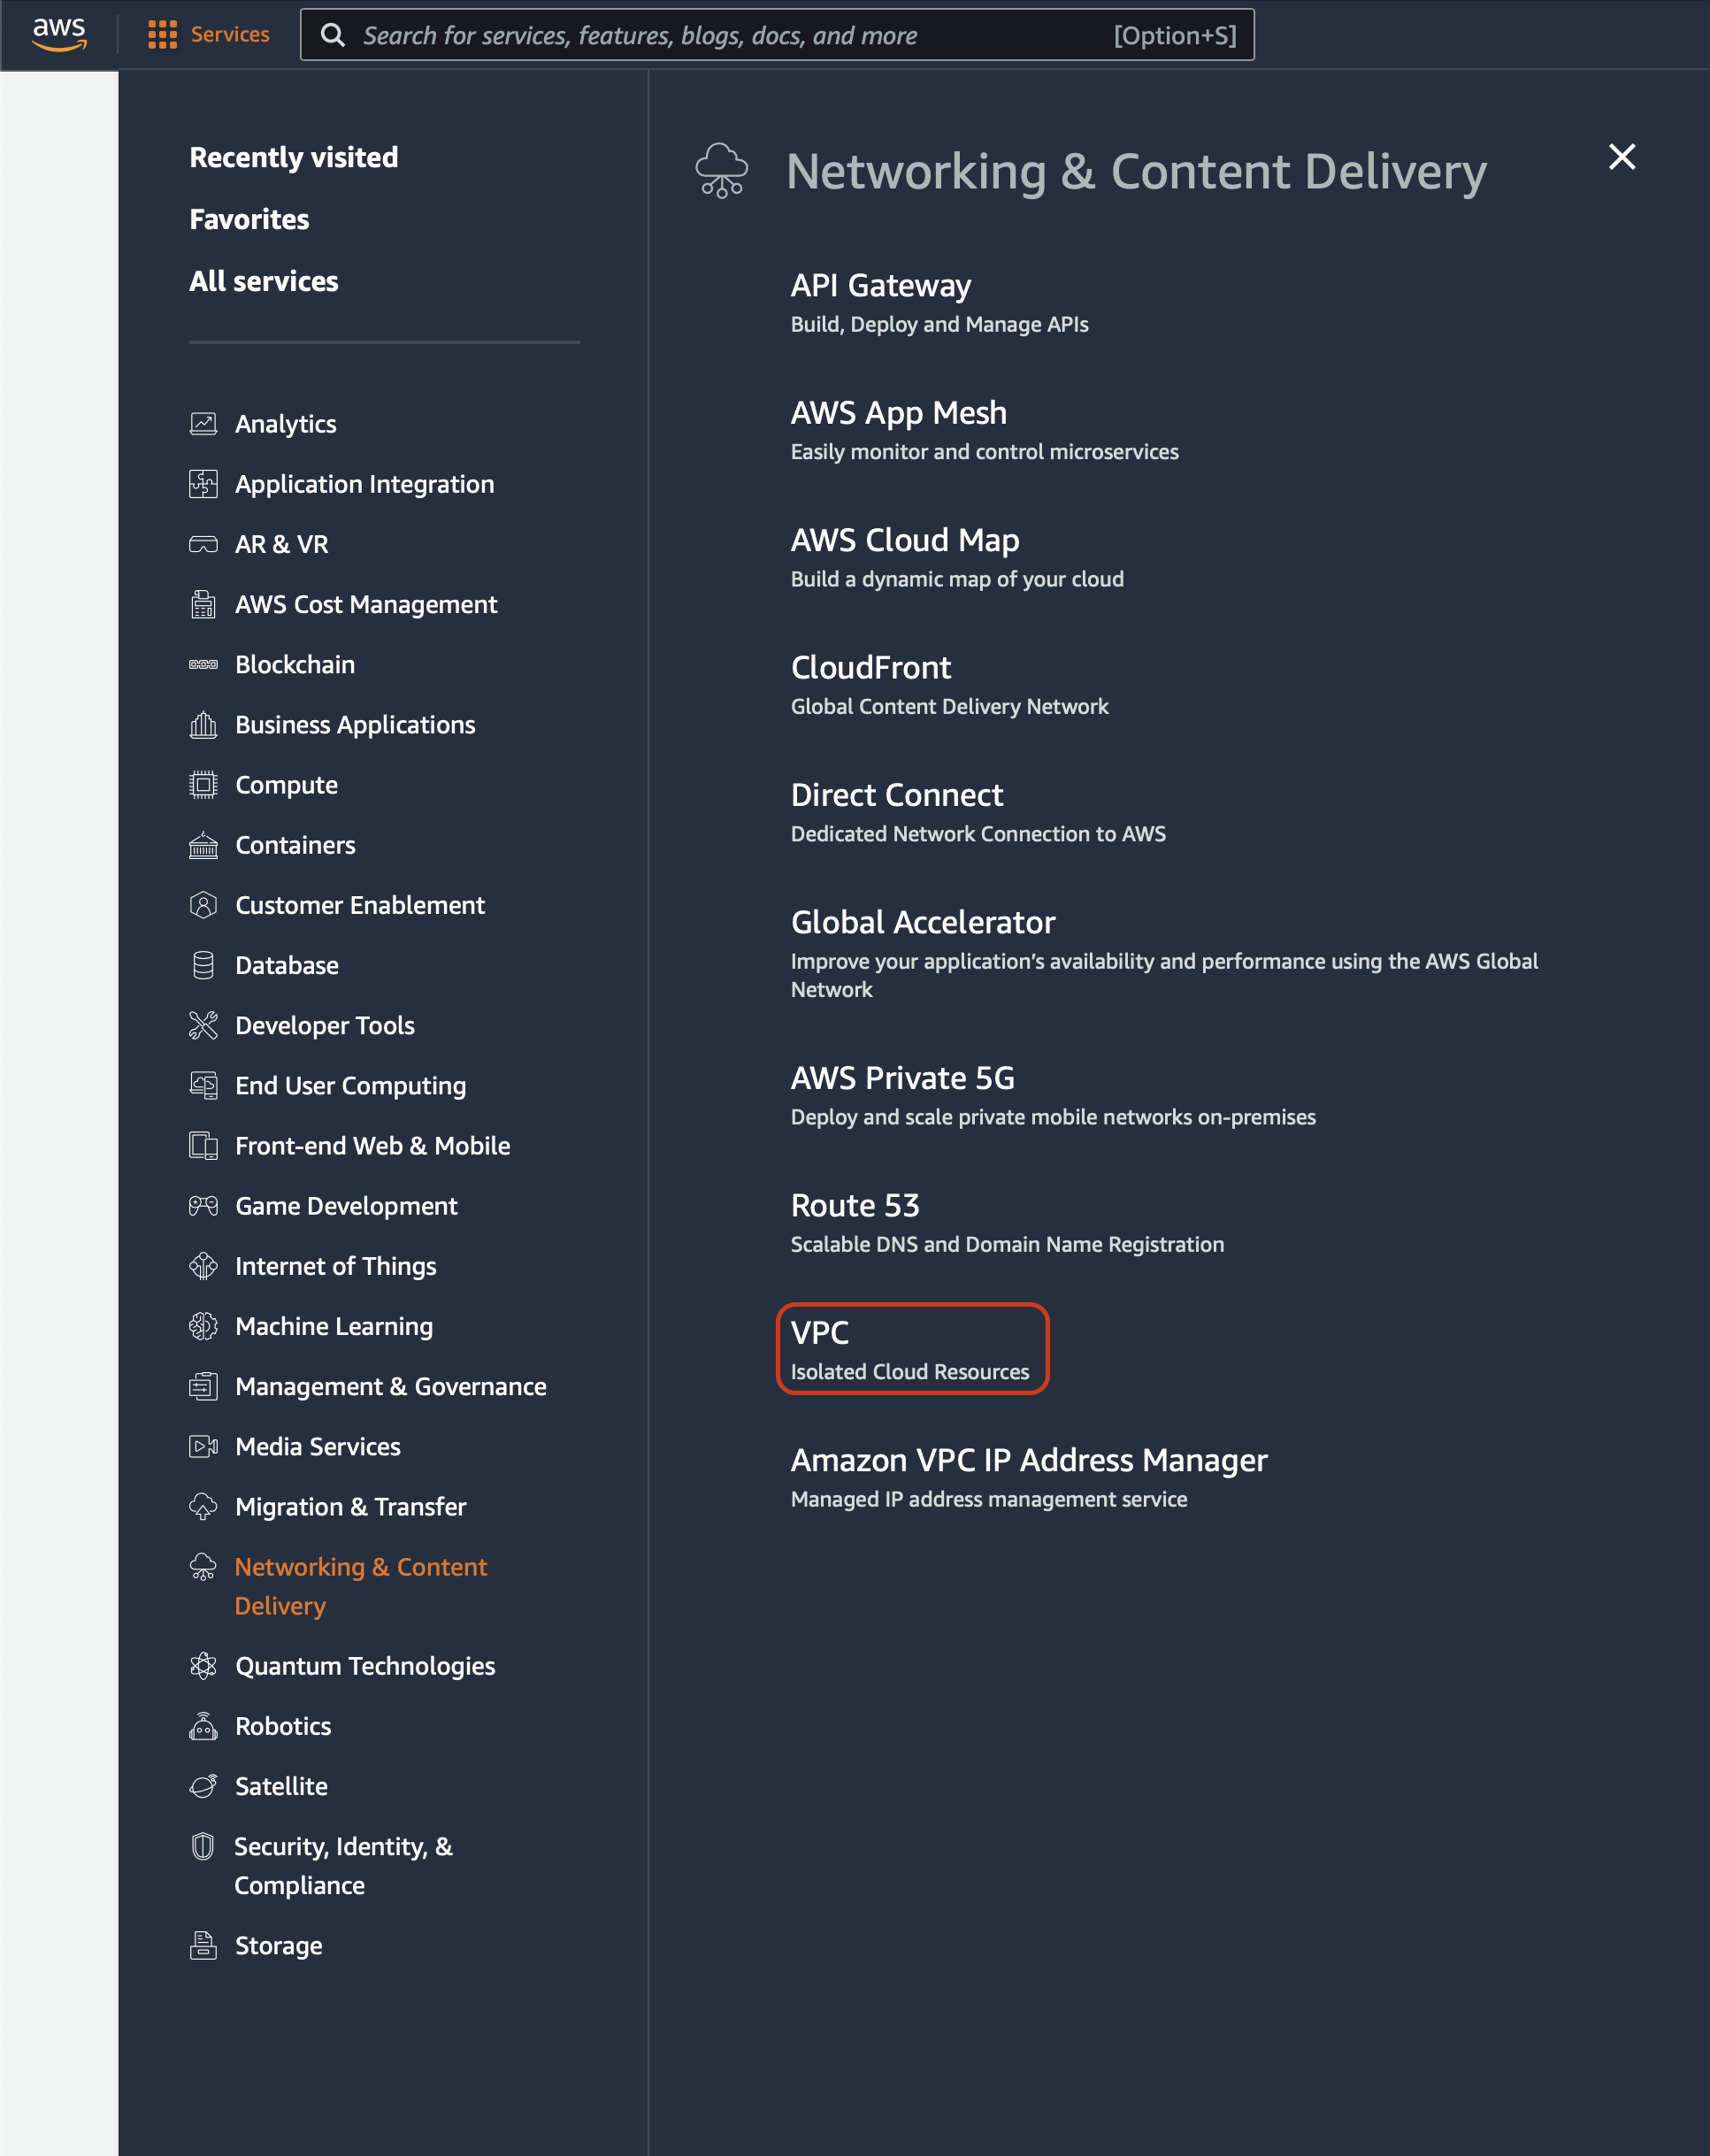
- Select Networking and Content Delivery
- Select VPC.
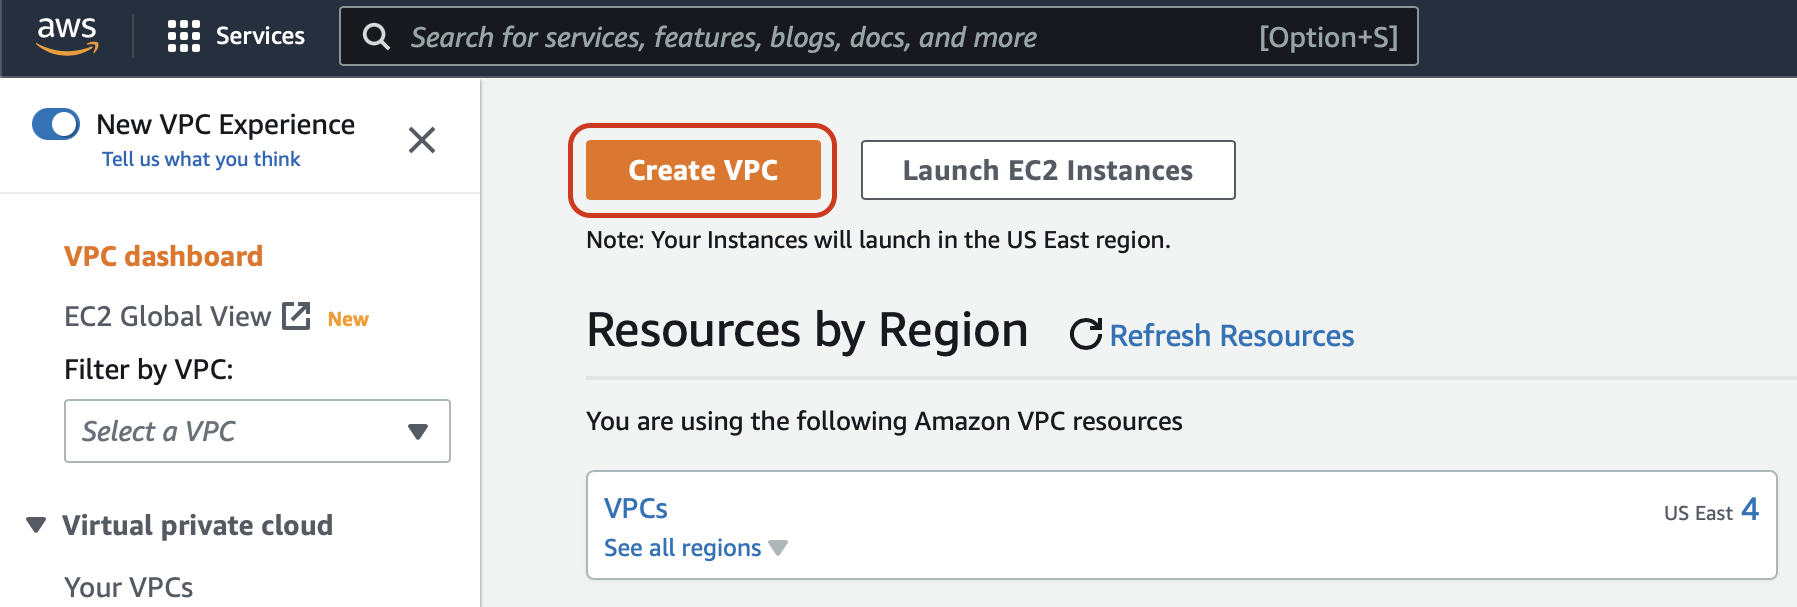
- From the VPC Dashboard, click on Create VPC.
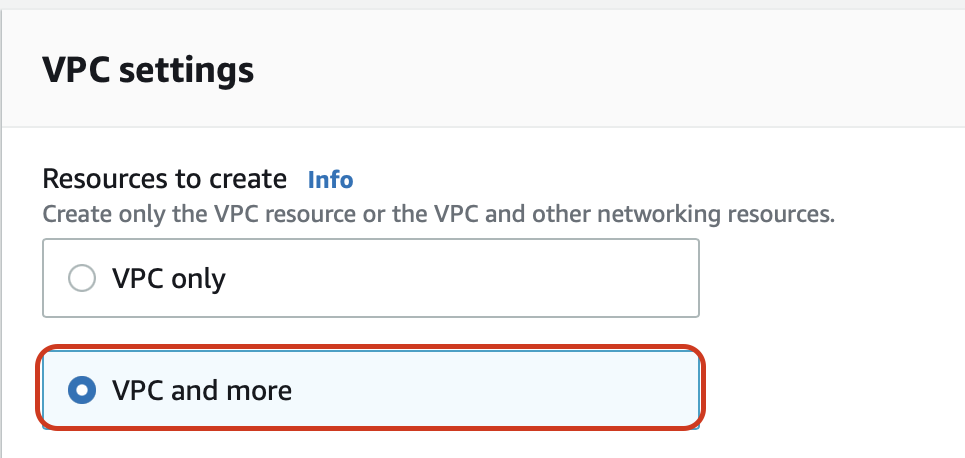
- Select VPC and more.
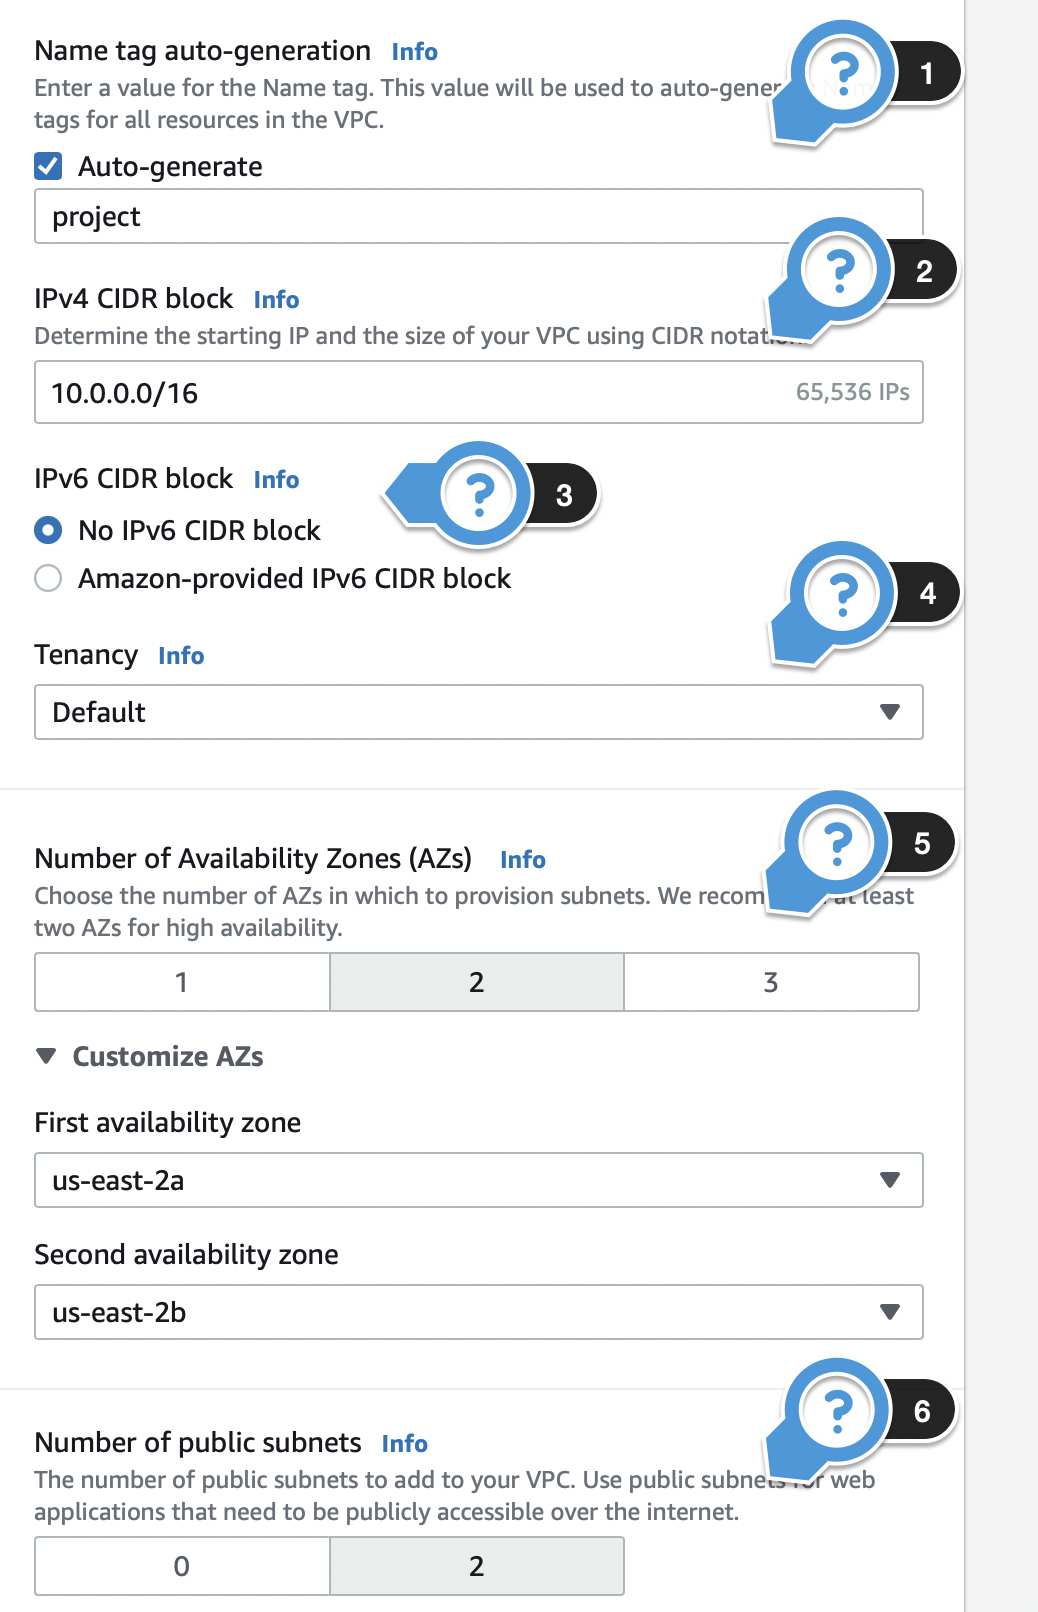
Configure the IP CIDR block, Public and Private Subnets, and all other settings as appropriate.
- Provide a Name tag that will be used to generate the Name tag of all resources in the VPC.
- Provide an IPv4 CIDR block for your VPC. The default can be kept, provided it does not conflict with other CIDR clocks within your organization. For this example, we will us 10.0.0.0/16
- IPv6 CIDR block can be kept at the default of No IPv6 CIDR block unless your use case necessitates an Amazon provided IPv6 CIDR block.
- Tenancy can be kept at the default of Default. This ensures that instances launched in this VPC use the tenancy attribute specified at launch. Switching this value to Dedicated would ensure that instances launched in this VPC are run on dedicated tenancy instances regardless of the tenancy attribute specified at launch.
- Number of Availability Zones (AZs) can be kept at the default of 2. If you wish to customize the availability zone location, you may do so under Customize AZs.
- Number of public subnets should be kept as the default of 2.
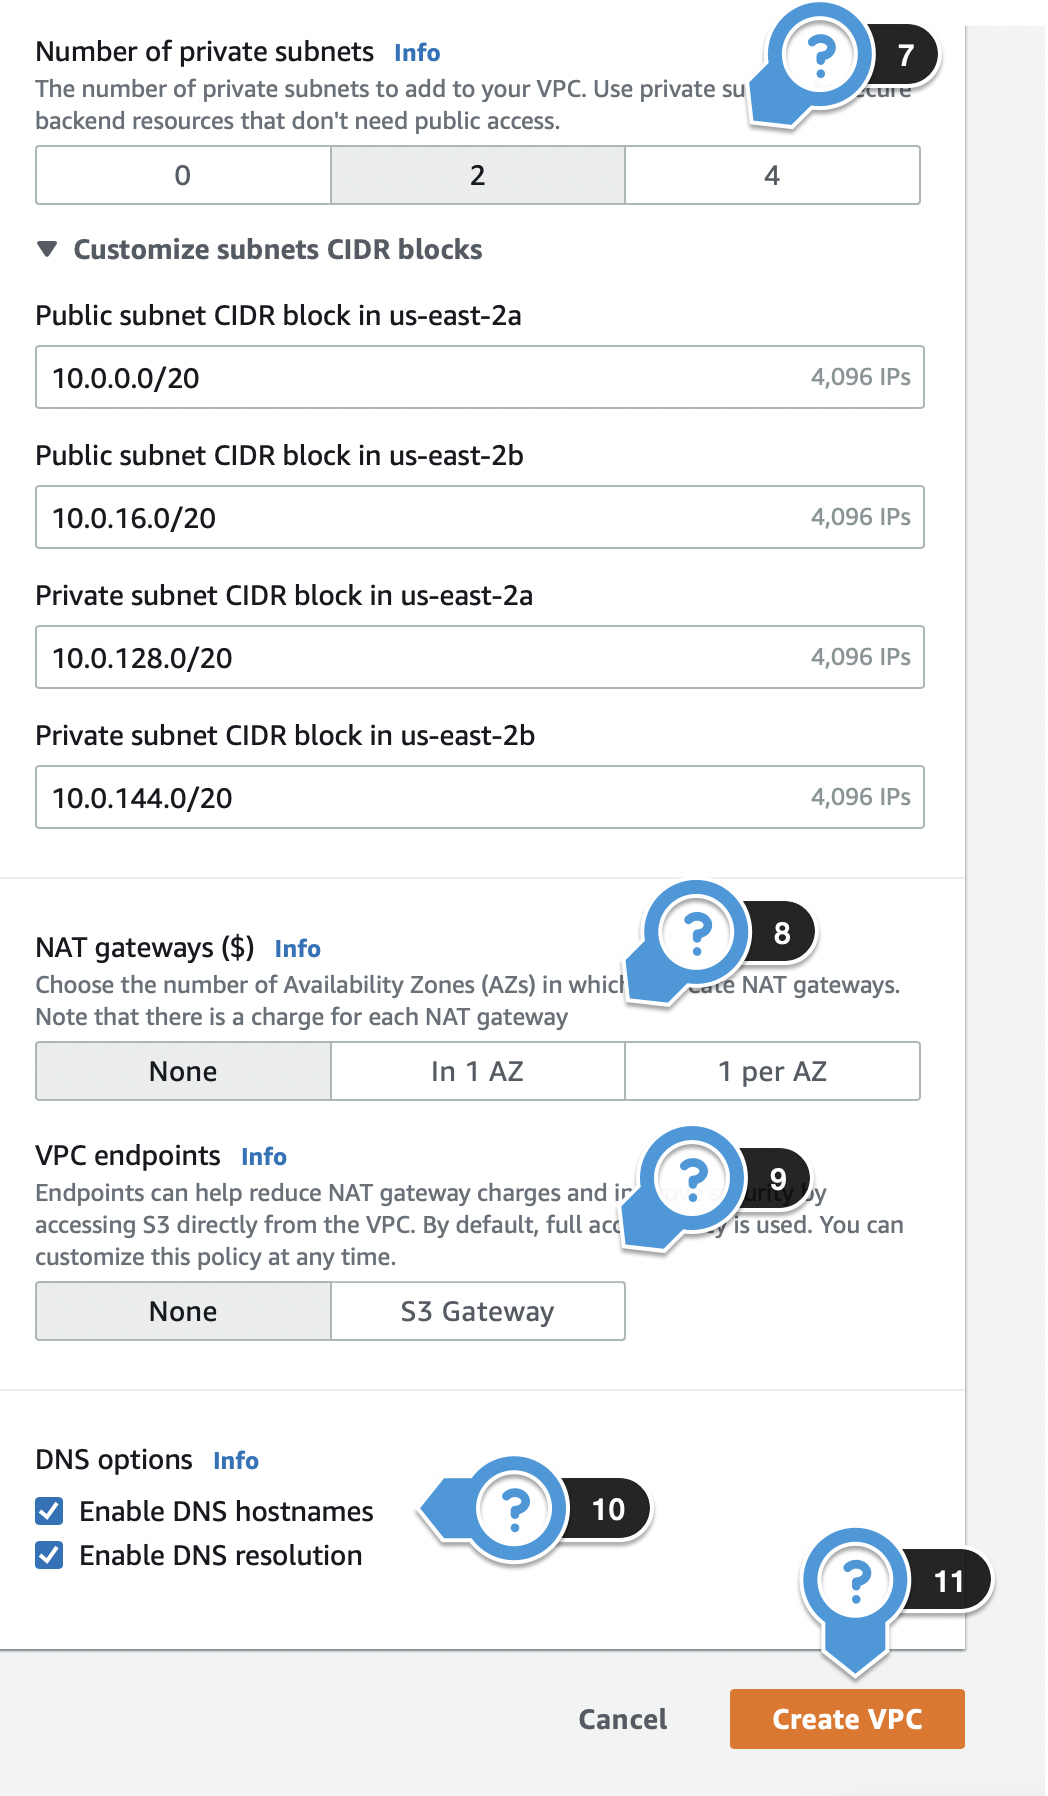
- Number of private subnets can be kept at the default of 2. If you wish to customize the CIDR blocks of your subnets, you may do so under Customize subnets CIDR blocks.
- NAT gateways ($) can be kept at the default of 0 unless your use case necessitates the use of NAT gateways. (Hourly charges for NAT instances apply.)
- Select None for VPC endpoints unless you are using NAT gateways and your use case necessitates the use of S3 Gateways.
- The DNS options of Enable DNS hostnames and Enable DNS resolution can be kept at the default of being selected.
- Once all settings are configured, select Create VPC to complete your VPC creation.
Configuration Best Practices to Consider Now:
- Select different availability zones when configuring the subnets for the greatest level of VPC redundancy.
- Select the proper instance type for intended usage, including anticipated networking and storage needs.
- Select a valid Key Pair that is secured and available for use.
Specify the IAM User for SoftNAS®
About Amazon IAM Users
AWS Identity and Access Management is a web service that enables Amazon Web Services (AWS) customers to manage users and user permissions in AWS. The service is targeted at organizations with multiple users or systems that use AWS products such as Amazon EC2, Amazon RDS, and the AWS Management Console. With IAM, centrally manage users, security credentials such as access keys, and permissions that control which AWS resources users can access.
Create an AWS IAM User for SoftNAS®. This will allow SoftNAS® instances to use the credentials of the AWS IAM User when accessing the VPC. For a step-by-step guide to setting up your IAM user, see Creating the SoftNAS® IAM Role for AWS.
Creating a Subnet
Buurst's No Downtime Guarantee requires that each instance in an HA pairing must belong to a separate Availability zone or region for redundancy. For this reason, at least two subnets are required for your VPC, each in a different Availability Zone. Depending on how you configure your VPC during the previous steps, all subnets should already be created, requiring you only to associate the subnets to the routing table (described below). However, if you need to create a second subnet, follow the below steps.
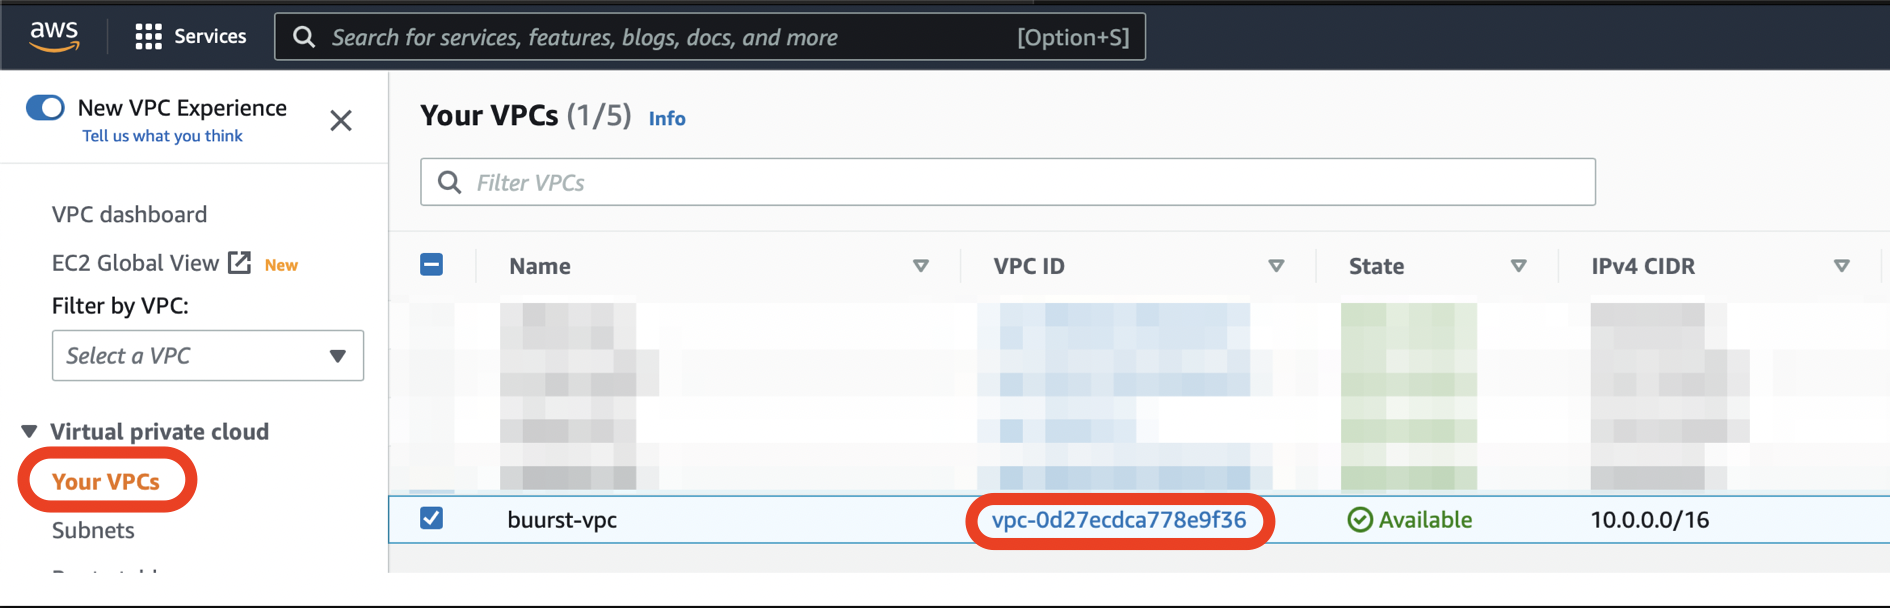
If you are going to assign additional subnets to your newly created VPC, it is important to log the VPC ID. The VPC ID can be found in Your VPCs from the VPC Dashboard.
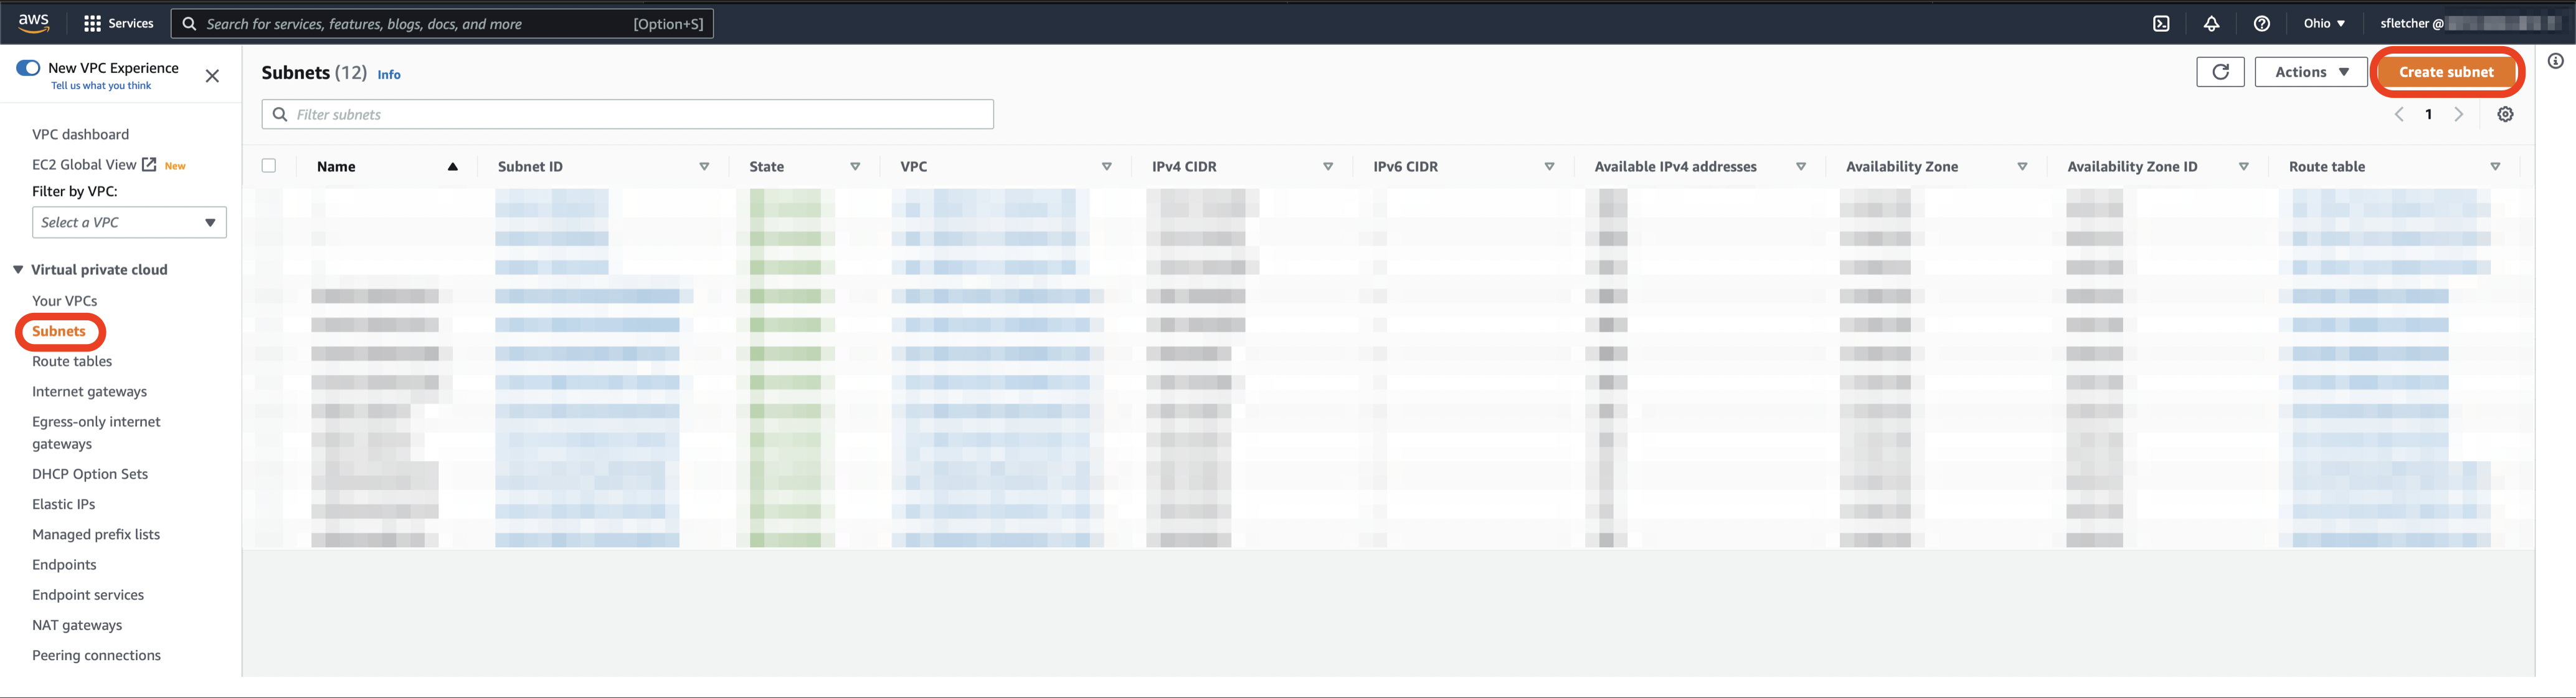
- Select Subnets from the VPC Dashboard > Virtual private cloud
- Click Create Subnet.
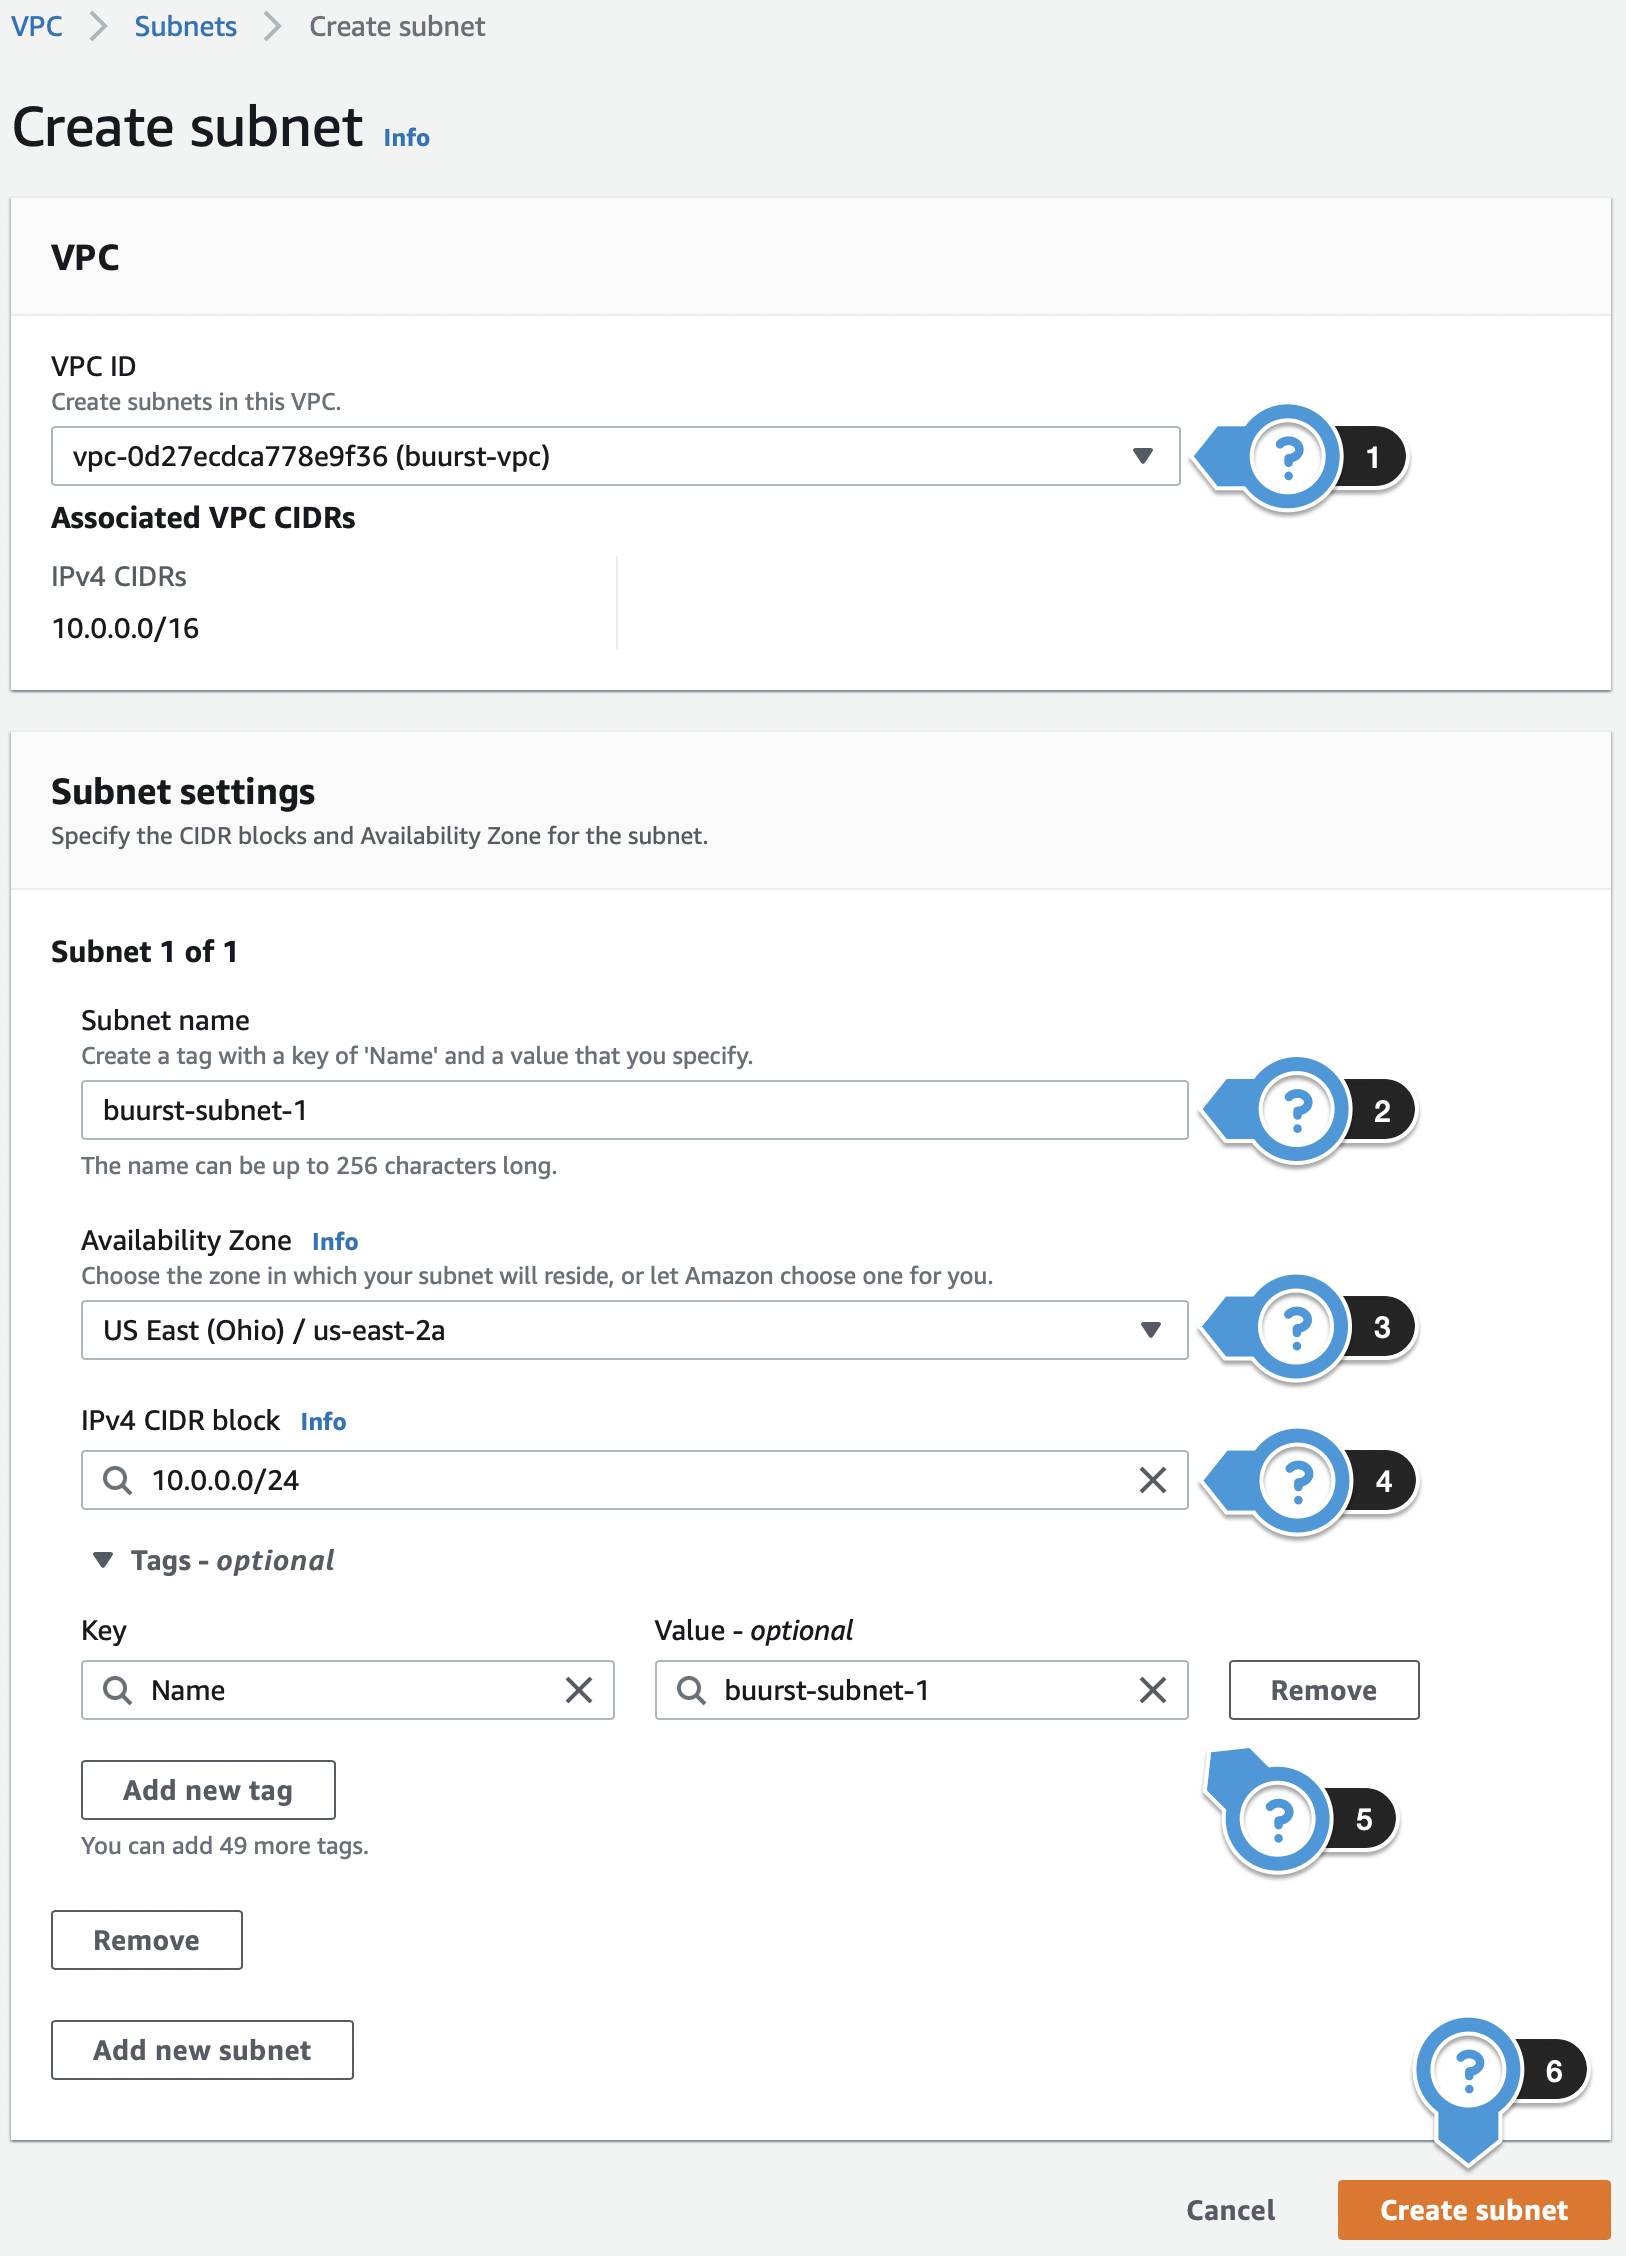
- In Create Subnet, you will provide the following information to create each subnet:
- VPC ID: From the drop-down menu, select the VPC that you previously created.
- Subnet name: Provide a name for the subnet, ideally one that identifies it as a secondary public or private subnet, dependent on which you will be deploying into.
- Availability Zone: This should be a separate availability zone from the default VPC public/private subnets.
- IPv4 CIDR block: The IPv4 CIDR block specifies an IP range for your instance. As we are creating two subnets, the CIDR block provided should be smaller than the CIDR block specified for the VPC.
- Tags - optional: If you would like, you can assign a friendly name to easily identify the subnet.
- Create subnet: Once all settings are configured, select Create subnet to complete your subnet creation.
Associating Subnets to a Route Table
Once your subnets have been created, they need to be associated with the correct route table. If creating a private VPC HA deployment, the two private subnets just created will need to be associated with the NAT Gateway or private Route Table. If public, you will need to associate a second public subnet to the route table. In the below example, we will be associating private subnets to a private route table. However, the process is the same in either case. Simply be sure to select the correct route table, and associate the appropriate subnet.
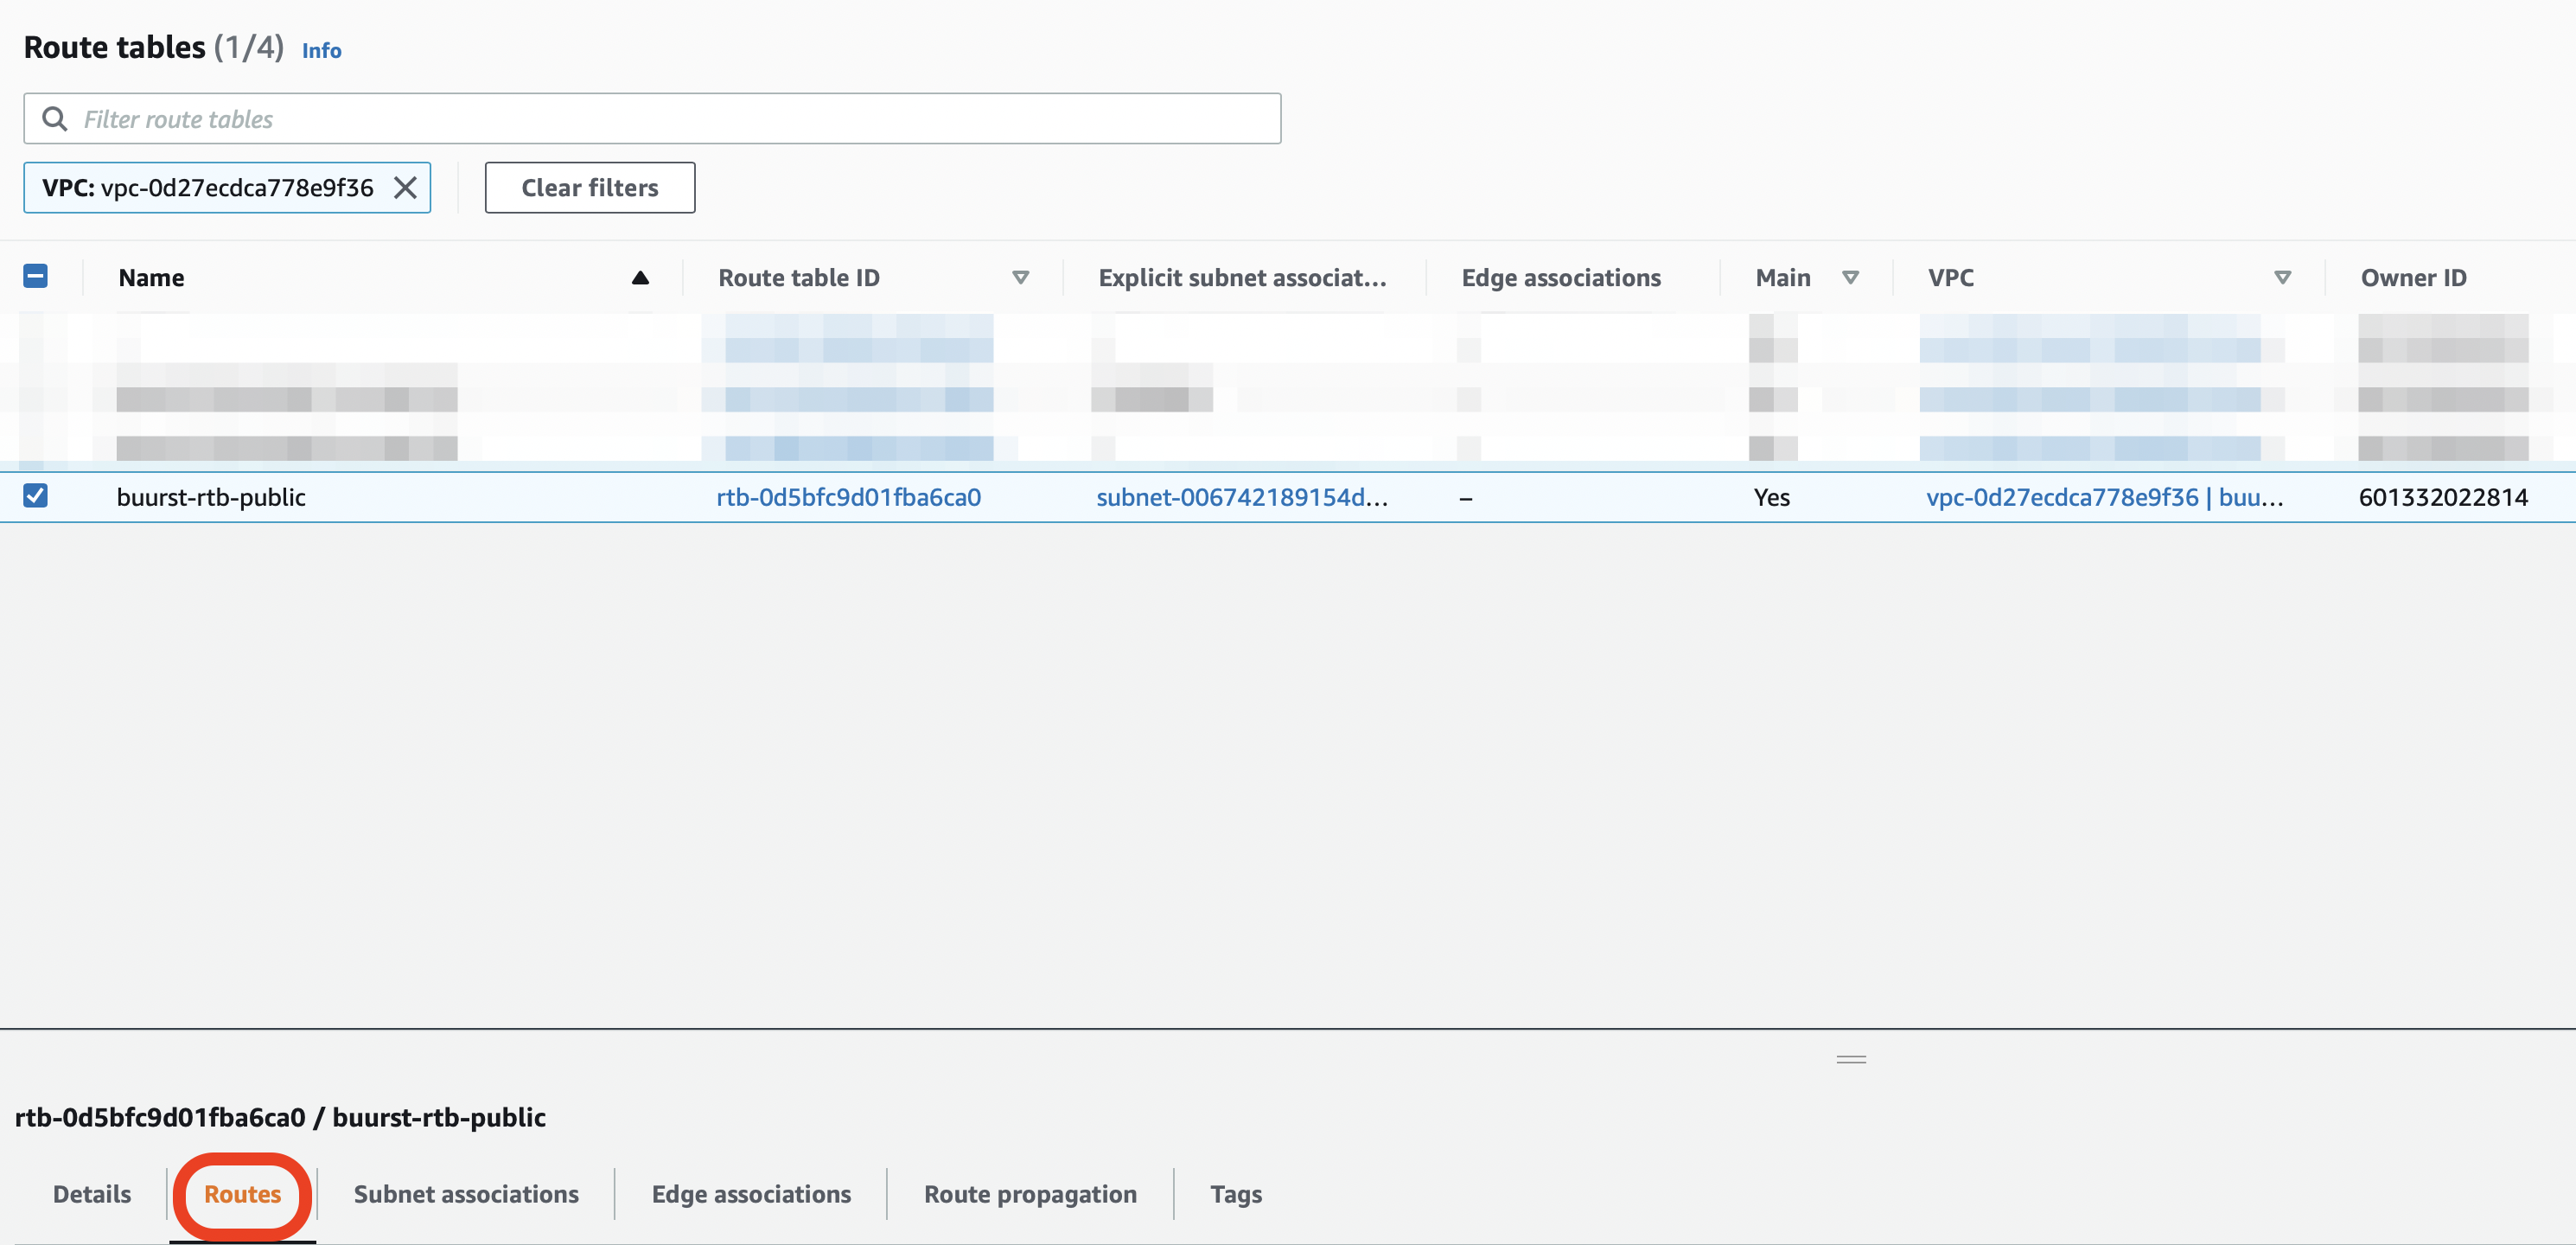
Scroll down to see the default route (identified by the 0.0.0.0 IP address). If this route is associated with an internet gateway, this is the public route table.

Move to the second route table associated with the VPC if the first is associated with an internet gateway.
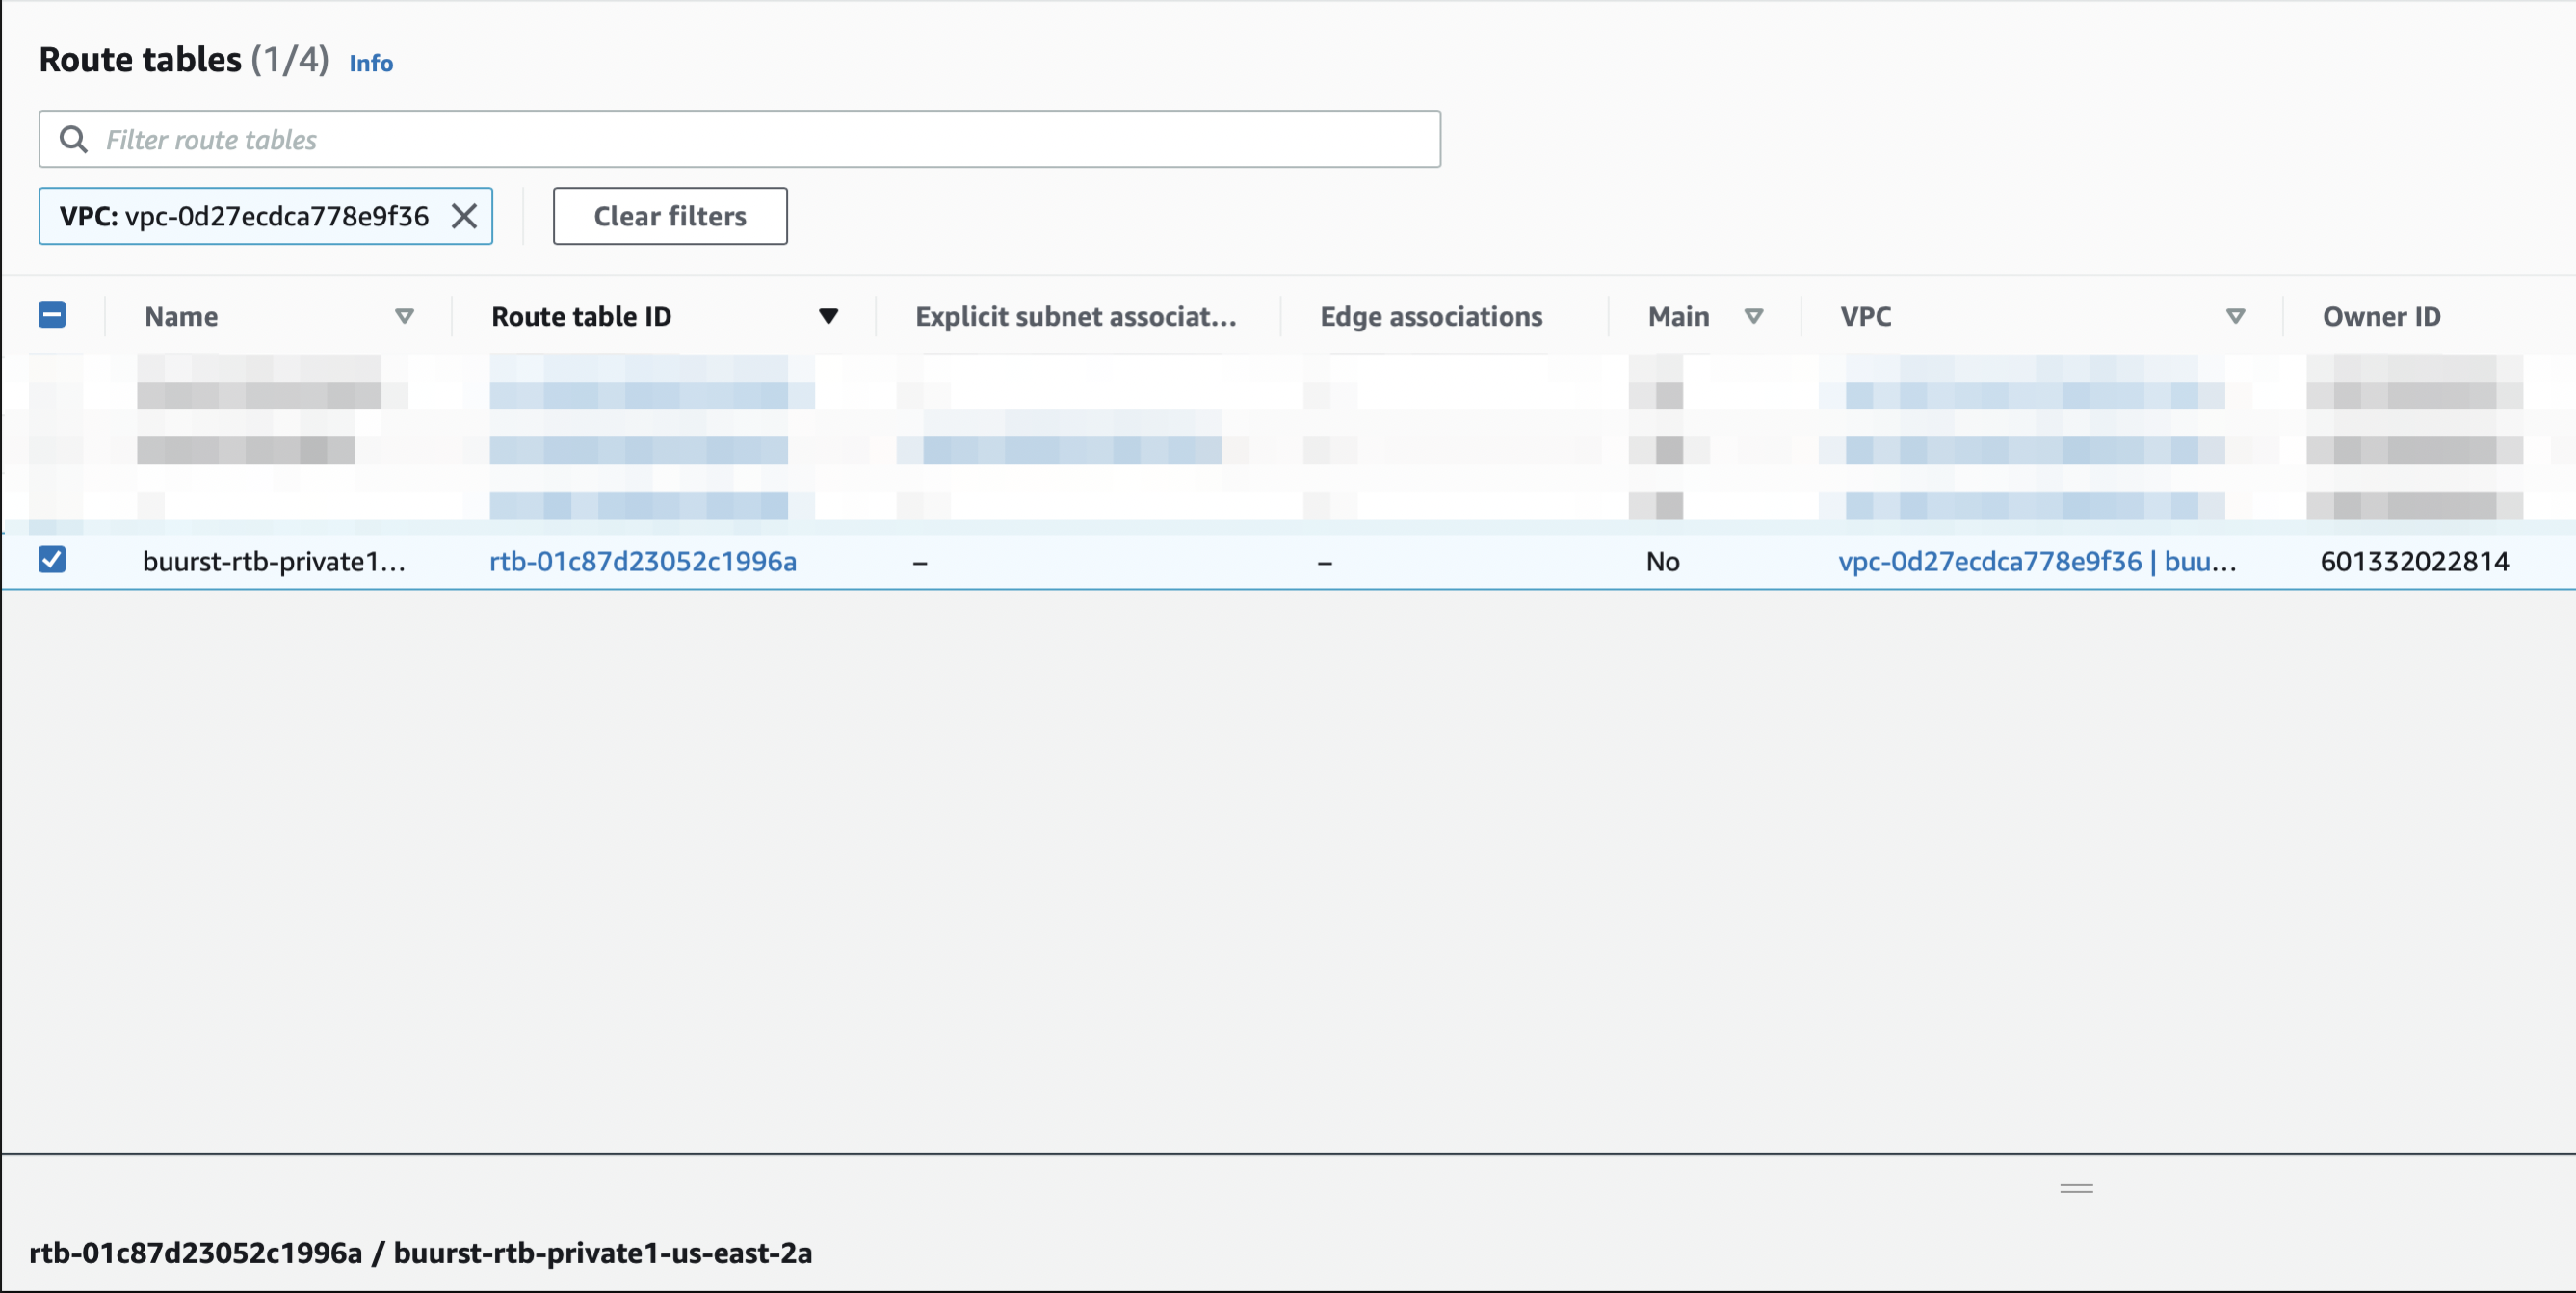
After verifying the private route table (associated with the NAT Gateway),
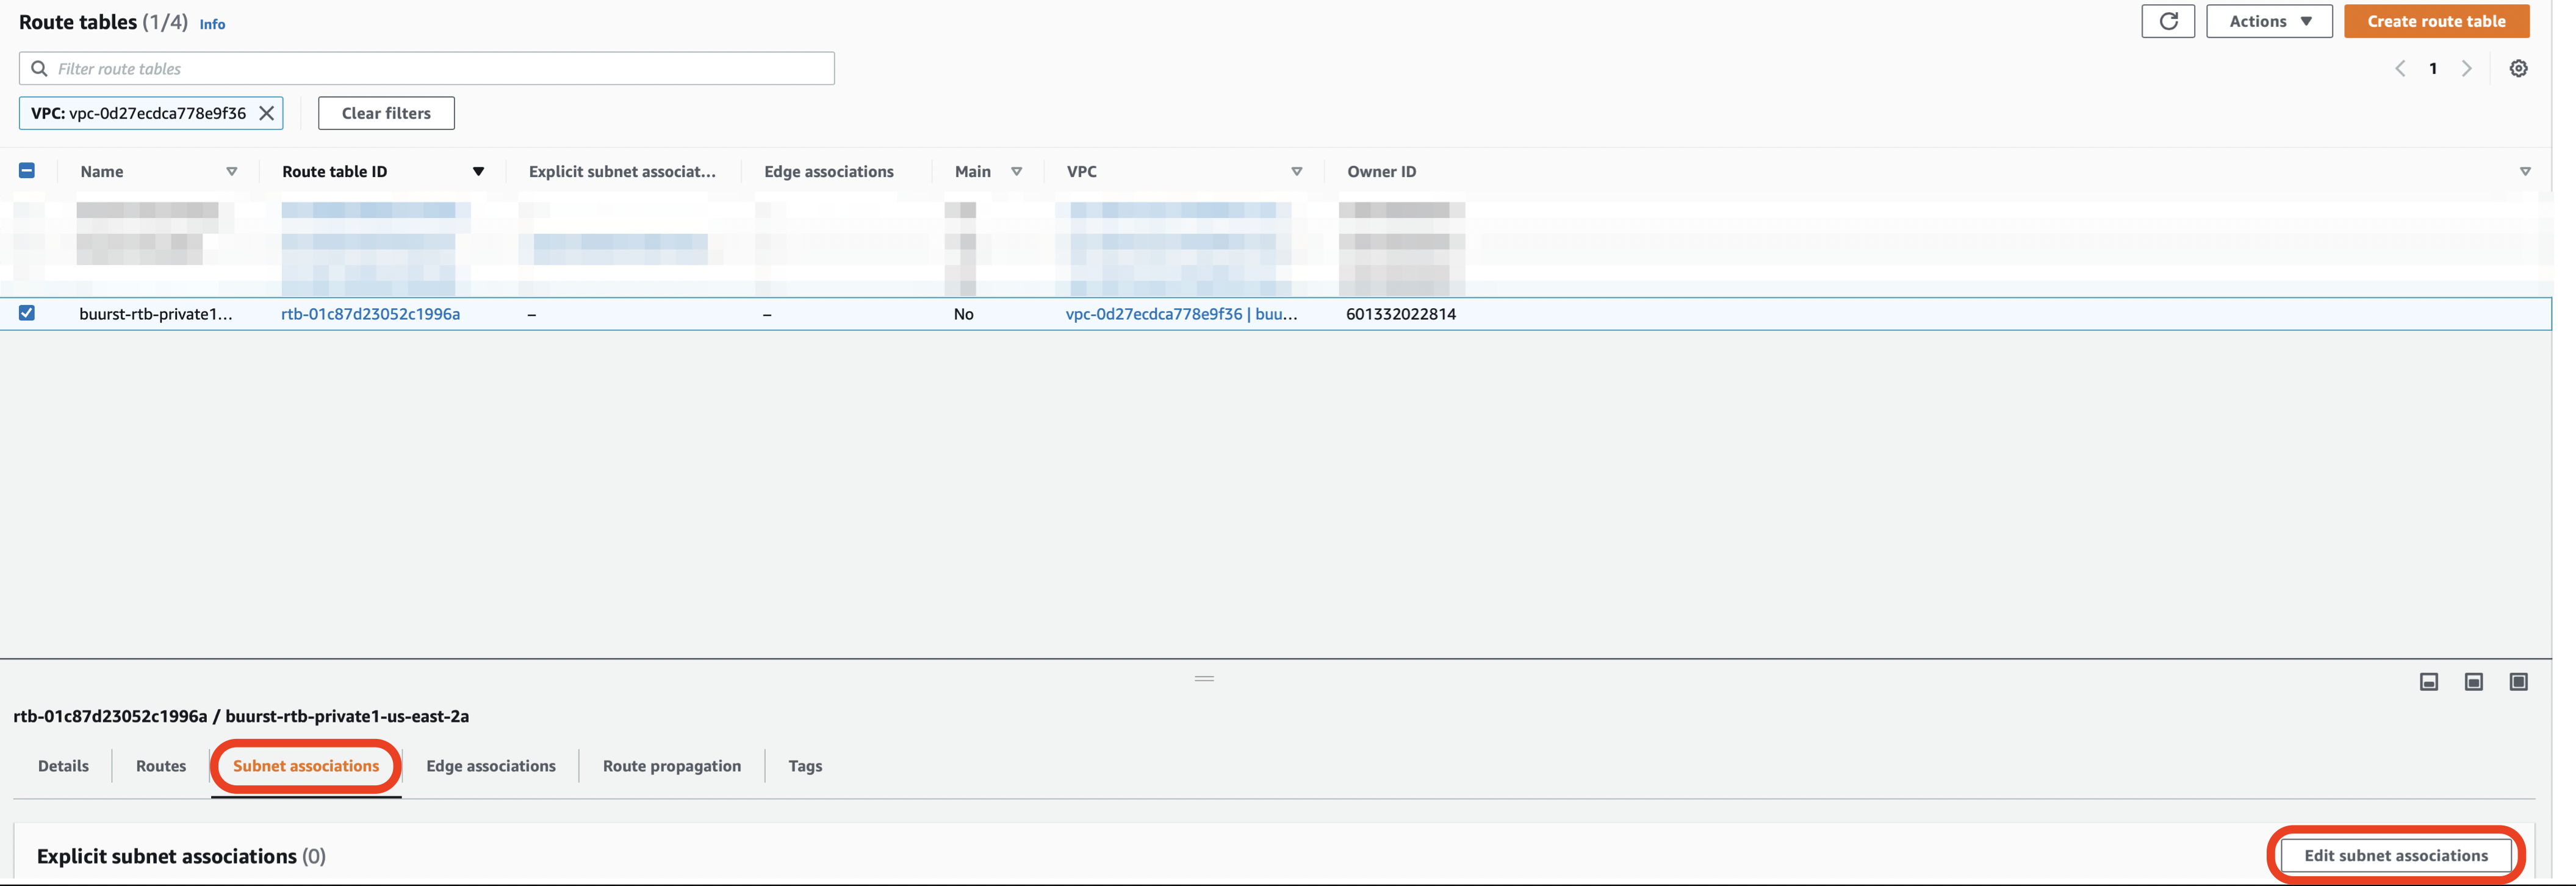
- select this route table, and select the Subnet associations tab.
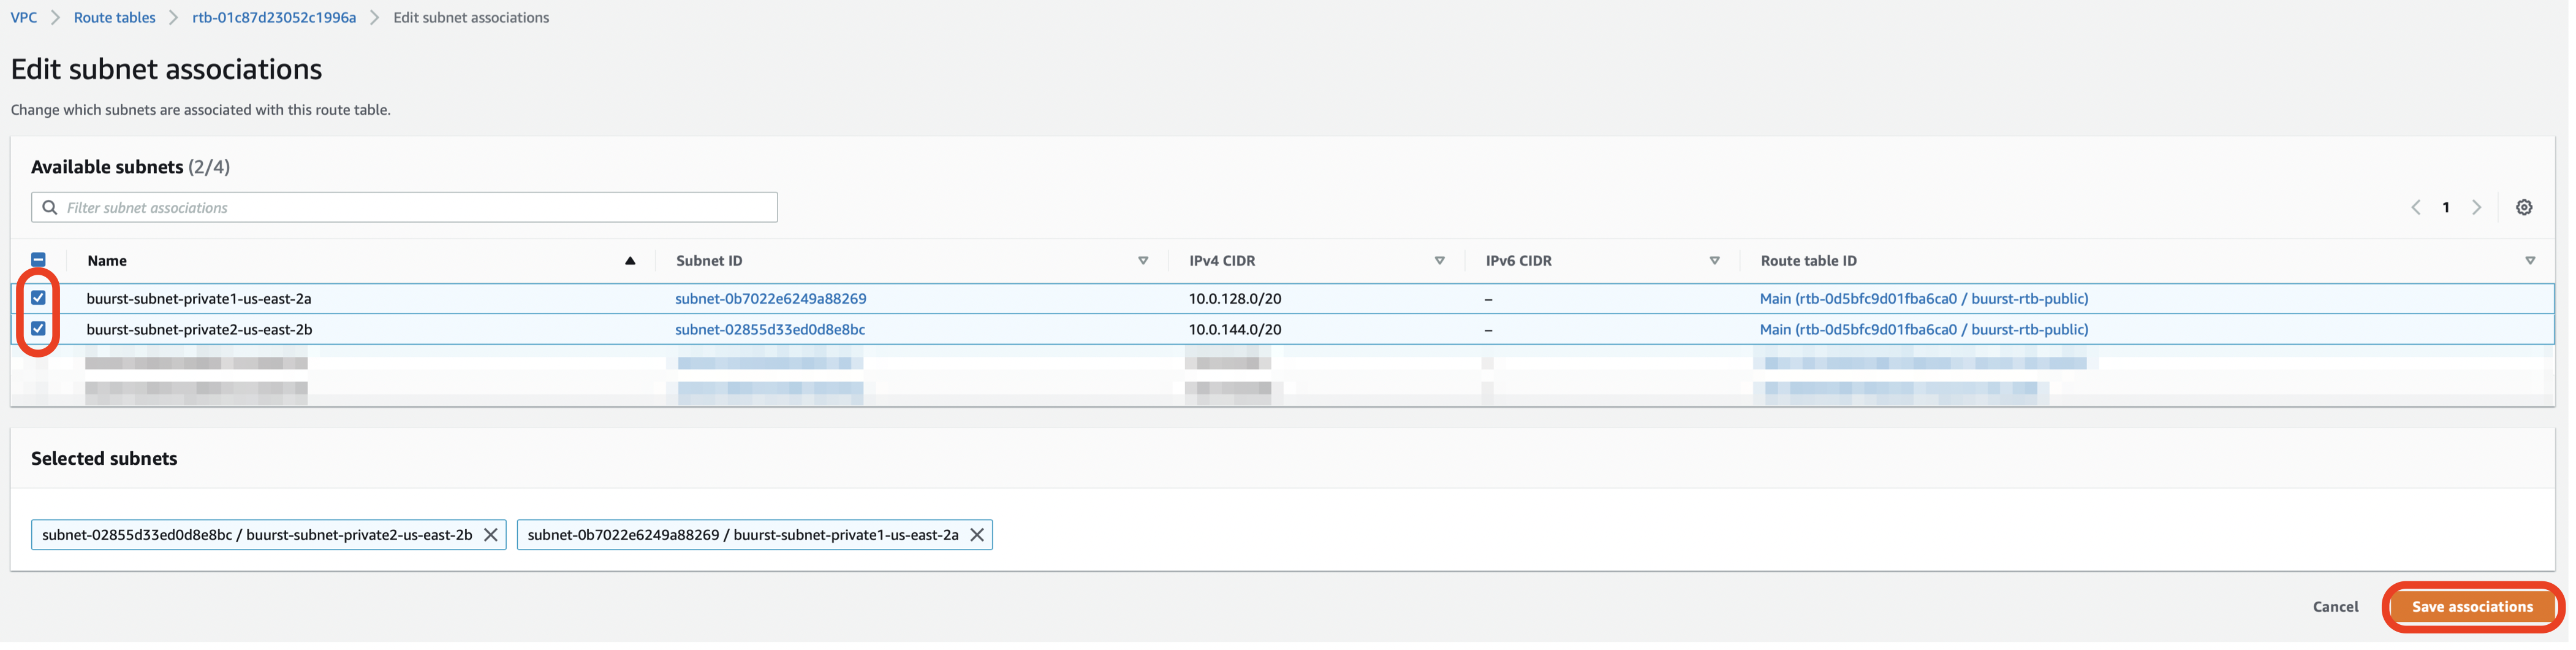
- Click Edit subnet associations.
- Select the two private subnets created earlier
- Click Save.
If deploying into a public subnet, you would simply associate a second public subnet instead (This public subnet should have been created as described earlier in the Creating a Subnet section of this guide).
Launch An Instance of SoftNAS® into the VPC
To launch an instance of SoftNAS® into the already-set-up VPC, the following is required:
- Select the appropriate SoftNAS® AMI from the Marketplace AMI section of EC2 services.
- Select at least the small instance.
- Configure the instance details.
- Launch instance into the subnet.
- Add an additional ethernet interface.
- Add storage as required.
- Tag the instance.
- Set up security groups.
- Select a key pair for SSH.
The above procedure is repeated to create a second SoftNAS® instance for HA.