AWS Getting Started - Create your SoftNAS Instances
- Former user (Deleted)
- Sean Hastert
- Tom Sheffield (Unlicensed)
Amazon Web Services provides virtual cloud platform and computing resources for developers and IT professionals. SoftNAS® provides a powerful shared-storage interface into this robust resource through unified connections of CIFS, NFS, iSCSI, giving the virtually unlimited capacity, remote replication, and high availability needed for the expected workload.
- Begin from www.buurst.com and choose SoftNAS® for AWS.
- Continue through the registration wizard.
A SoftNAS® for Amazon Marketplace pricing page will ultimately appear. Choose to Launch with 1-Click or change preferred settings in the Manual Launch page and Launch from EC2 Console.
Amazon defines instance as "a copy of an Amazon Machine Image running as a virtual server in the AWS cloud." This guide will use the AWS terminology in this section for UI consistency.
What is covered in this document:
Manual Launch Procedure
To maximize customization, Manual Launch is the recommended choice for initial setup. Below are the basic steps to follow.
Launch Instance
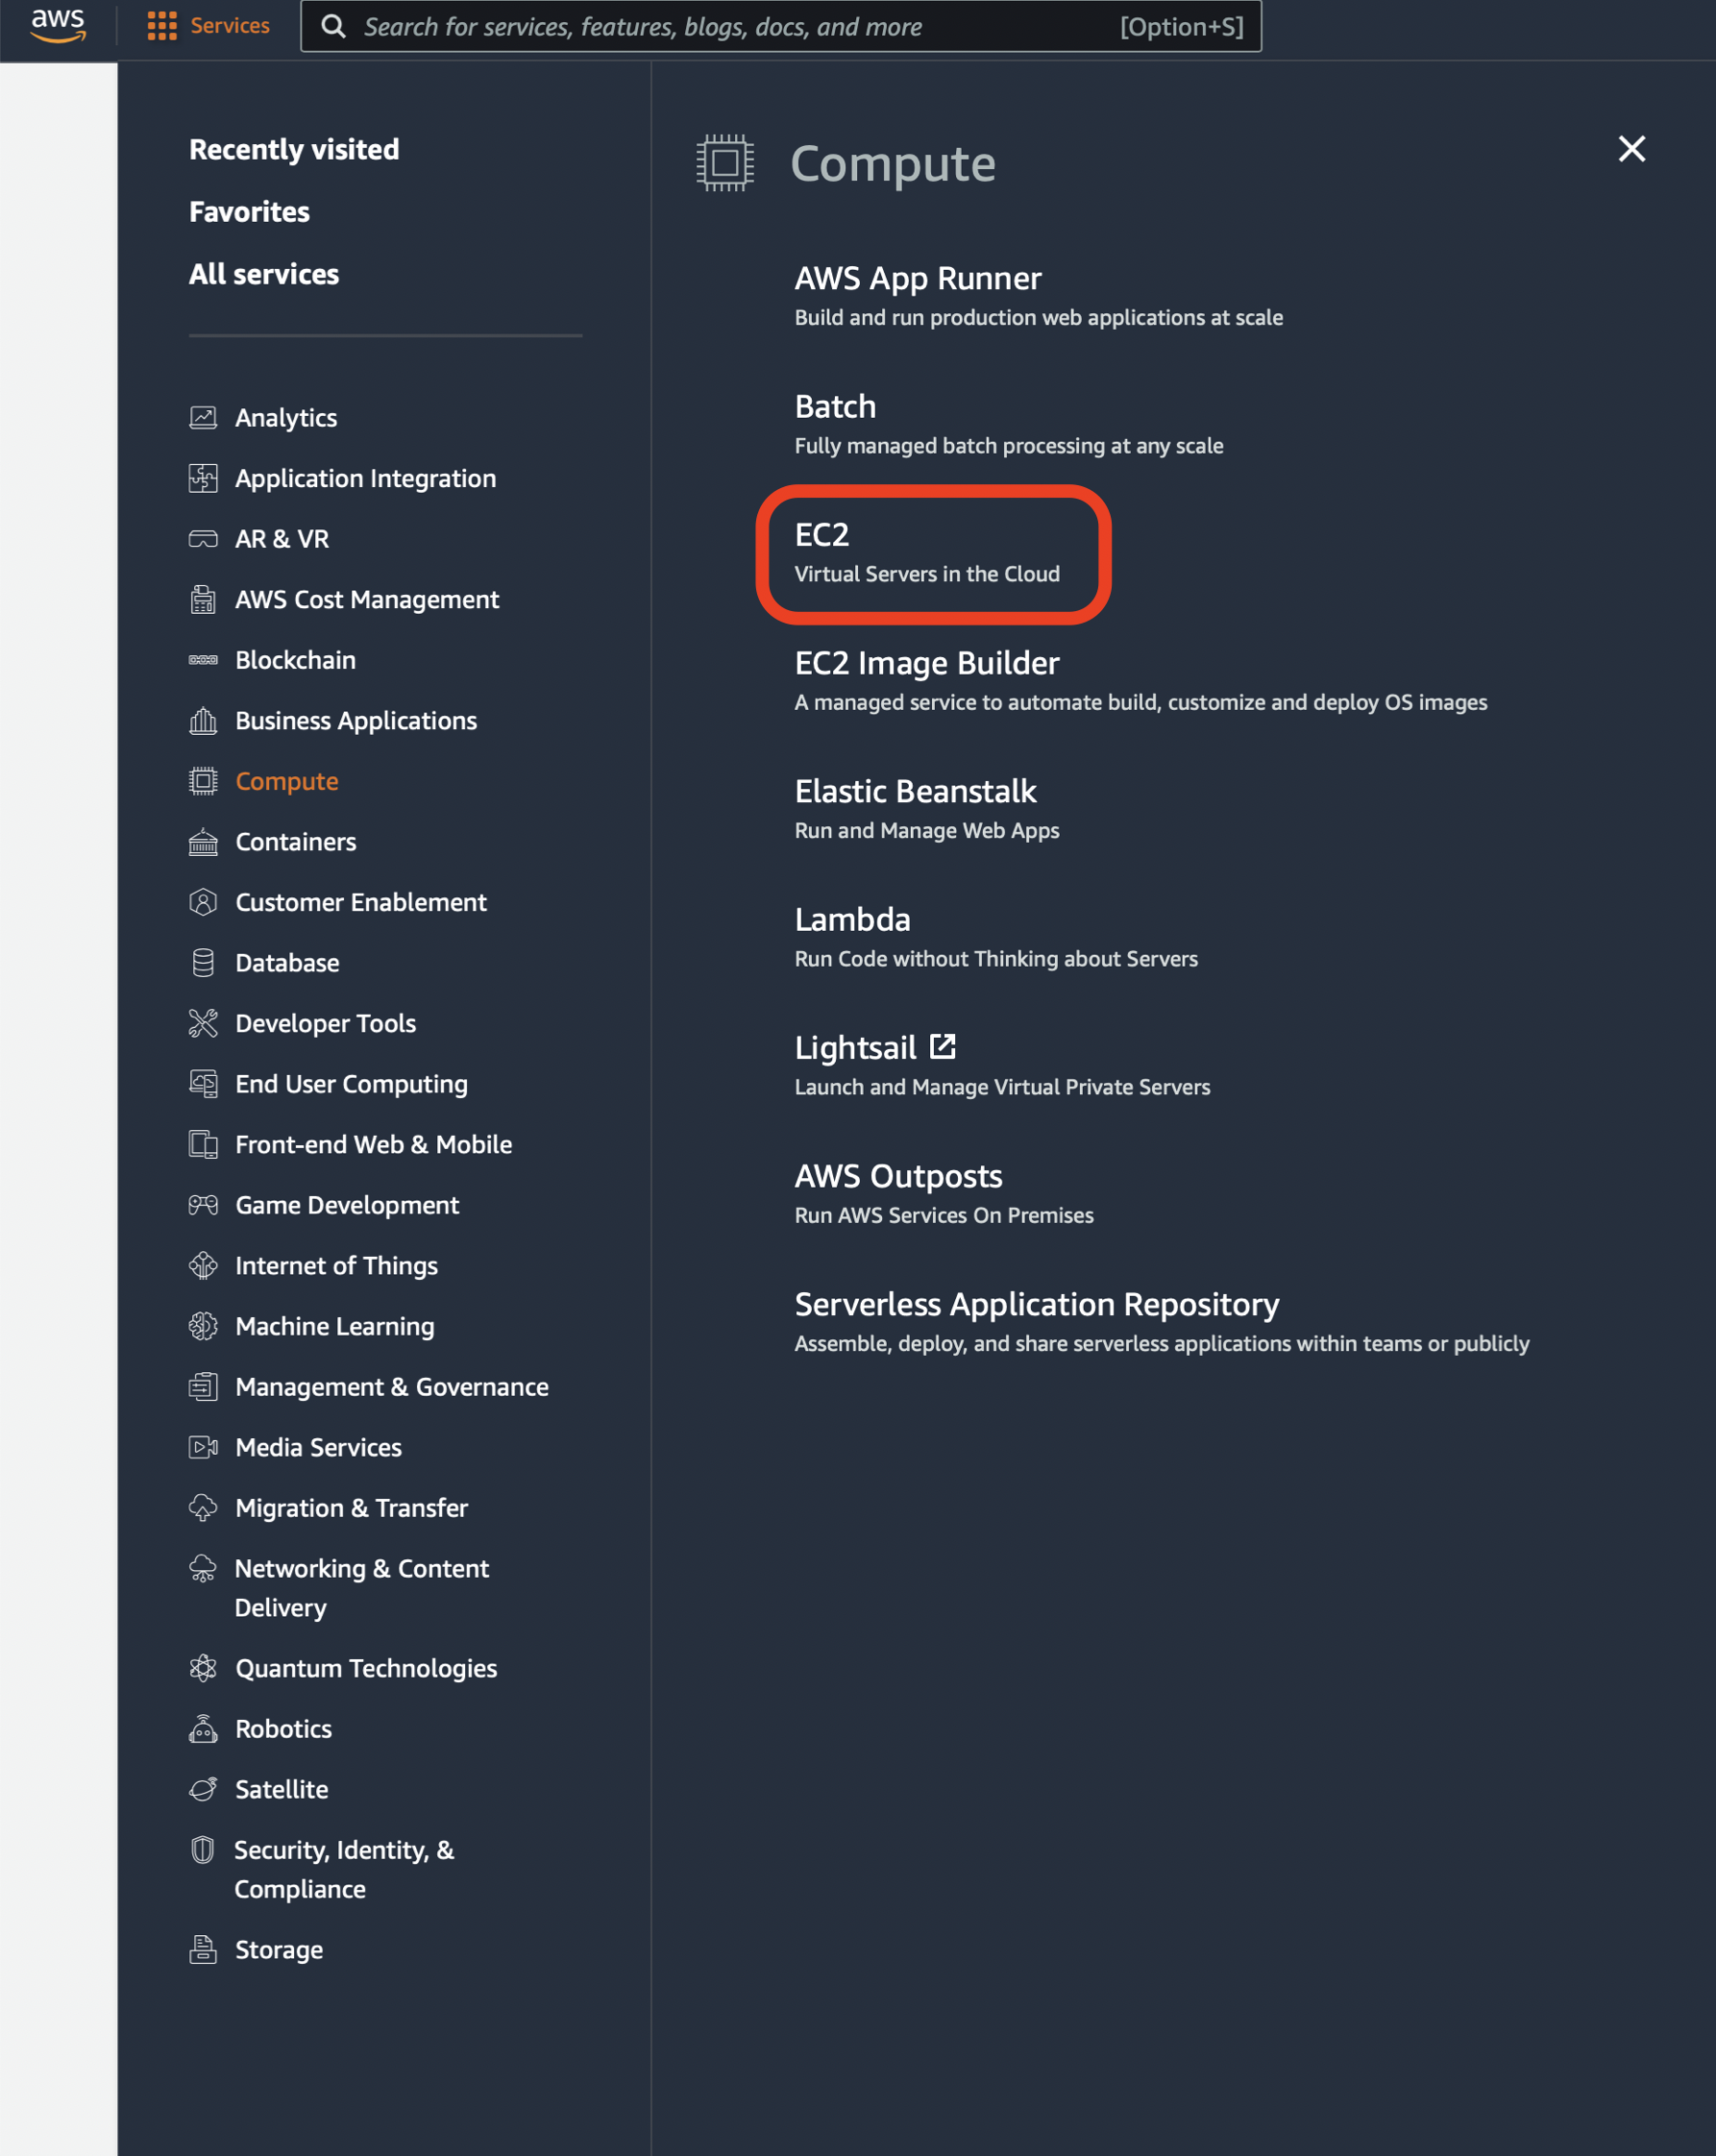
- Once an AWS account has been created, log into the management console, and select EC2 from Services > Compute > EC2, or if applicable, Recently visited, and navigate to the EC2 Dashboard.
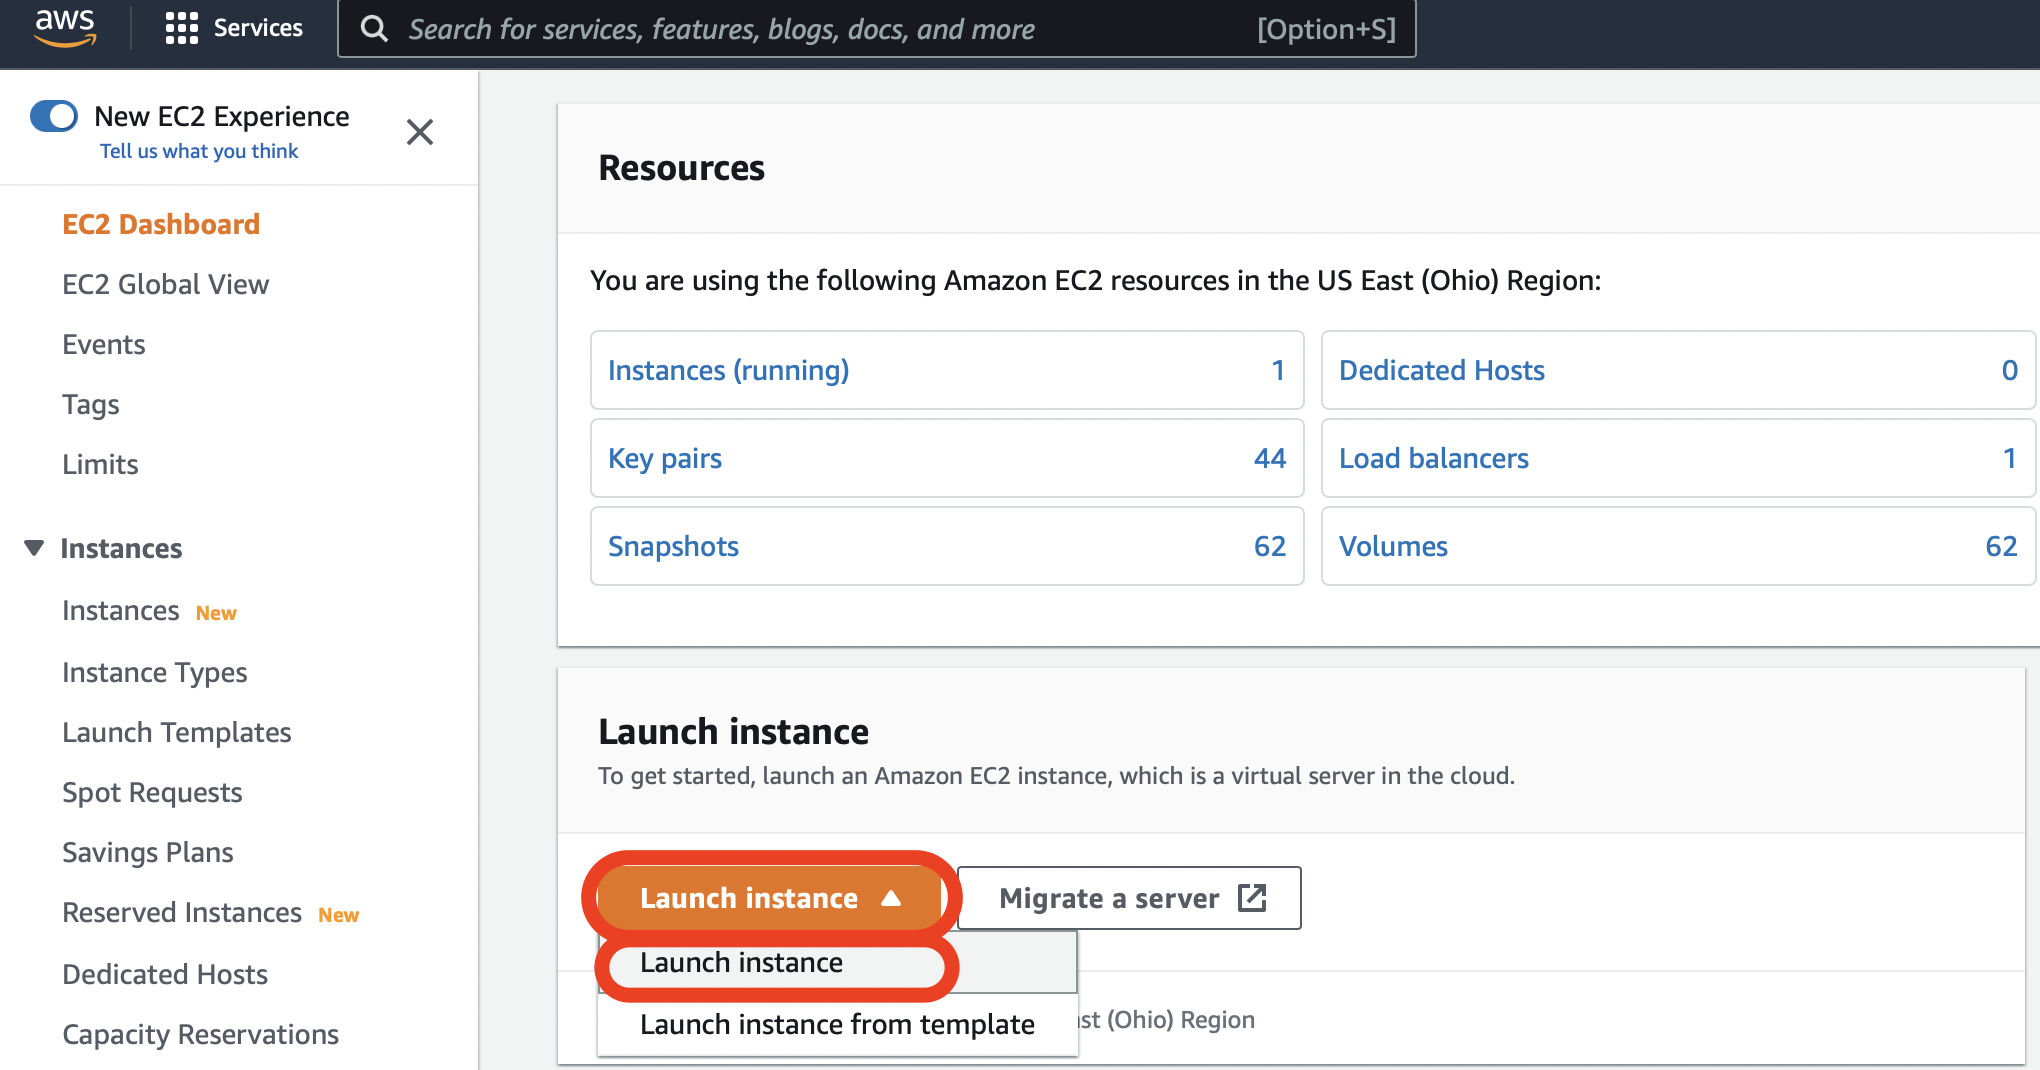
- Select Launch instance > Launch instance from the EC2 Dashboard or the Instances page.
- This will display the "Launch an instance" page.
1. Name your SoftNAS® Instance
- Enter the Name of your instance.
- If you wish to add any additional tags, you can do so here by clicking Add additional tags.
Tag Naming Limits and Requirements
- Each resource can have a maximum of 50 user created tags.
- the aws: tag is reserved for AWS use, and DOES NOT count against the 50 tag limit.
- For each resource, each tag key must be unique.
- The tag key must be a minimum of 1 and a maximum of 128 Unicode characters in UTF-8.
- The tag value must be a minimum of 0 and a maximum of 256 Unicode characters in UTF-8.
- Tag keys and values are case sensitive.

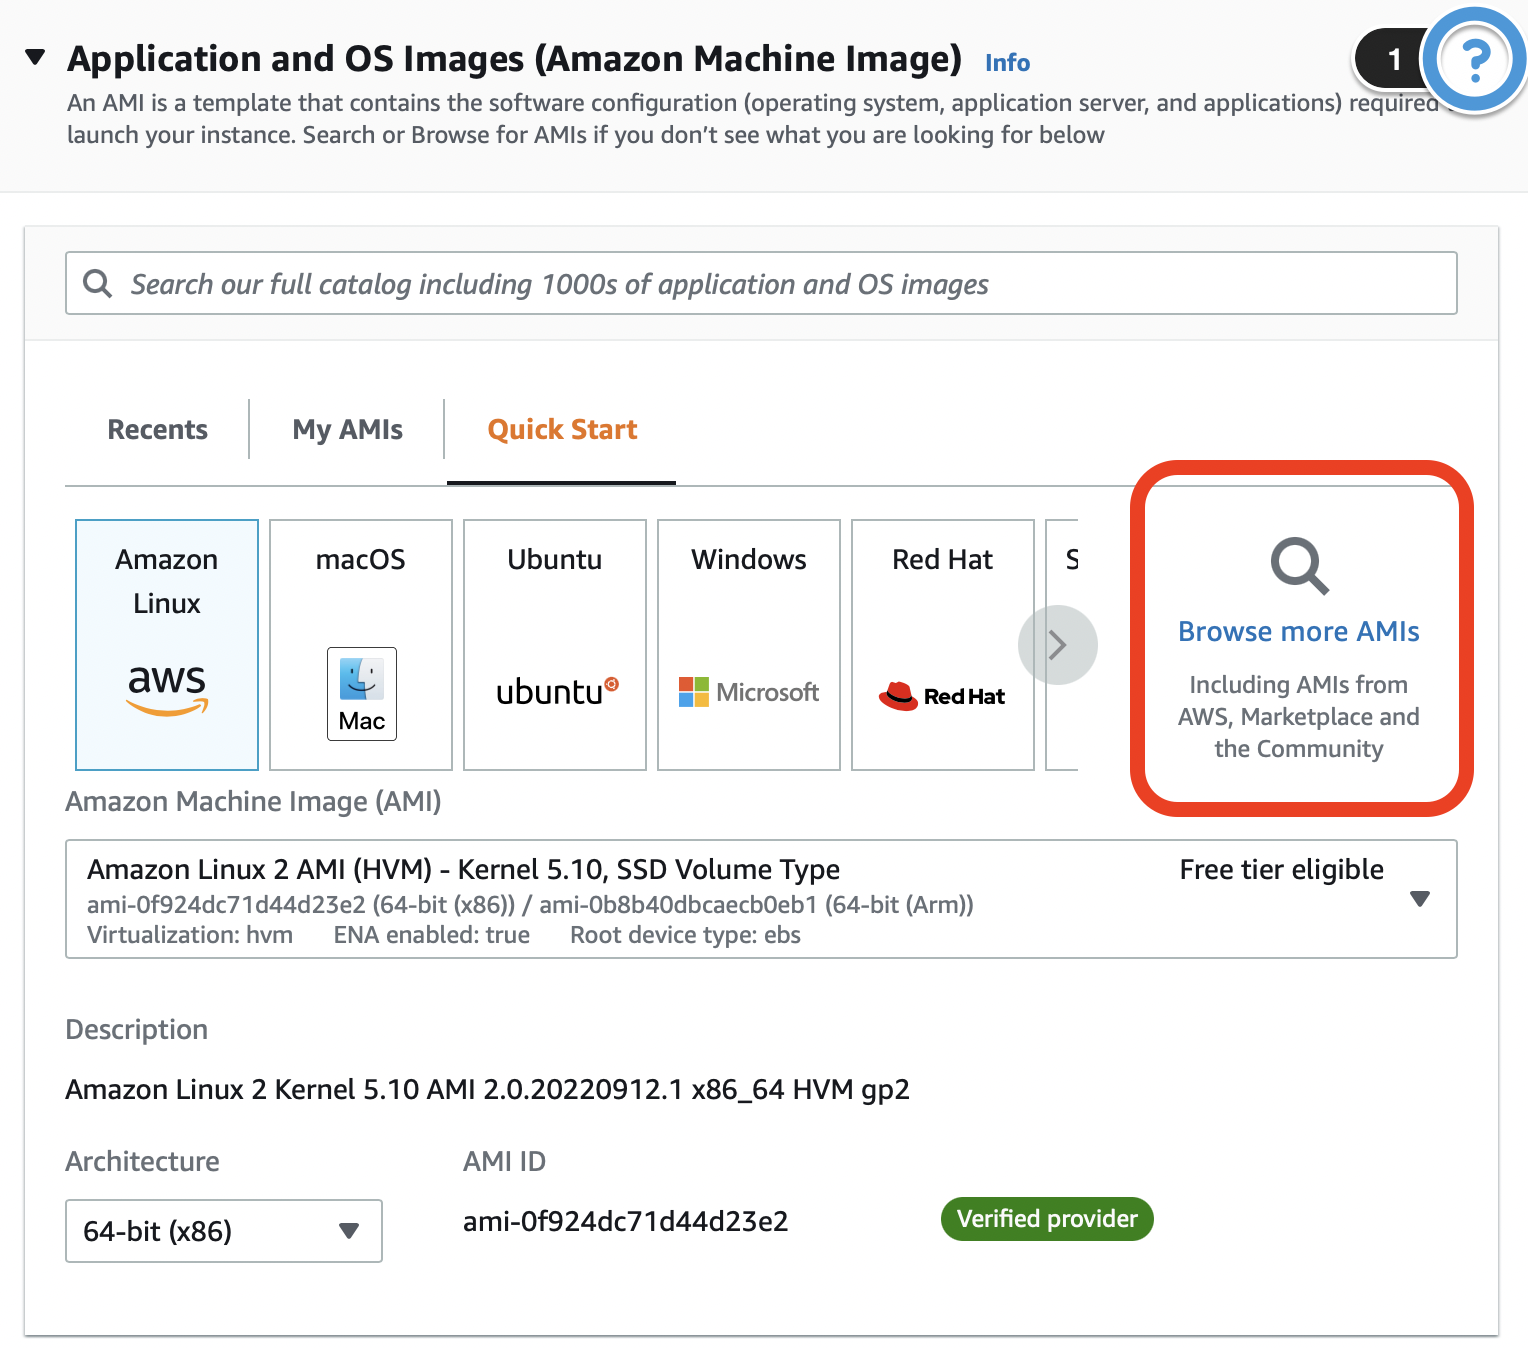
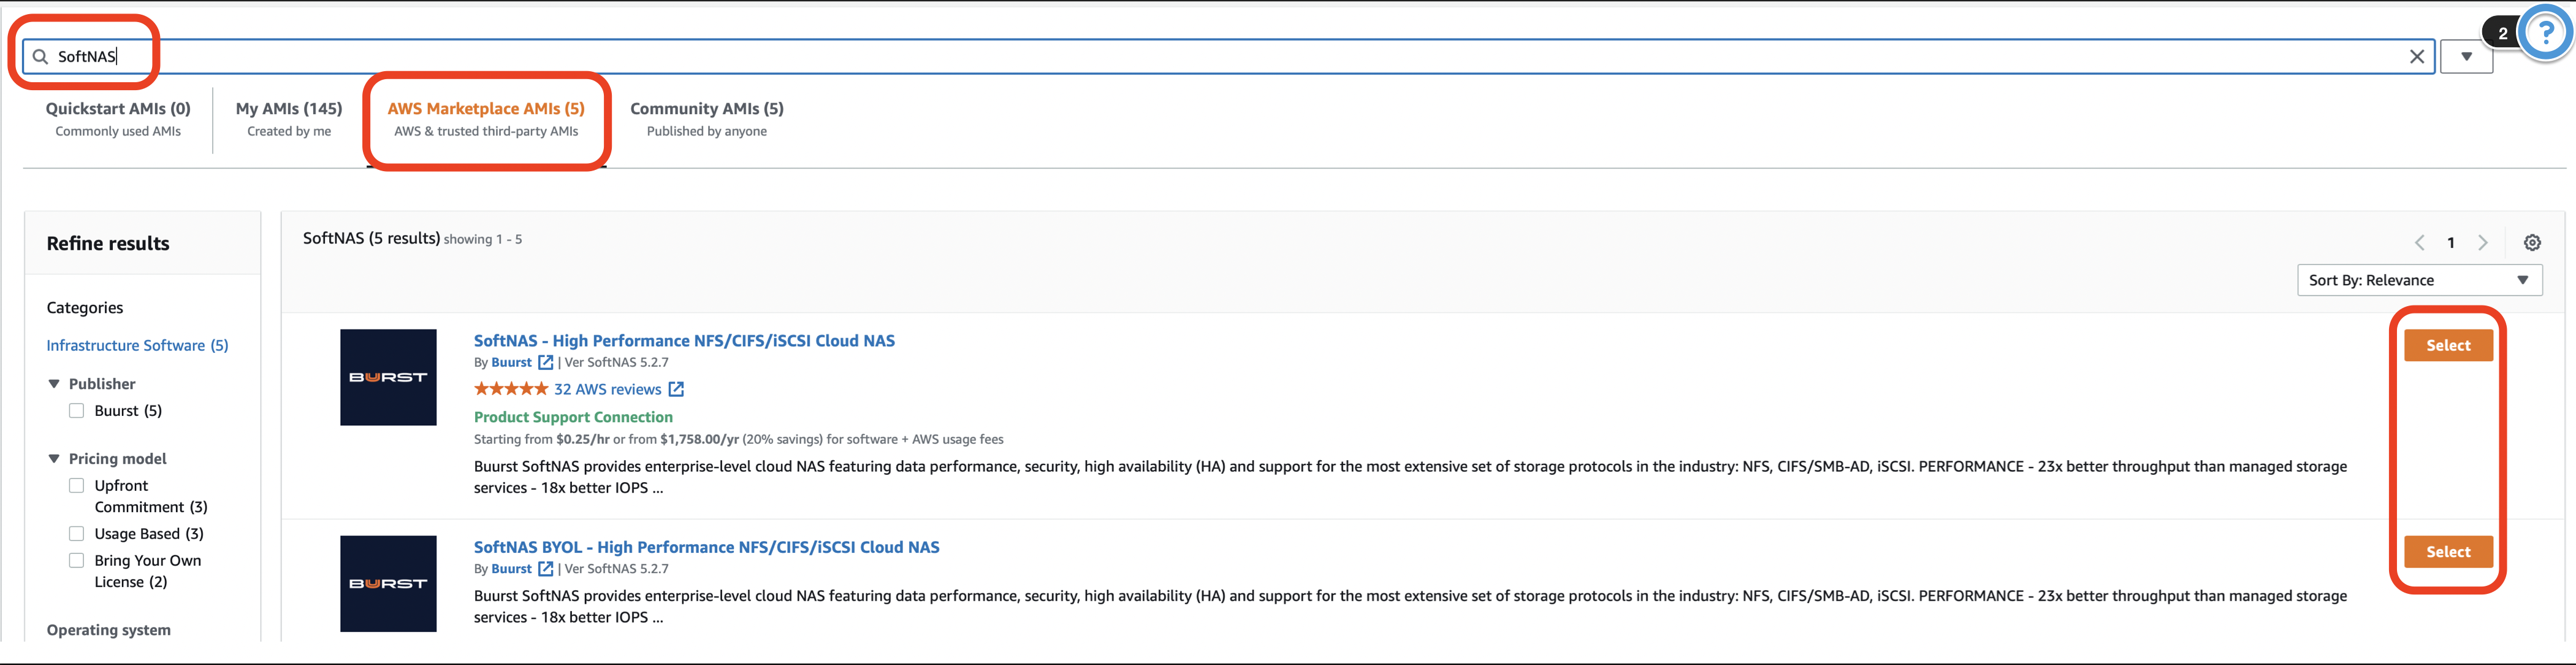
2. Choose a SoftNAS® Amazon Machine Image (AMI)
- Select Browse more AMIs.
- In the search box, type in SoftNAS, click AWS Marketplace AMIs, and then click Select on the version that most accurately fits the needs of deployment.
- Click Continue.

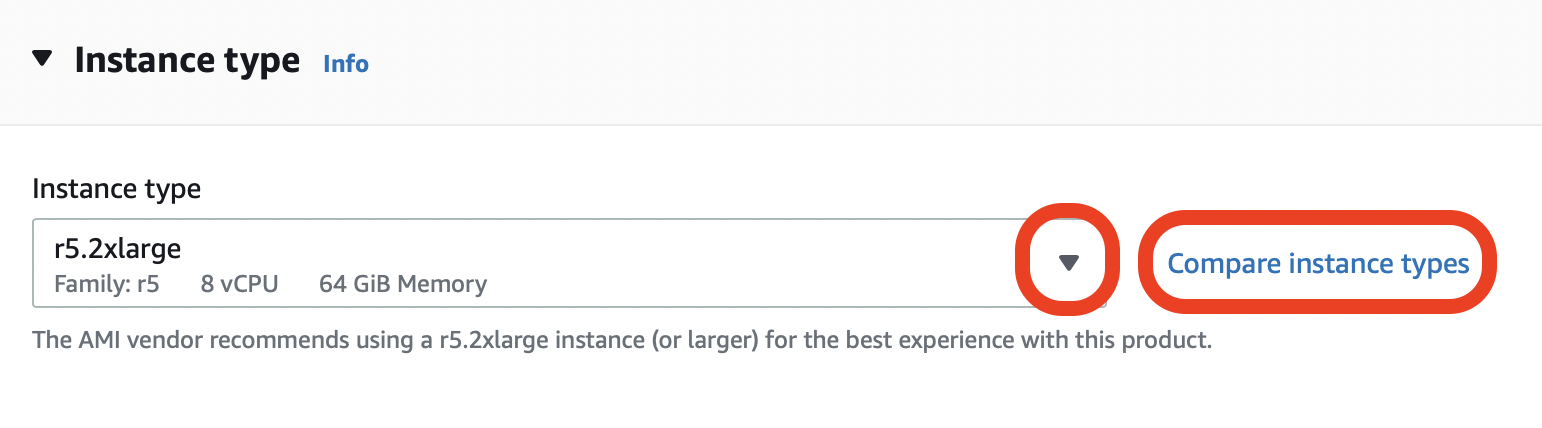
3. Choose an Instance Type
Consider the following elements when configuring an Instance:
Element | Setup Recommendations |
|---|---|
Memory |
|
| |
| |
| |
CPU |
|
| |
Network |
|
|
Additional Information
- Once you select the SoftNAS® AMI, the Instance type will automatically populate with our minimum recommendation for instance size (r5.2xlarge).
- If you wish to change this to better fit your needs, you can do so through either the drop down selection or Compare instance types.
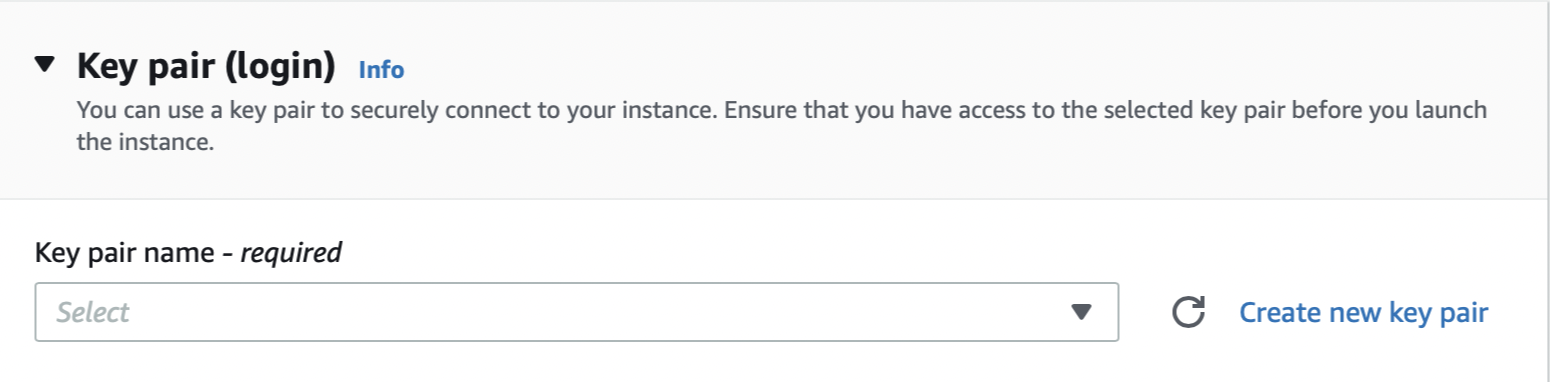
4. Creating a Key Pair
A Key Pair is a pair of security credentials associated with this Instance; the Public Key and the Private Key. The Create Key Pair section of the wizard will be displayed. In this step, create a public/private key pair used with SSH to access and administer the SoftNAS® instance in the cloud.
The Key Pair helps to securely connect to an instance when it is launched. You have two options to choose from. Either choose from existing key pairs that have been created in the current region or create a new key pair.
- If choosing from existing key pairs, simply select from the available options under the Select drop down.
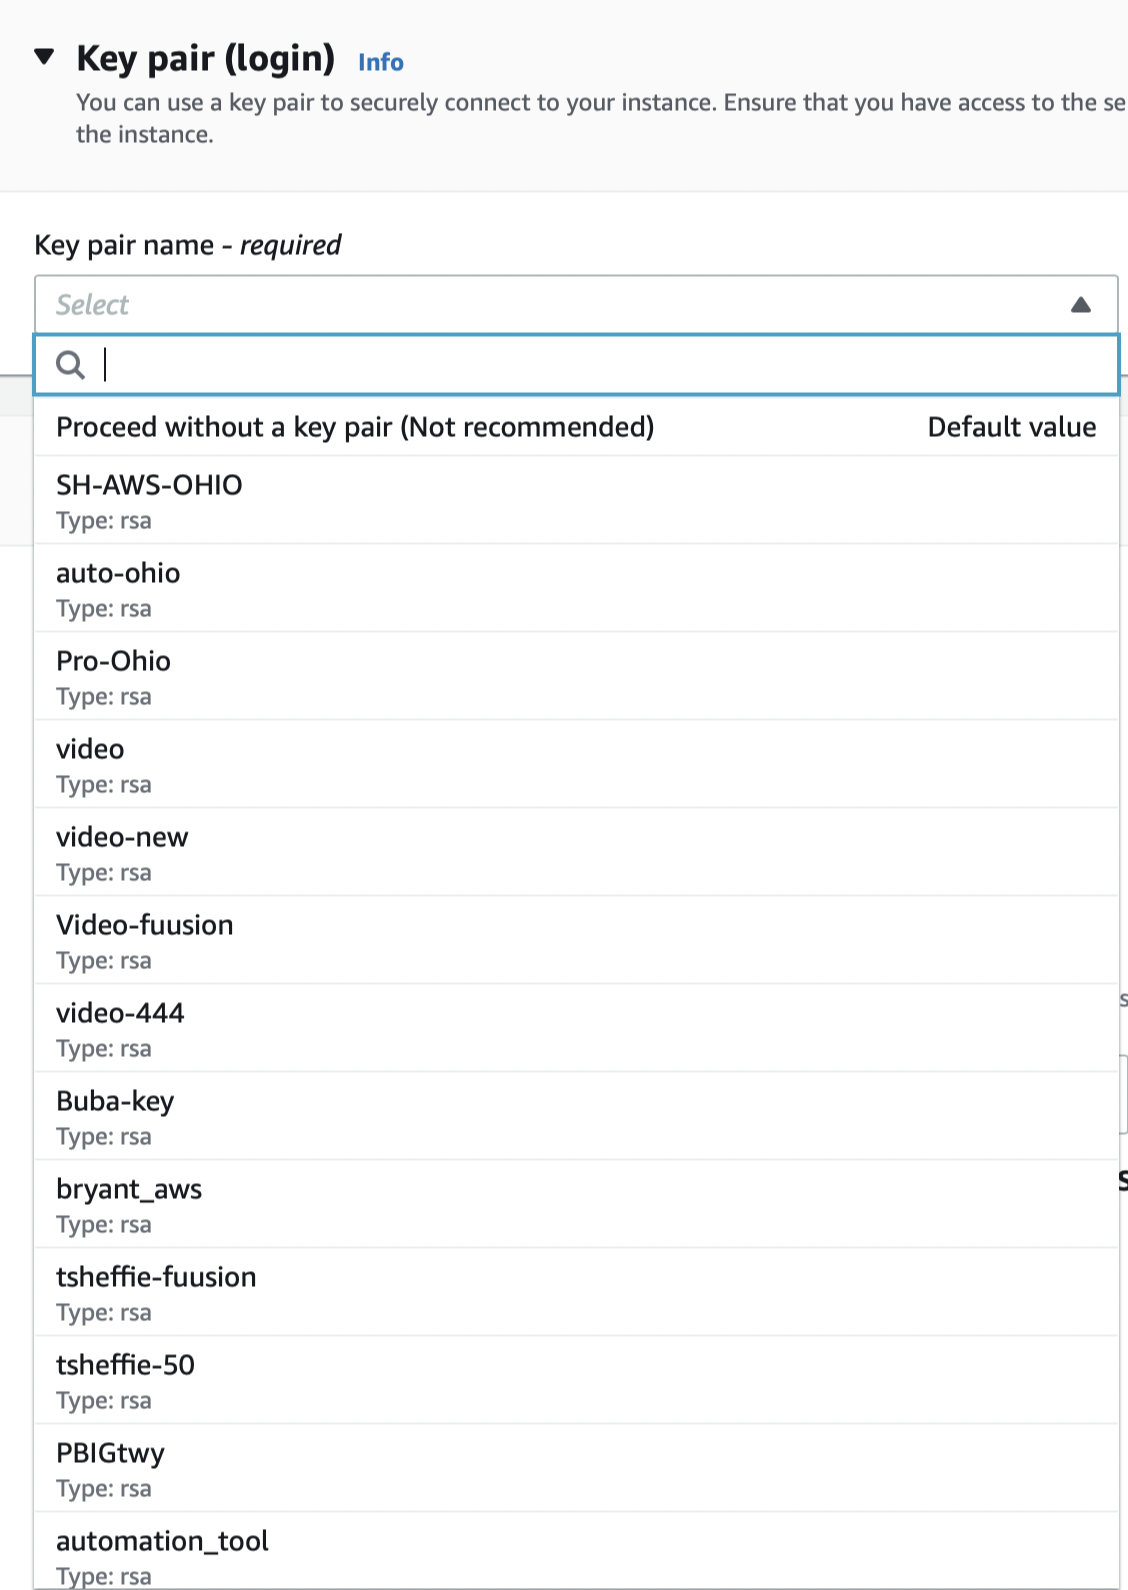
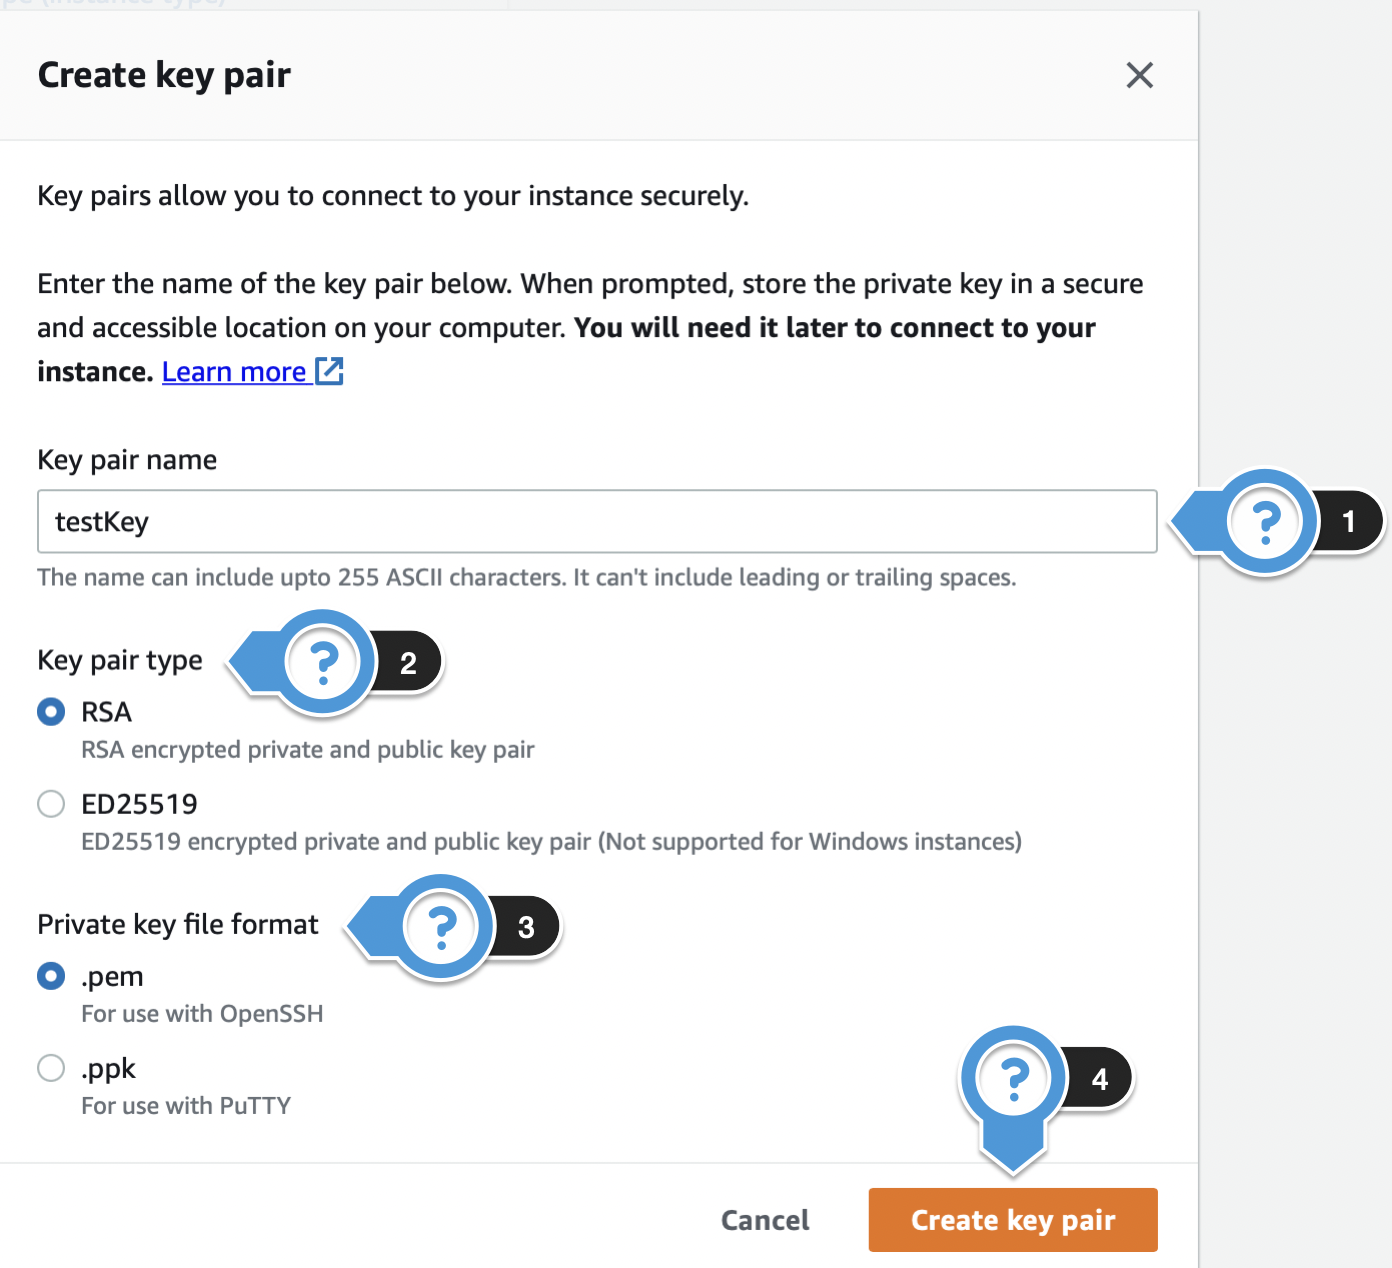
- If creating a new key pair, click Create new key pair, and complete the following steps:
- Key pair name: Enter the name that you want your key pair to be known by.
- Key pair type: Choose the encryption type for your key pair.
- Private key file format: Choose the format for your key pair.
- Click Create key pair once done.
Private Key File
This is the only chance you will have to download the Private Key file. Store this in a safe place.
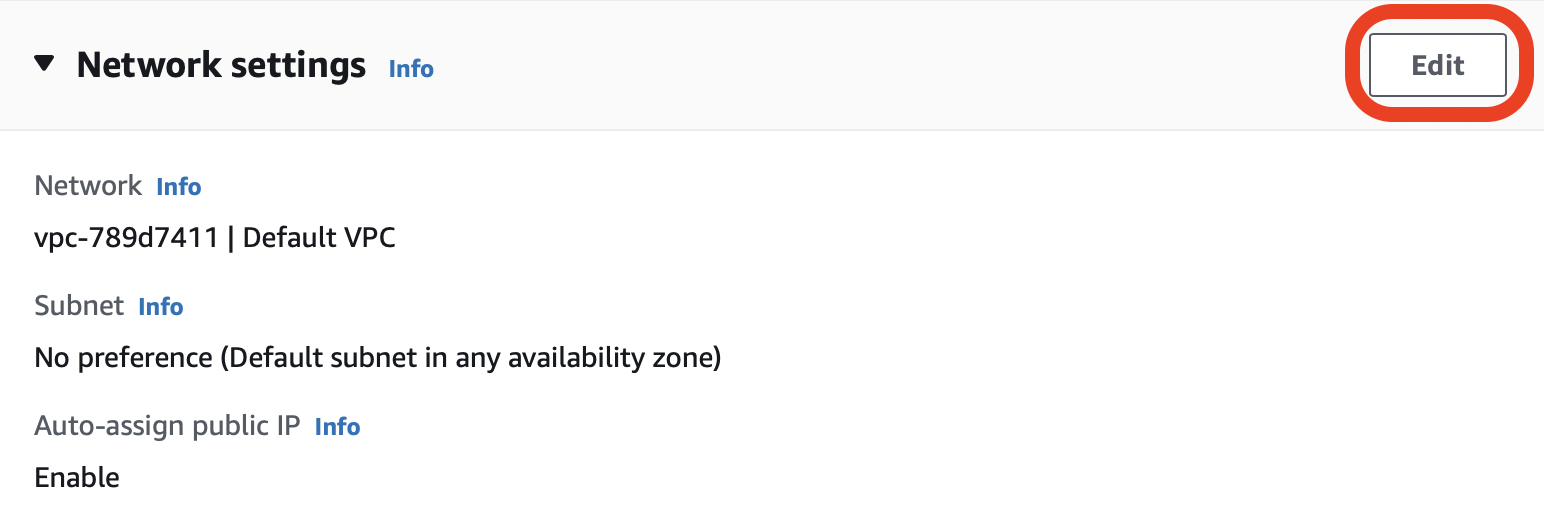
5. Configure Network Settings / Security Groups
To edit the Network settings, click Edit.
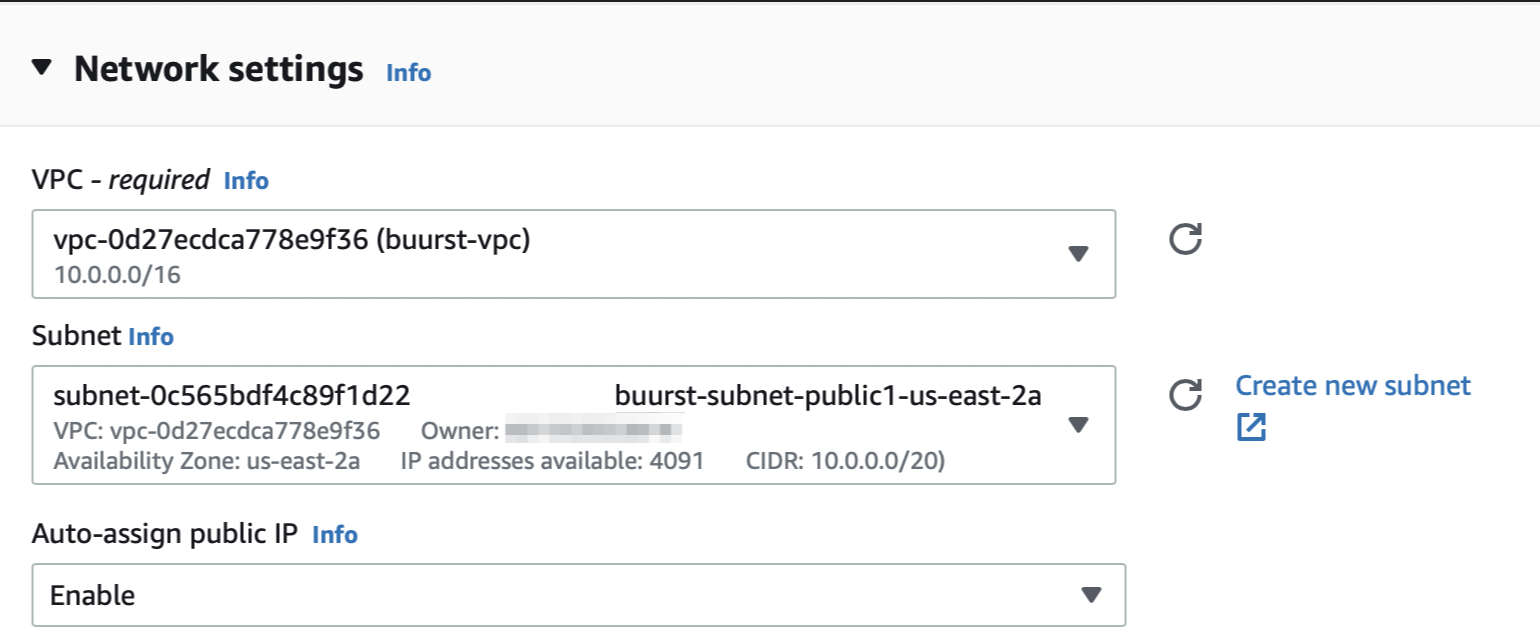
- VPC - Select the VPC in which you want the instance deployed into.
- Subnet - Select the subnet in which the network interface will be located.
- Auto-assign public IP - Choose whether a public IP address is automatically assigned to the primary network interface of the instance.
VPC Notes:
For optimal efficiency, launch an instance into an Amazon VPC (Virtual Private Cloud) environment. VPCs can be useful if all computing will be done in the EC2 environment, or to interconnect an existing network via a VPN gateway to the VPC environment; e.g., setting up an IPSec tunnel between an existing data center and the VPC. To operate SoftNAS® within the private subnet of a VPC, create an outbound NAT route that enables the SoftNAS® instance to access the Internet to perform software updates, activation, etc. In this case, only outbound TCP traffic to the softnas.com, mirror.softnas.com and my.nalpeiron.com domains are required to be enabled; i.e., inbound access to ports 22 and 443 for administration can be restricted to VPC subnet access only. Please refer to the Knowledge Base Article titled Upgrading Software through a Firewall.
Use a VPC to use SoftNAS® in high availability mode (SNAP HATM). For more information, see the document High Availability.
If using SoftNAS® in high availability mode (SNAP HATM), complete all remaining steps and then follow the instructions here for adding a secondary network interface.
Within Network settings, you can also create or assign security groups.
- If you want to assign a security group that has already been created, click Select existing security group and then select your preferred security group from the drop down menu titled Common security groups.
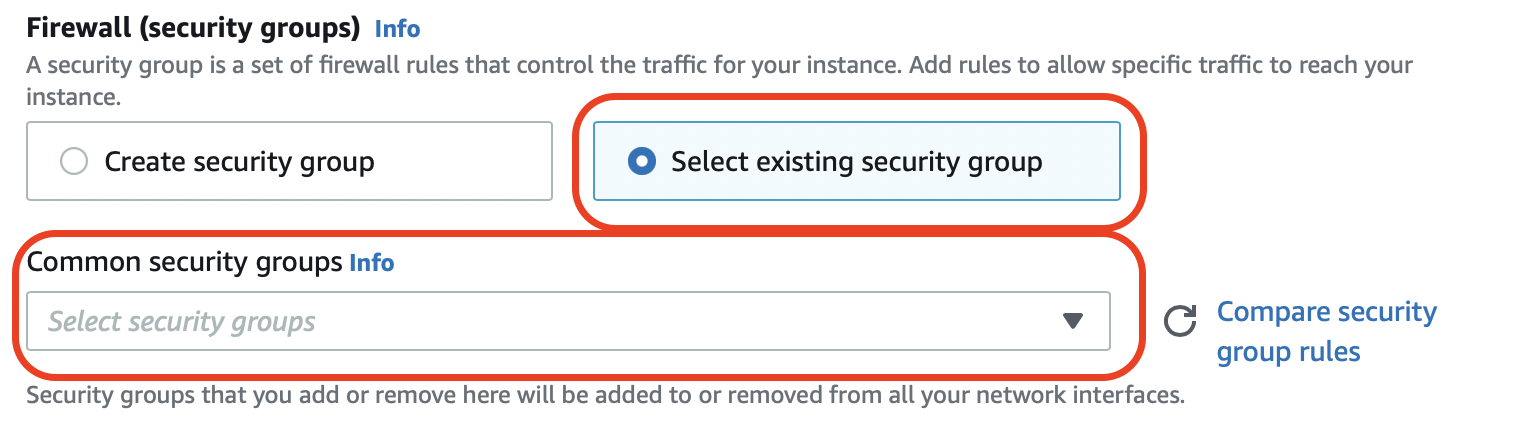
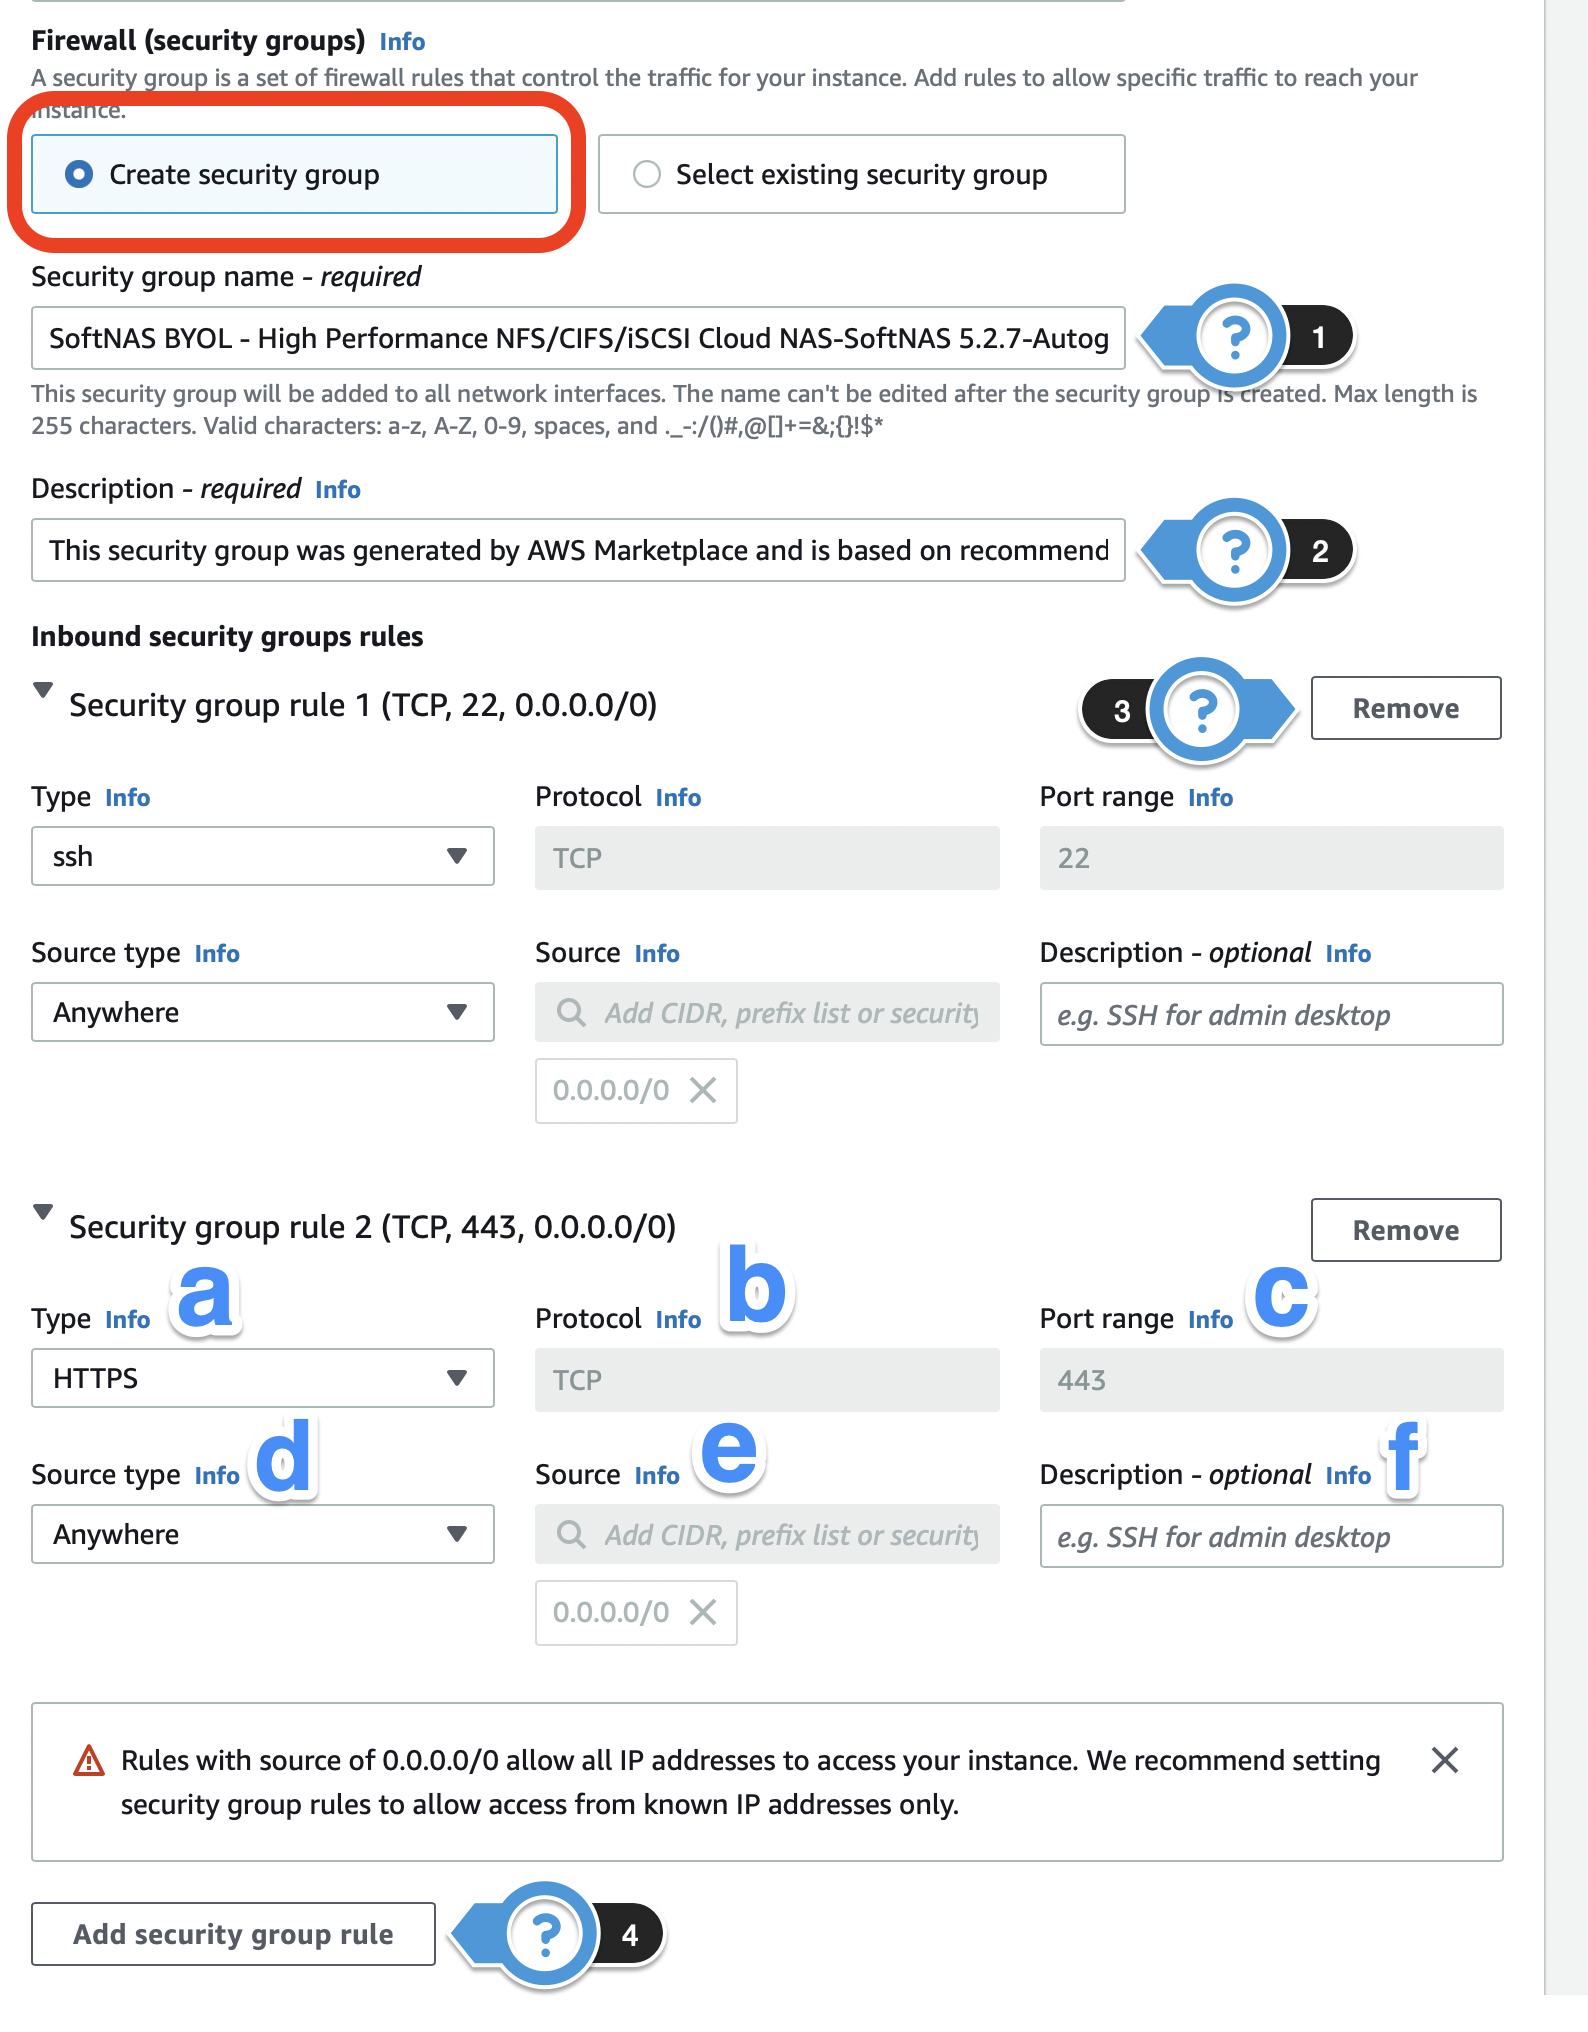
- If you want to create a new security group, click Create security group and complete the following:
- Security group name - The name in which your security group will be identified by.
- Description - A description to help you identify the security group.
- Remove - Select this to remove any current rules that you do not want/need.
- Add security group rule - Add a new rule to the security group.
- Type - Select the network traffic type.
- Protocol - Select the type of protocol.
- Port range - Enter the port number if creating for a custom rules or protocol.
- Source type - Select where you want to allow access to your instance.
- Source - If you select Custom for Source type, you can specify a value in this field.
- Description (optional) - A description to help you identify the security group rule.
- For the purposes of high availability, only the default ports provided by Buurst's Amazon Machine Image are required. These default ports are SSH for connection to the image by Command Line Interface (CLI), and HTTPS for connection to the user interface via the browser. Other ports can be opened for specific use cases, but are unnecessary for a proof of concept.
- Buurst highly recommends locking down both SSH and HTTPS access even further by specifying an IP address or IP range that the instance will accept traffic from. This range of IP addresses, or list of IP addresses should include the internal IP address of the current and target instance (when you know it). The list of accepted IP addresses should also include the IP address you are currently logging in from, or you may not be able to access your instance.
For beginning users, it may be simpler to keep the default Security Group settings until Replication and HA are configured, and any additional Platinum features (if applicable) have been decided upon. Leaving Security Group configuration to the end ensures that you have all the information needed, such as IP addresses and protocols for your use case. Go to Configuring Security Groups if you need further guidance to make changes.
6. Add Storage
The Configure storage section allows you to attach additional EBS volumes and instance store volumes or edit the settings of the root volume. SoftNAS recommends skipping this step, as it is easier to configure and add disks within the SoftNAS UI, rather than creating disks and later provisioning disks created in the azure portal.
Instance store volumes may not be attached after launching an instance; however, EBS volumes may be attached after the instance is launched. Keep this in mind during initial network planning.
Using gp3 SSDs with SoftNAS
If you are planning to use the EBS General Purpose SSD gp3, it needs to be added using the EC2 console or during the initial creation of the SoftNAS Instance. For additional information about this specific SSD, please refer to AWS Getting Started - Storage. There is also an article titled "Adding an AWS gp3 disk device to a SoftNAS deployment: Best Practice" for additional information.
See also: Managing Volumes

7. Advanced details
Most of the configuration options located under Advanced details can be left alone but there are a few that Buurst recommends.
| Setting | Recommended | Notes |
|---|---|---|
IAM instance profile | None | |
| Shutdown behavior | Stop | |
| Termination protection | Enable | Prevent Instances from being accidentally deleted |
| Detailed CloudWatch monitoring | As preferred | See CloudWatch Notes below |
CloudWatch Note:

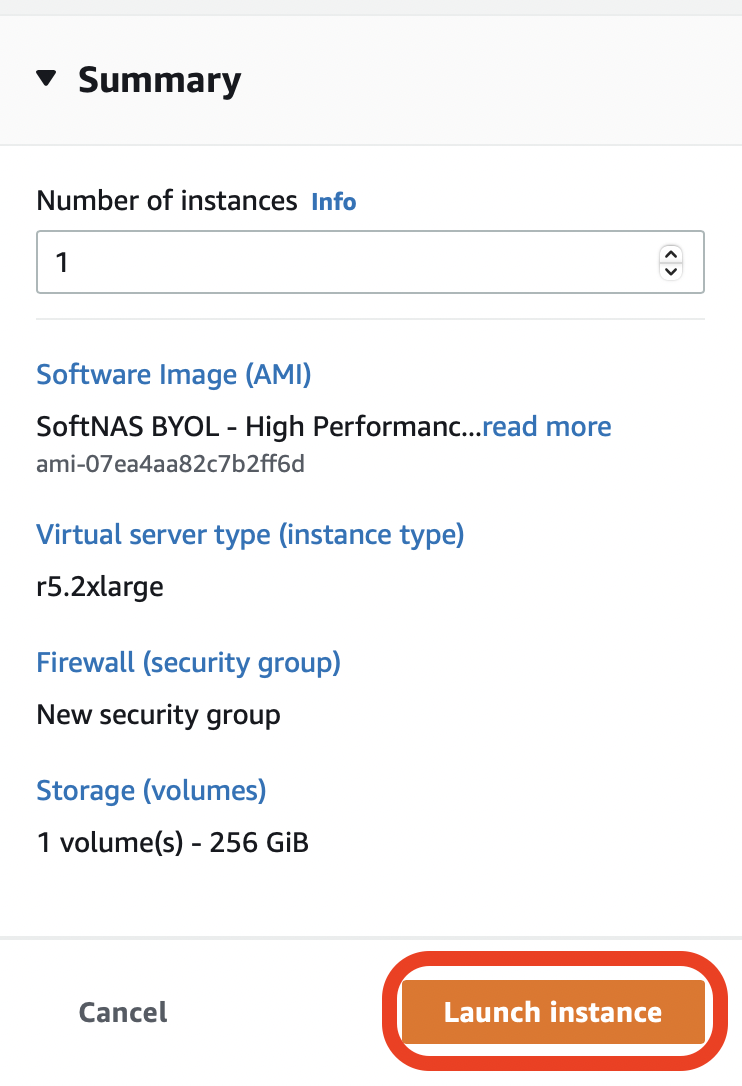
8. Launch Instance
- Once all configuration is complete, under the Summary section, click Launch instance.
- A screen will appear that displays the progress of initiating the launch of your instance. Once it displays Success, click the Instance ID to be taken to the EC2 Management Console and view your instance. This is in the format i-xxxxxxxxxxxxxxxxx.

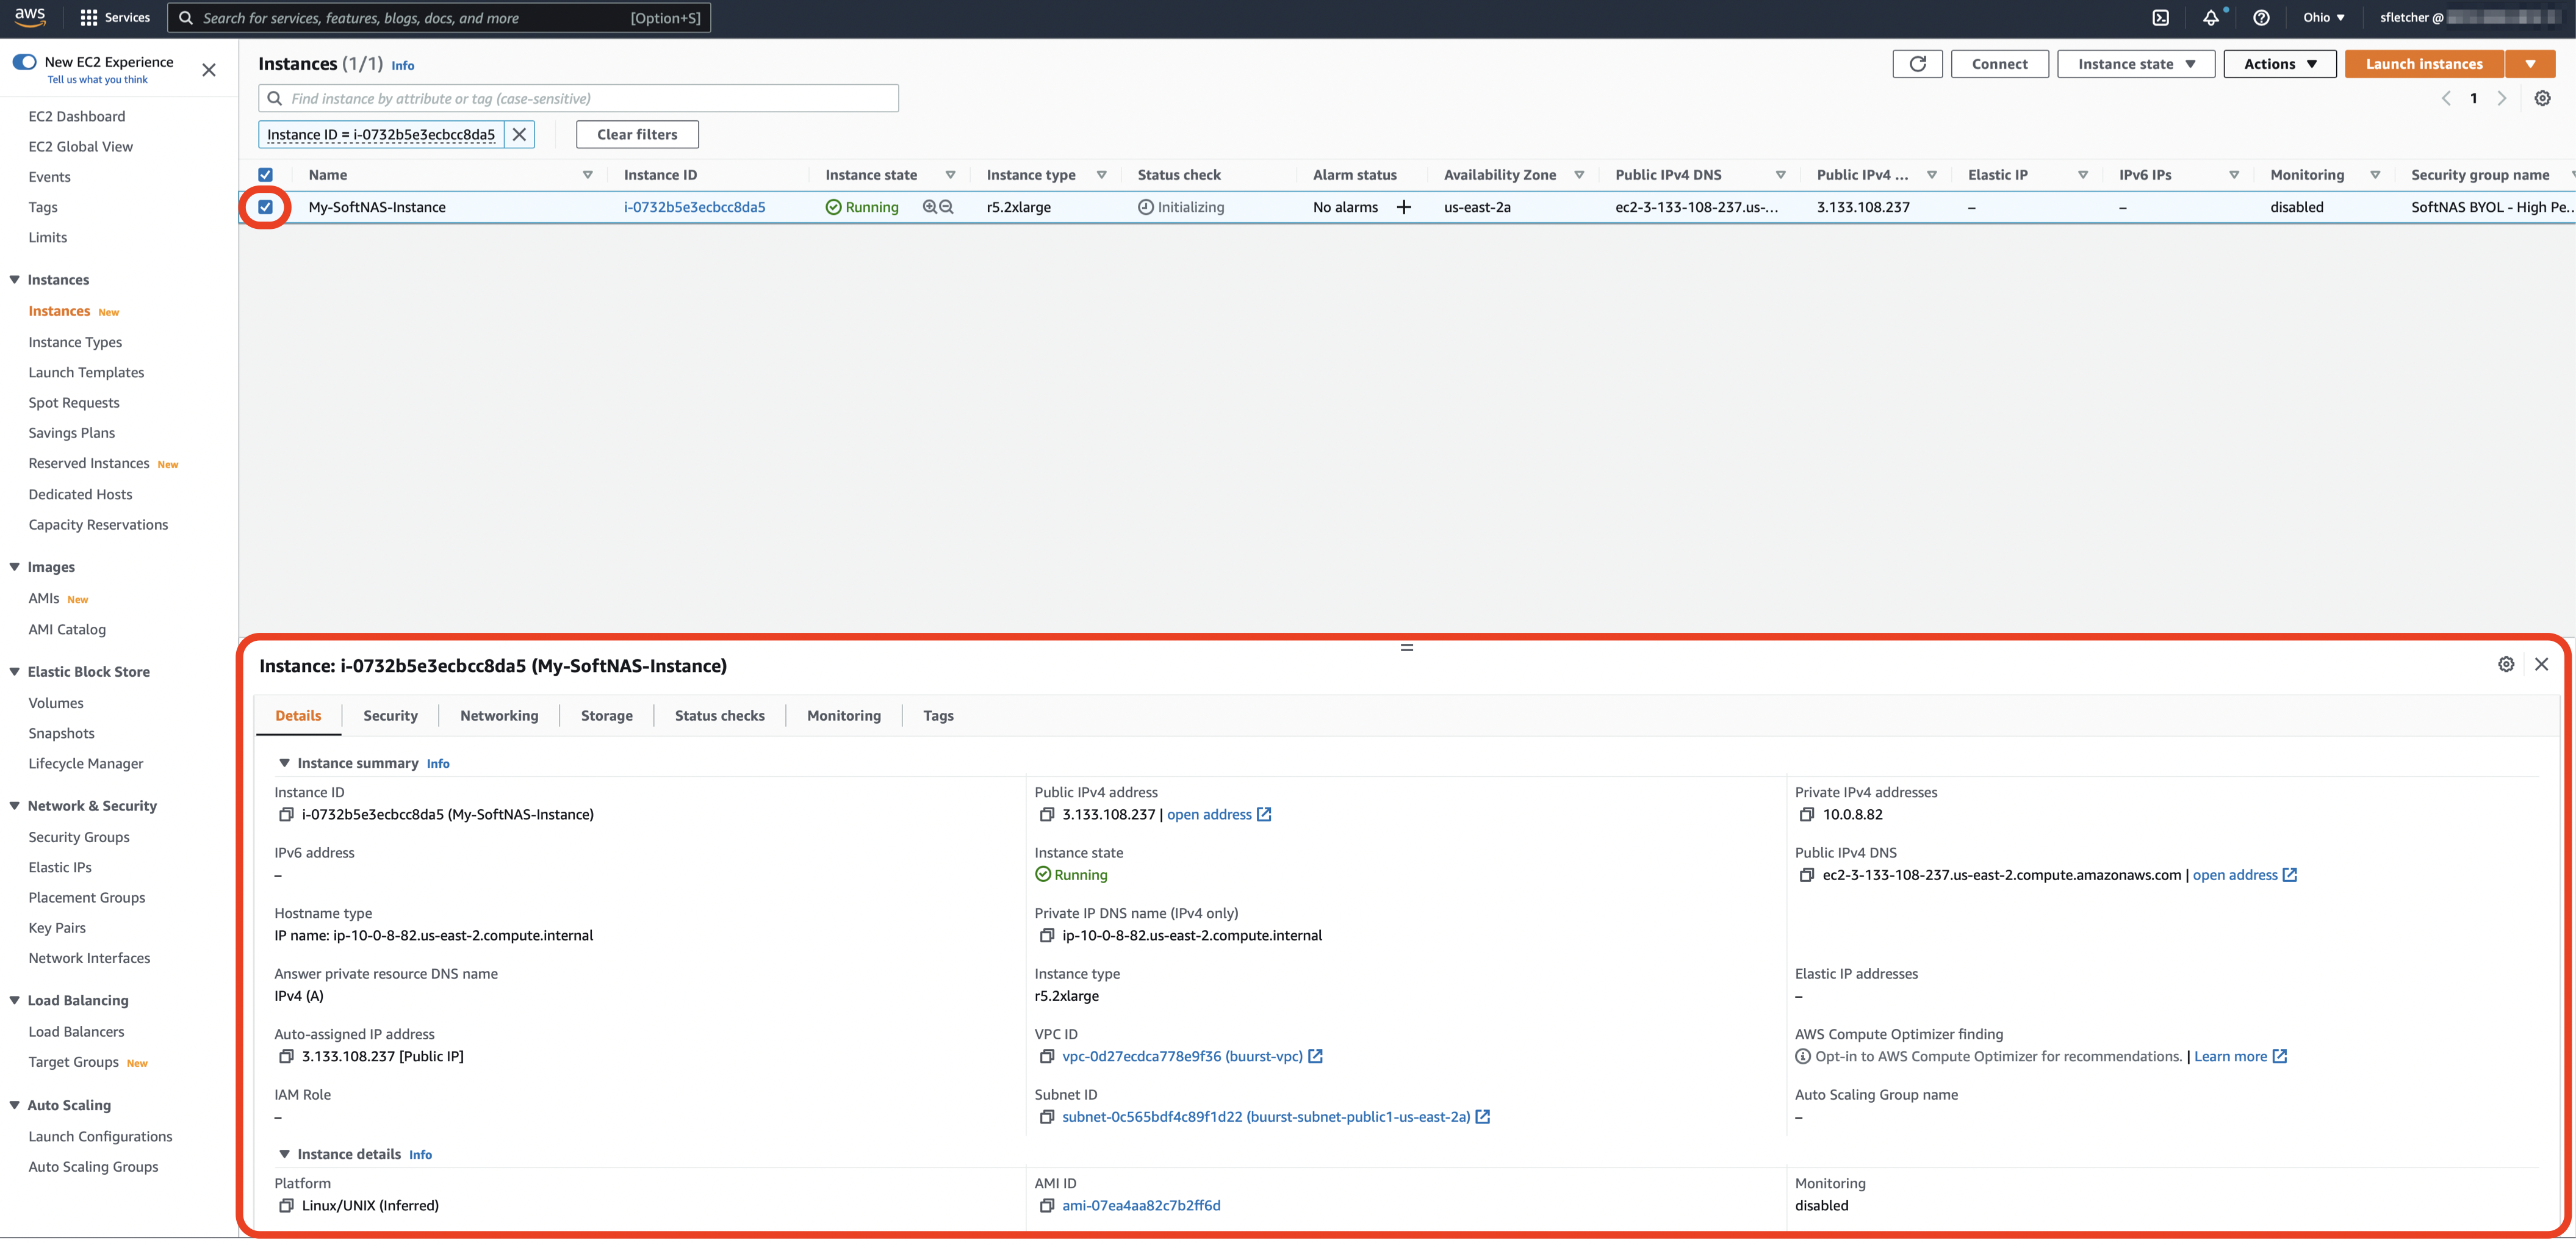
View Instance Details
Once you have deployed an instance, from the EC2 console you can select your specific deployment and under it you will see several tabs providing details including Description, Status Checks, Monitoring and Tags. To accomplish this:
- Select your instance as it is displayed in the main panel.
It will be highlighted once you do so.
The details of that instance will be displayed at the bottom of the screen in different tabs.
Details tab - Displays all the basic and general information of the instance.
Security tab - Displays all information regarding the security of the instance such as IAM Role, Security Groups, and the Inbound/Outbound rules associated.
Networking tab - Displays all information regarding the networking of the instance such as IP Addresses, VPCs, Subnets, Availability Zones, and Network Interfaces.
Storage tab - Displays all information regarding the storage of the instance such as the Block devices and corresponding names.
Status Checks tab - Displays the information on system status checks and instance status checks. Status Check Alarms are created from here. Status Checks & Alarms
Monitoring tab - Displays all the CloudWatch alarm and metrics in graph format.
Tags tab - Displays all the tags that are associated with the instance. Add, edit or remove tags in this area.