AWS Getting Started - Access EC2 SoftNAS Instance
- Former user (Deleted)
- Sean Hastert
- Tom Sheffield (Unlicensed)
Connecting to your Instance via Browser
To connect to your SoftNAS Instance is simple, provided you are on the same network as your virtual machine. If you are not, you will need to configure a VPN, a NAT, or AWS Direct Connect.
To connect via a Private subnet, you will use the private IP assigned automatically during instance creation. This IP address can be found in the Description tab of the selected instance.
- Obtain your IP address from the Details tab.
- Open your browser, and type https:// <ip_of_your_instance>.
A certificate warning is likely to appear – this is to be expected. This warning will be eliminated when you configure security certificates for your SoftNAS instance. However, this can wait for a production instance. Simply bypass the warning for the moment.
- If using Google Chrome, select Advanced, then the Proceed to <IP address> link.
- NOTE: If the Proceed to <IP address> link is not there, click anywhere on the window and type thisisunsafe.
- If using Internet Explorer or Edge, simply click Continue to Website anyway (Not Recommended).
- If using Firefox, select I Understand the Risks.
- If using Safari, select Show Details > visit this website > Visit this Website (pop-up)

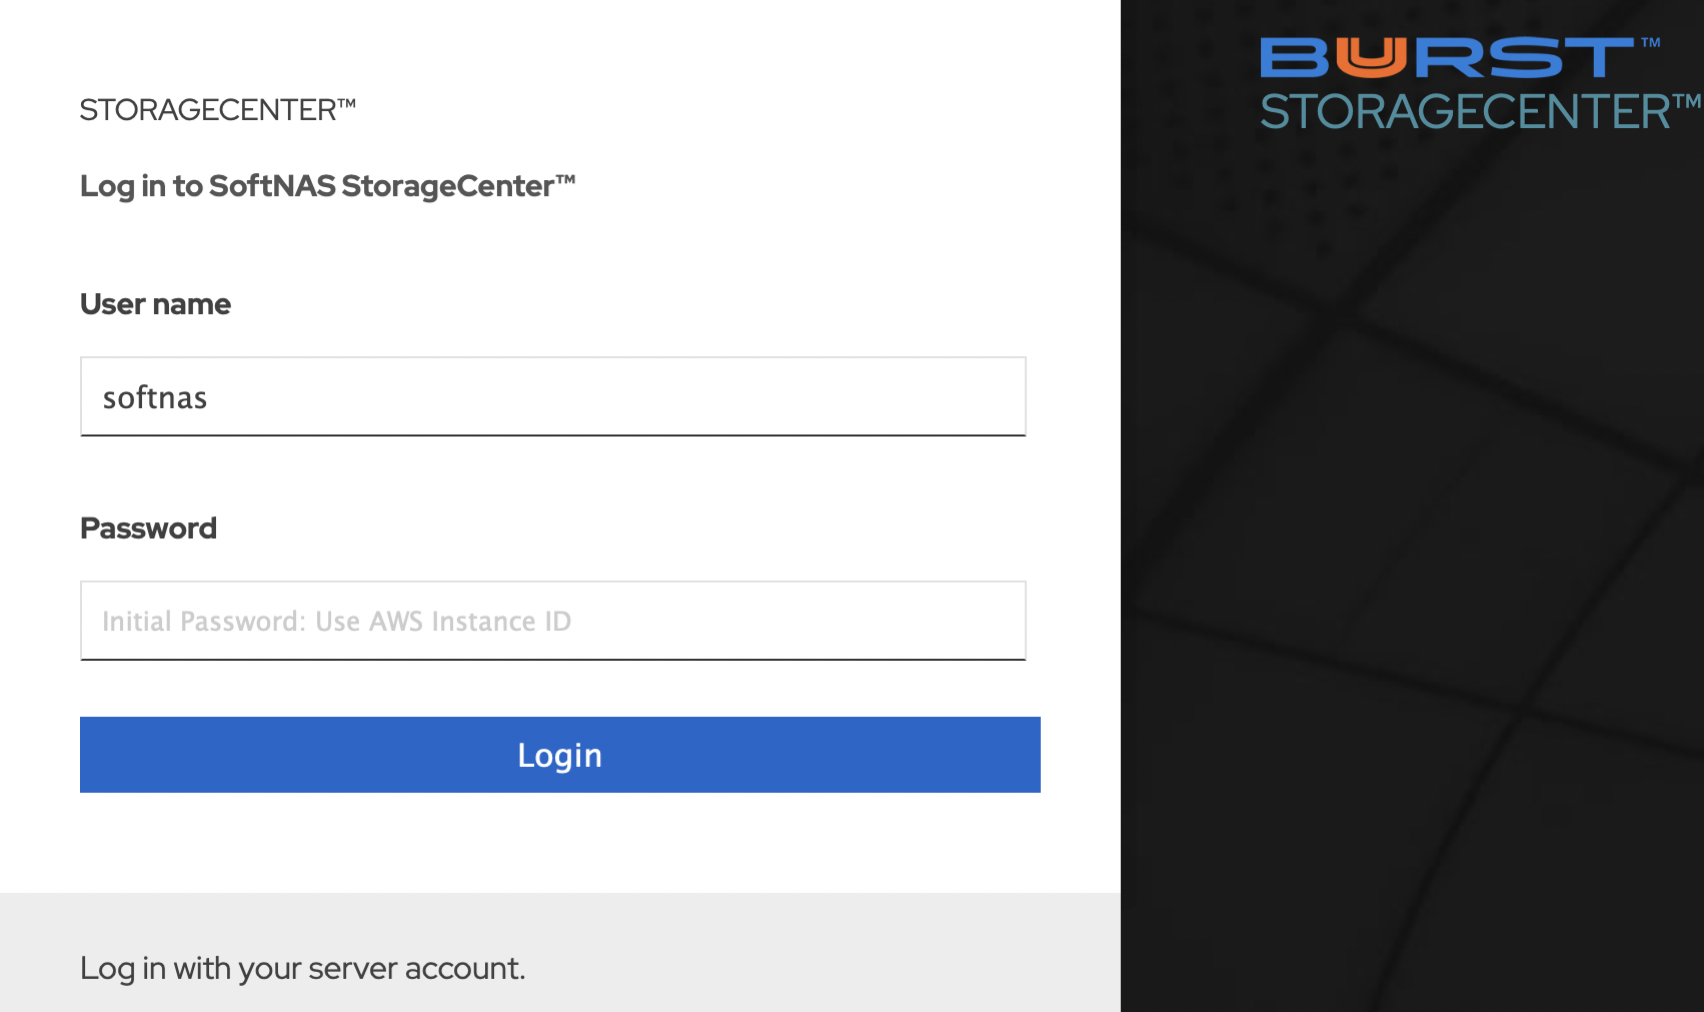
- Once the certificate error is bypassed, a login screen will appear.
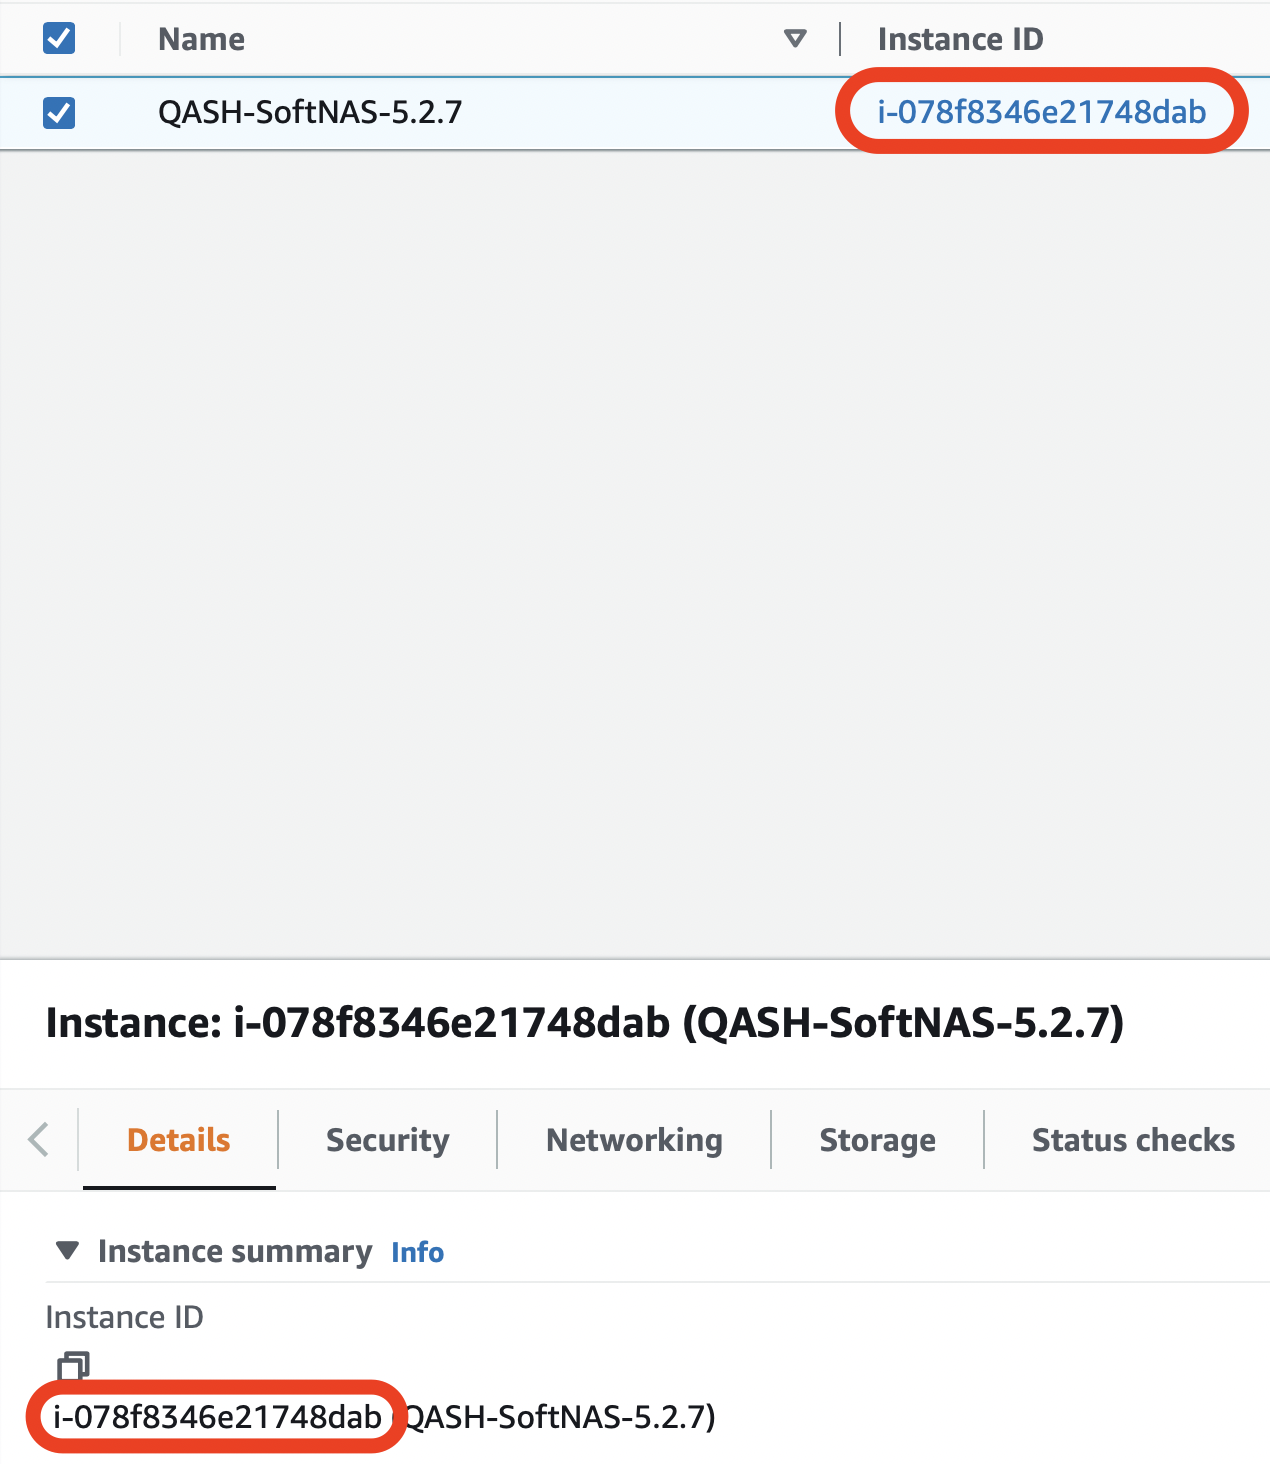
- The default username is ‘softnas’, and the password is the Instance ID. The Instance ID can be found in the EC2 Dashboard, under Instances.
- Enter the Instance ID.
- Click Login.
- Upon login, an End User License Agreement (EULA) will appear.
- Click I Agree.
Connecting to your Instance via SSH
Connecting to an EC2 instance directly via SSH is rarely necessary, however, the instructions below provide the required information should the need arise.
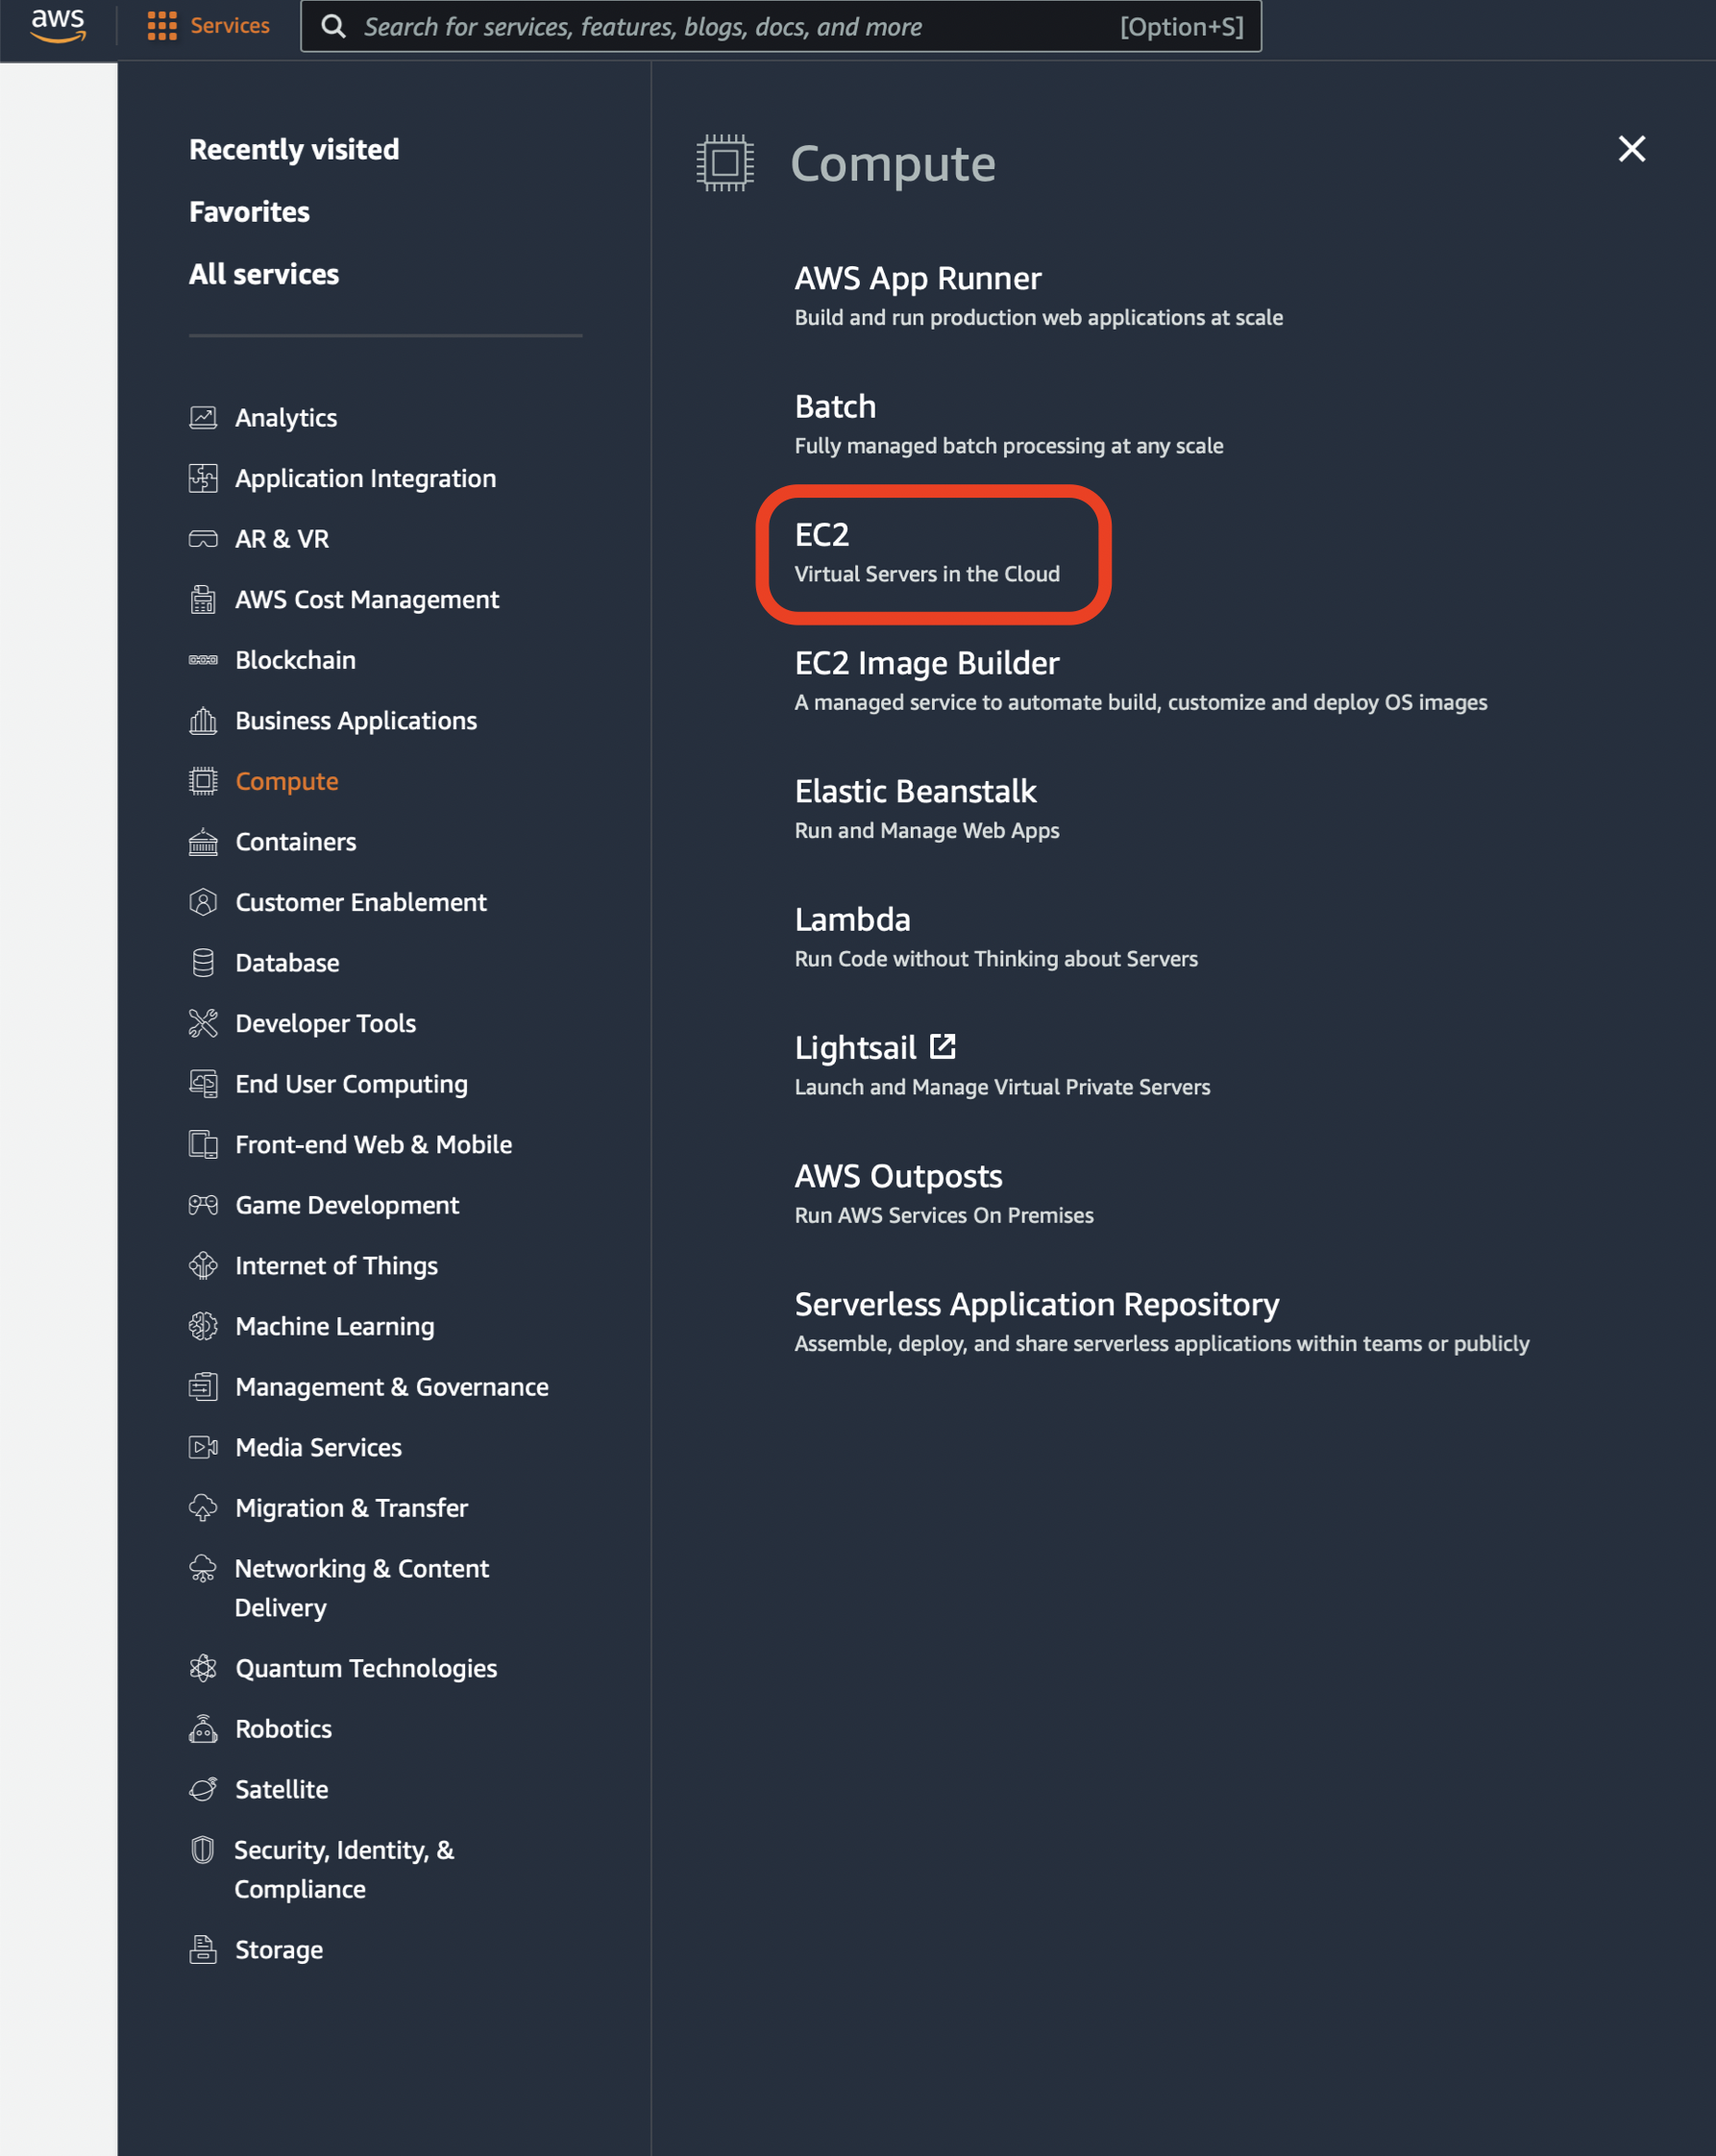
- Log into the management console, and select EC2 from Services > Compute > EC2, or if applicable, Recently visited, and navigate to the EC2 Dashboard.
- From the EC2 Dashboard, select Instances.

- Select the instance that you wish to connect. Click Actions > Connect.

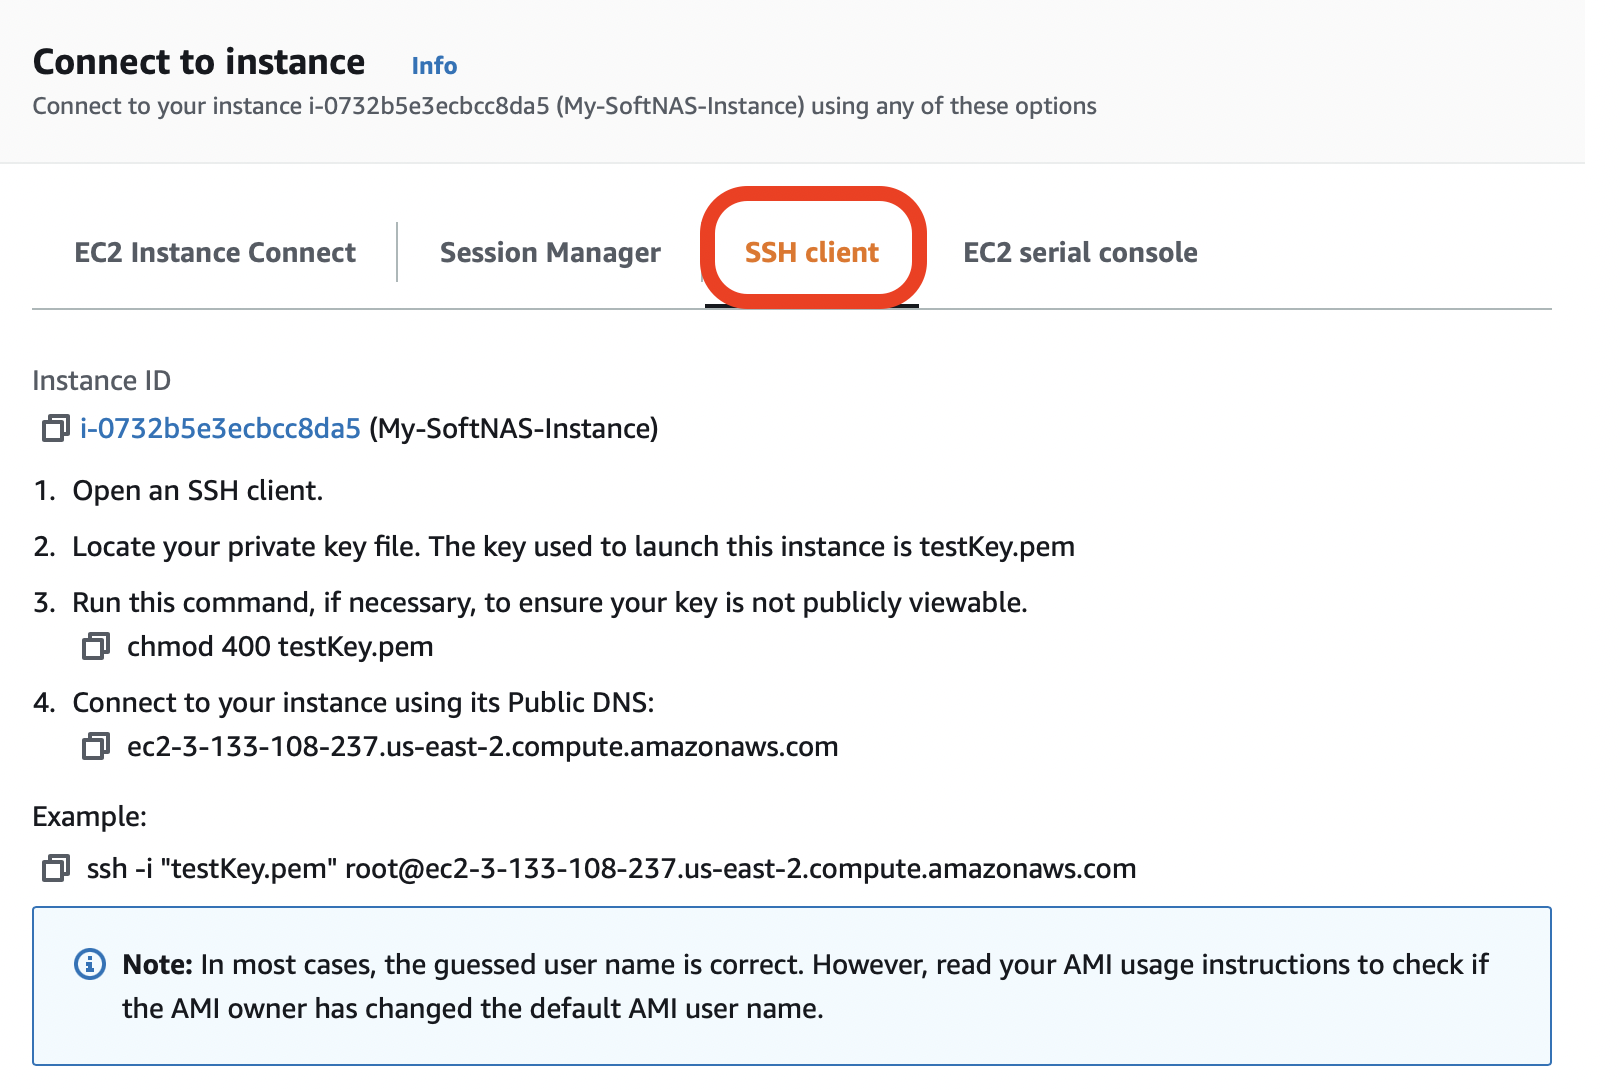
- The Connect to an Instance dialog will be displayed.
- Select the SSH client tab.
- Follow the on-screen instructions, connecting using the private key that is associated with your instance.
- The username to connect should be centos.
ssh -i "testKey.pem" centos@ec2-3-133-108-237.us-east-2.compute.amazonaws.com
You can also connect to your SoftNAS instance using a standalone SSH Client.
Some of the Windows SSH clients are given below and for more information on installing them, click the below links.
- Bitvise Tunnelier: This is a powerful SSH client with integrated SSH and SFTP for file transfers and other features. This is recommended for power SSH users.
- Putty: The ubiquitous Putty client is always a good choice for SSH users.
You are now ready to configure your SoftNAS Instance.