Creating and Configuring CIFS Shares
- Former user (Deleted)
- Sean Hastert
- Tom Sheffield (Unlicensed)
The Common Internet File System (CIFS) is the standard way that computer users share files across corporate intranets and the Internet. It provides users with seamless file and print interoperability between VMs and Windows-based clients. CIFS allows multiple clients to access and update the same file while preventing conflicts by providing file sharing and file locking.
Buurst's SoftNAS uses Samba Windows File Sharing for secured, stable and fast file sharing and print services. It allows the networking of Microsoft Windows®, Linux, UNIX, and other operating systems together, enabling access to Windows-based file and printer shares. Samba seamlessly integrates Linux/Unix Servers and Desktops into Active Directory environments using the winbind daemon.
Covered in this document:
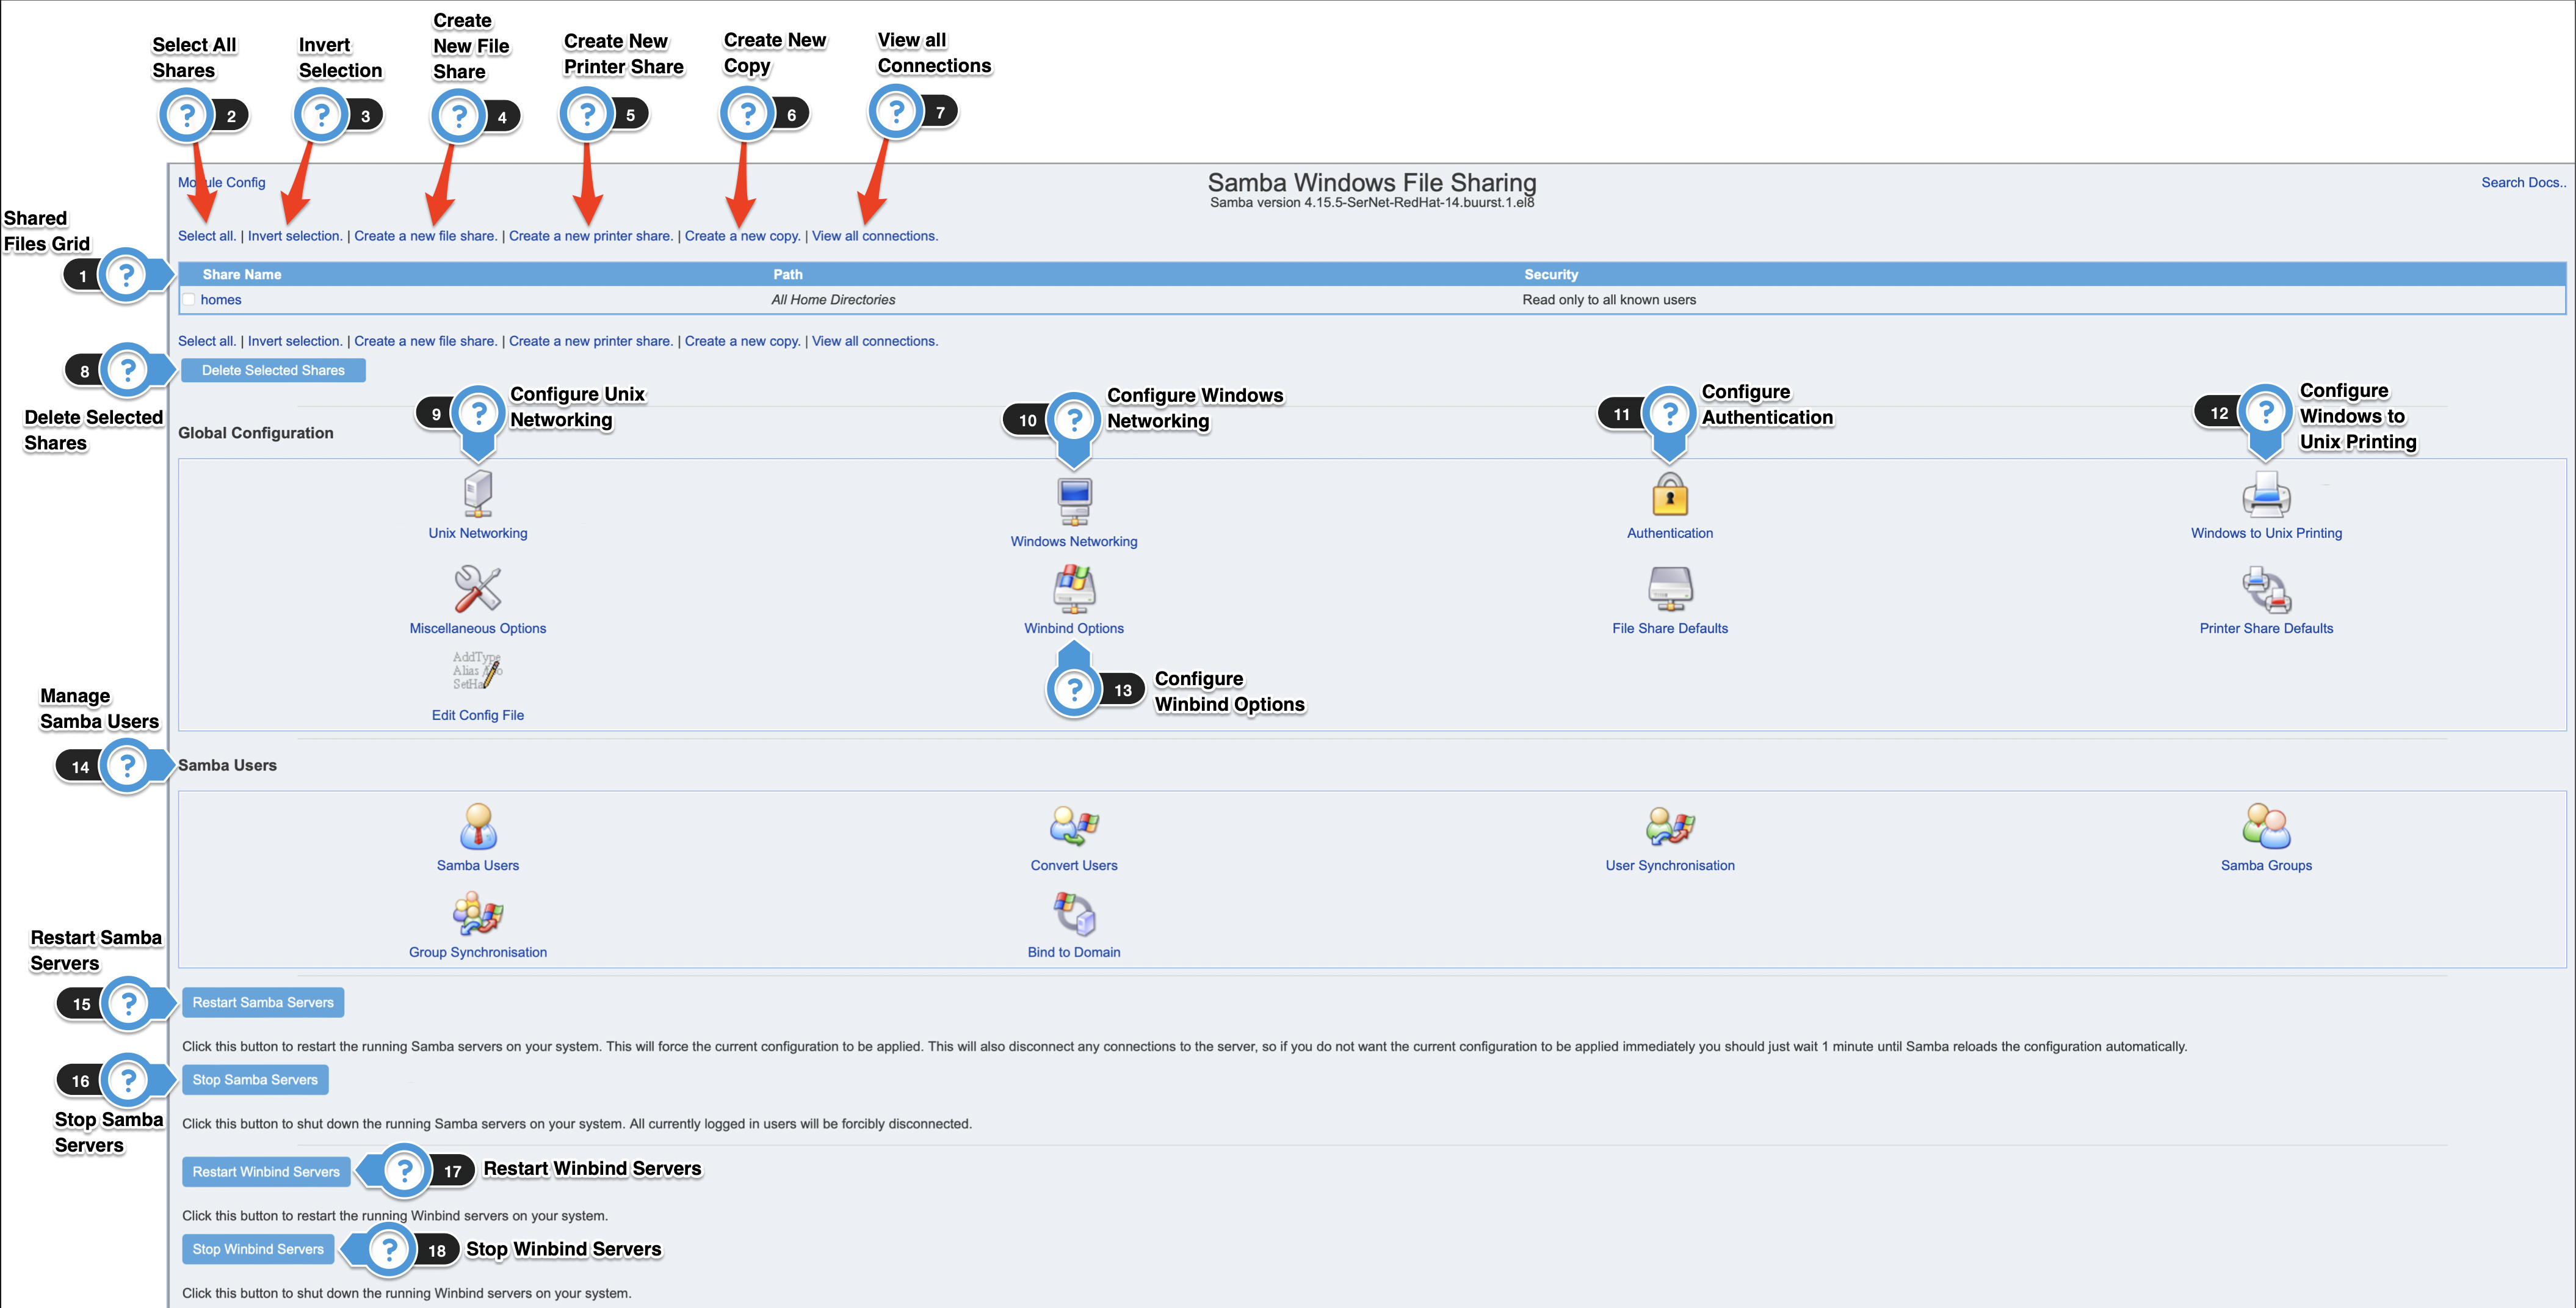
1. Shared Files Grid
- The Shared Files Grid displays the list of all shared files in a tabular grid format. It has the following fields.
Field | Description |
|---|---|
Share Name | It is the name of the share. |
Path | It specifies the path that is shared. |
Security | It shows the type of security available for the share. |
2. Selecting All Shares
- Located along the top of the Samba File Sharing Wizard.
- Click the Select All button and all the shared files in the list will be selected.
3. Inverting Selection
- Located along the top of the Samba File Sharing Wizard.
- Click the Invert Selection button and the selection of the shared files in the list will be inverted.
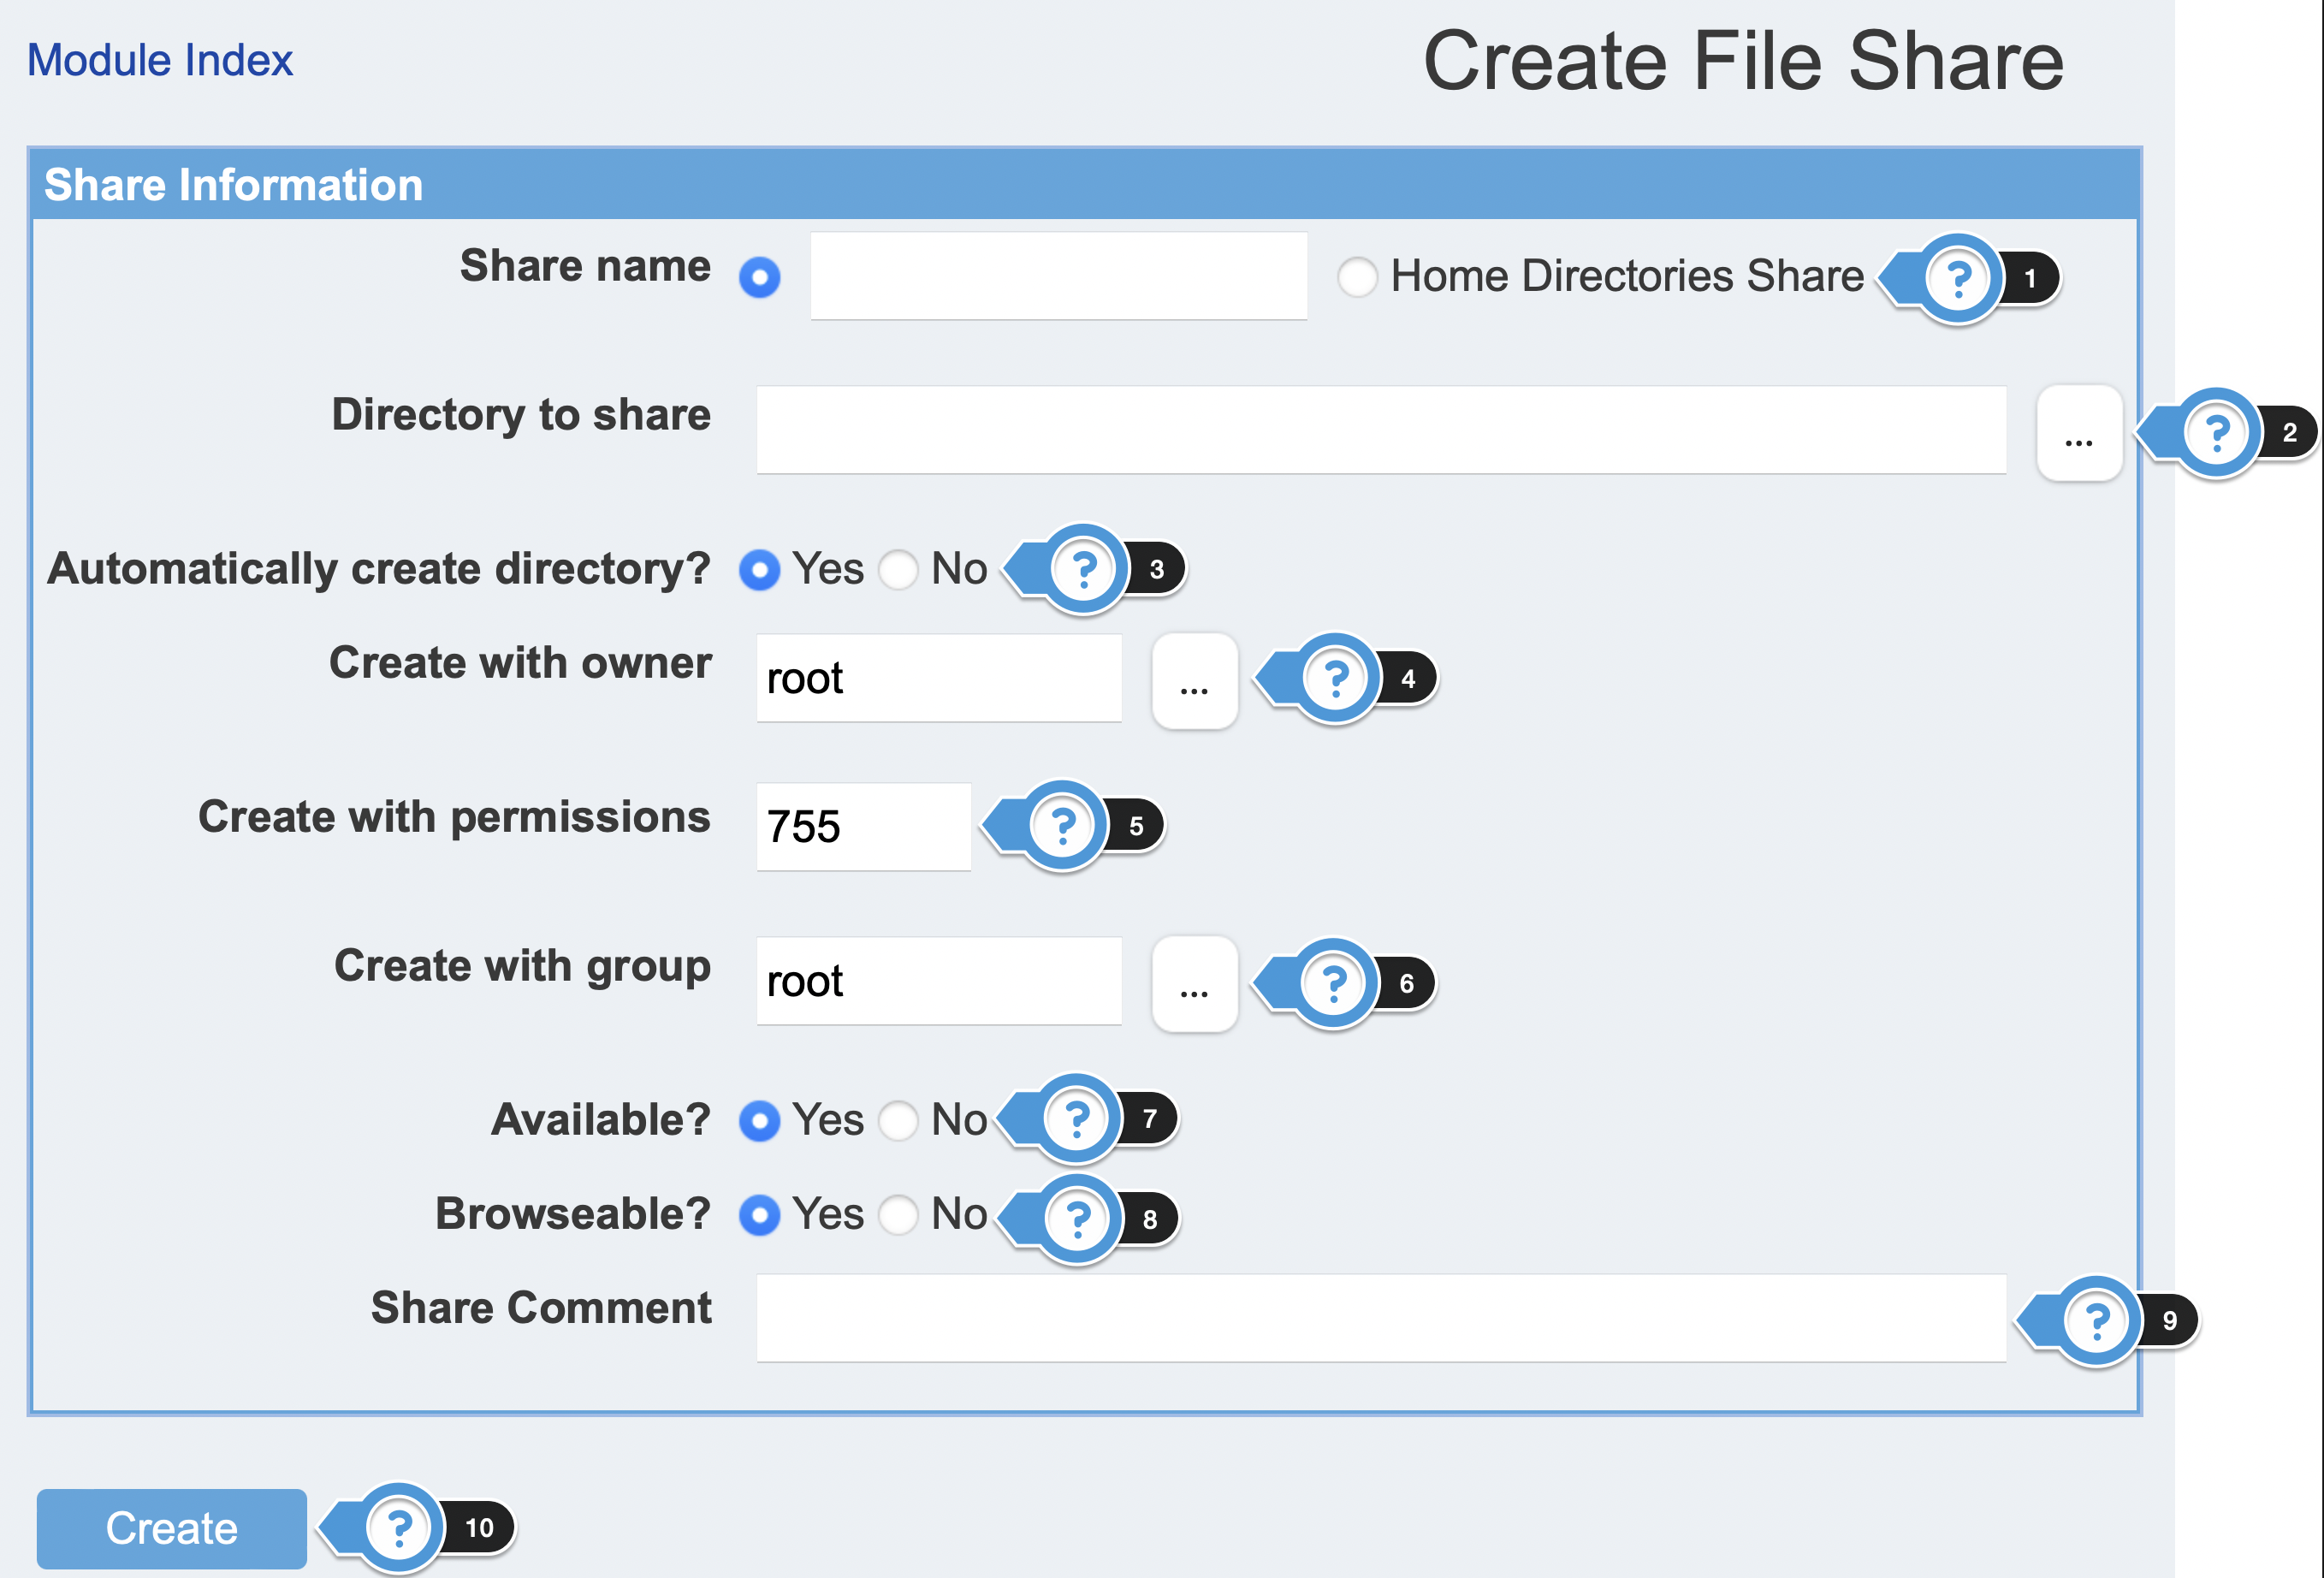
4. Creating a New File Share
Located along the top of the Samba File Sharing Wizard.
- On the CIFS Shares panel, click the Create a New File Share link. The Create File Share section of the panel will be displayed.
- Select the first button and enter the name of the share that will appear as the network mount point in the Share Name text entry box.
- The Directory to share is the path to the Volume that was created in the prior step. Click the Browse button to select the Volume from the filesystem for sharing.
- Set the Automatically Create Directory field option to be Yes.
- The Create with Owner field determines which Linux user will be assigned to the shared folder.
Enter the permission mask in the Create with Permissions text entry box.
EXAMPLE: 777 is read/write/execute
- The Create with Group field determines which Linux group will be assigned to the shared folder.
- To make the share to be available on the network, check the Yes option in the Available field.
- To make the share to be browsable on the network, check the Yes option in the Browsable field.
- In the Share Comment text box, enter the comment if any to display to users who browse the share.
- Once done, click the Create button.
- The new file share will be created and is viewable from the Shared Files Grid.
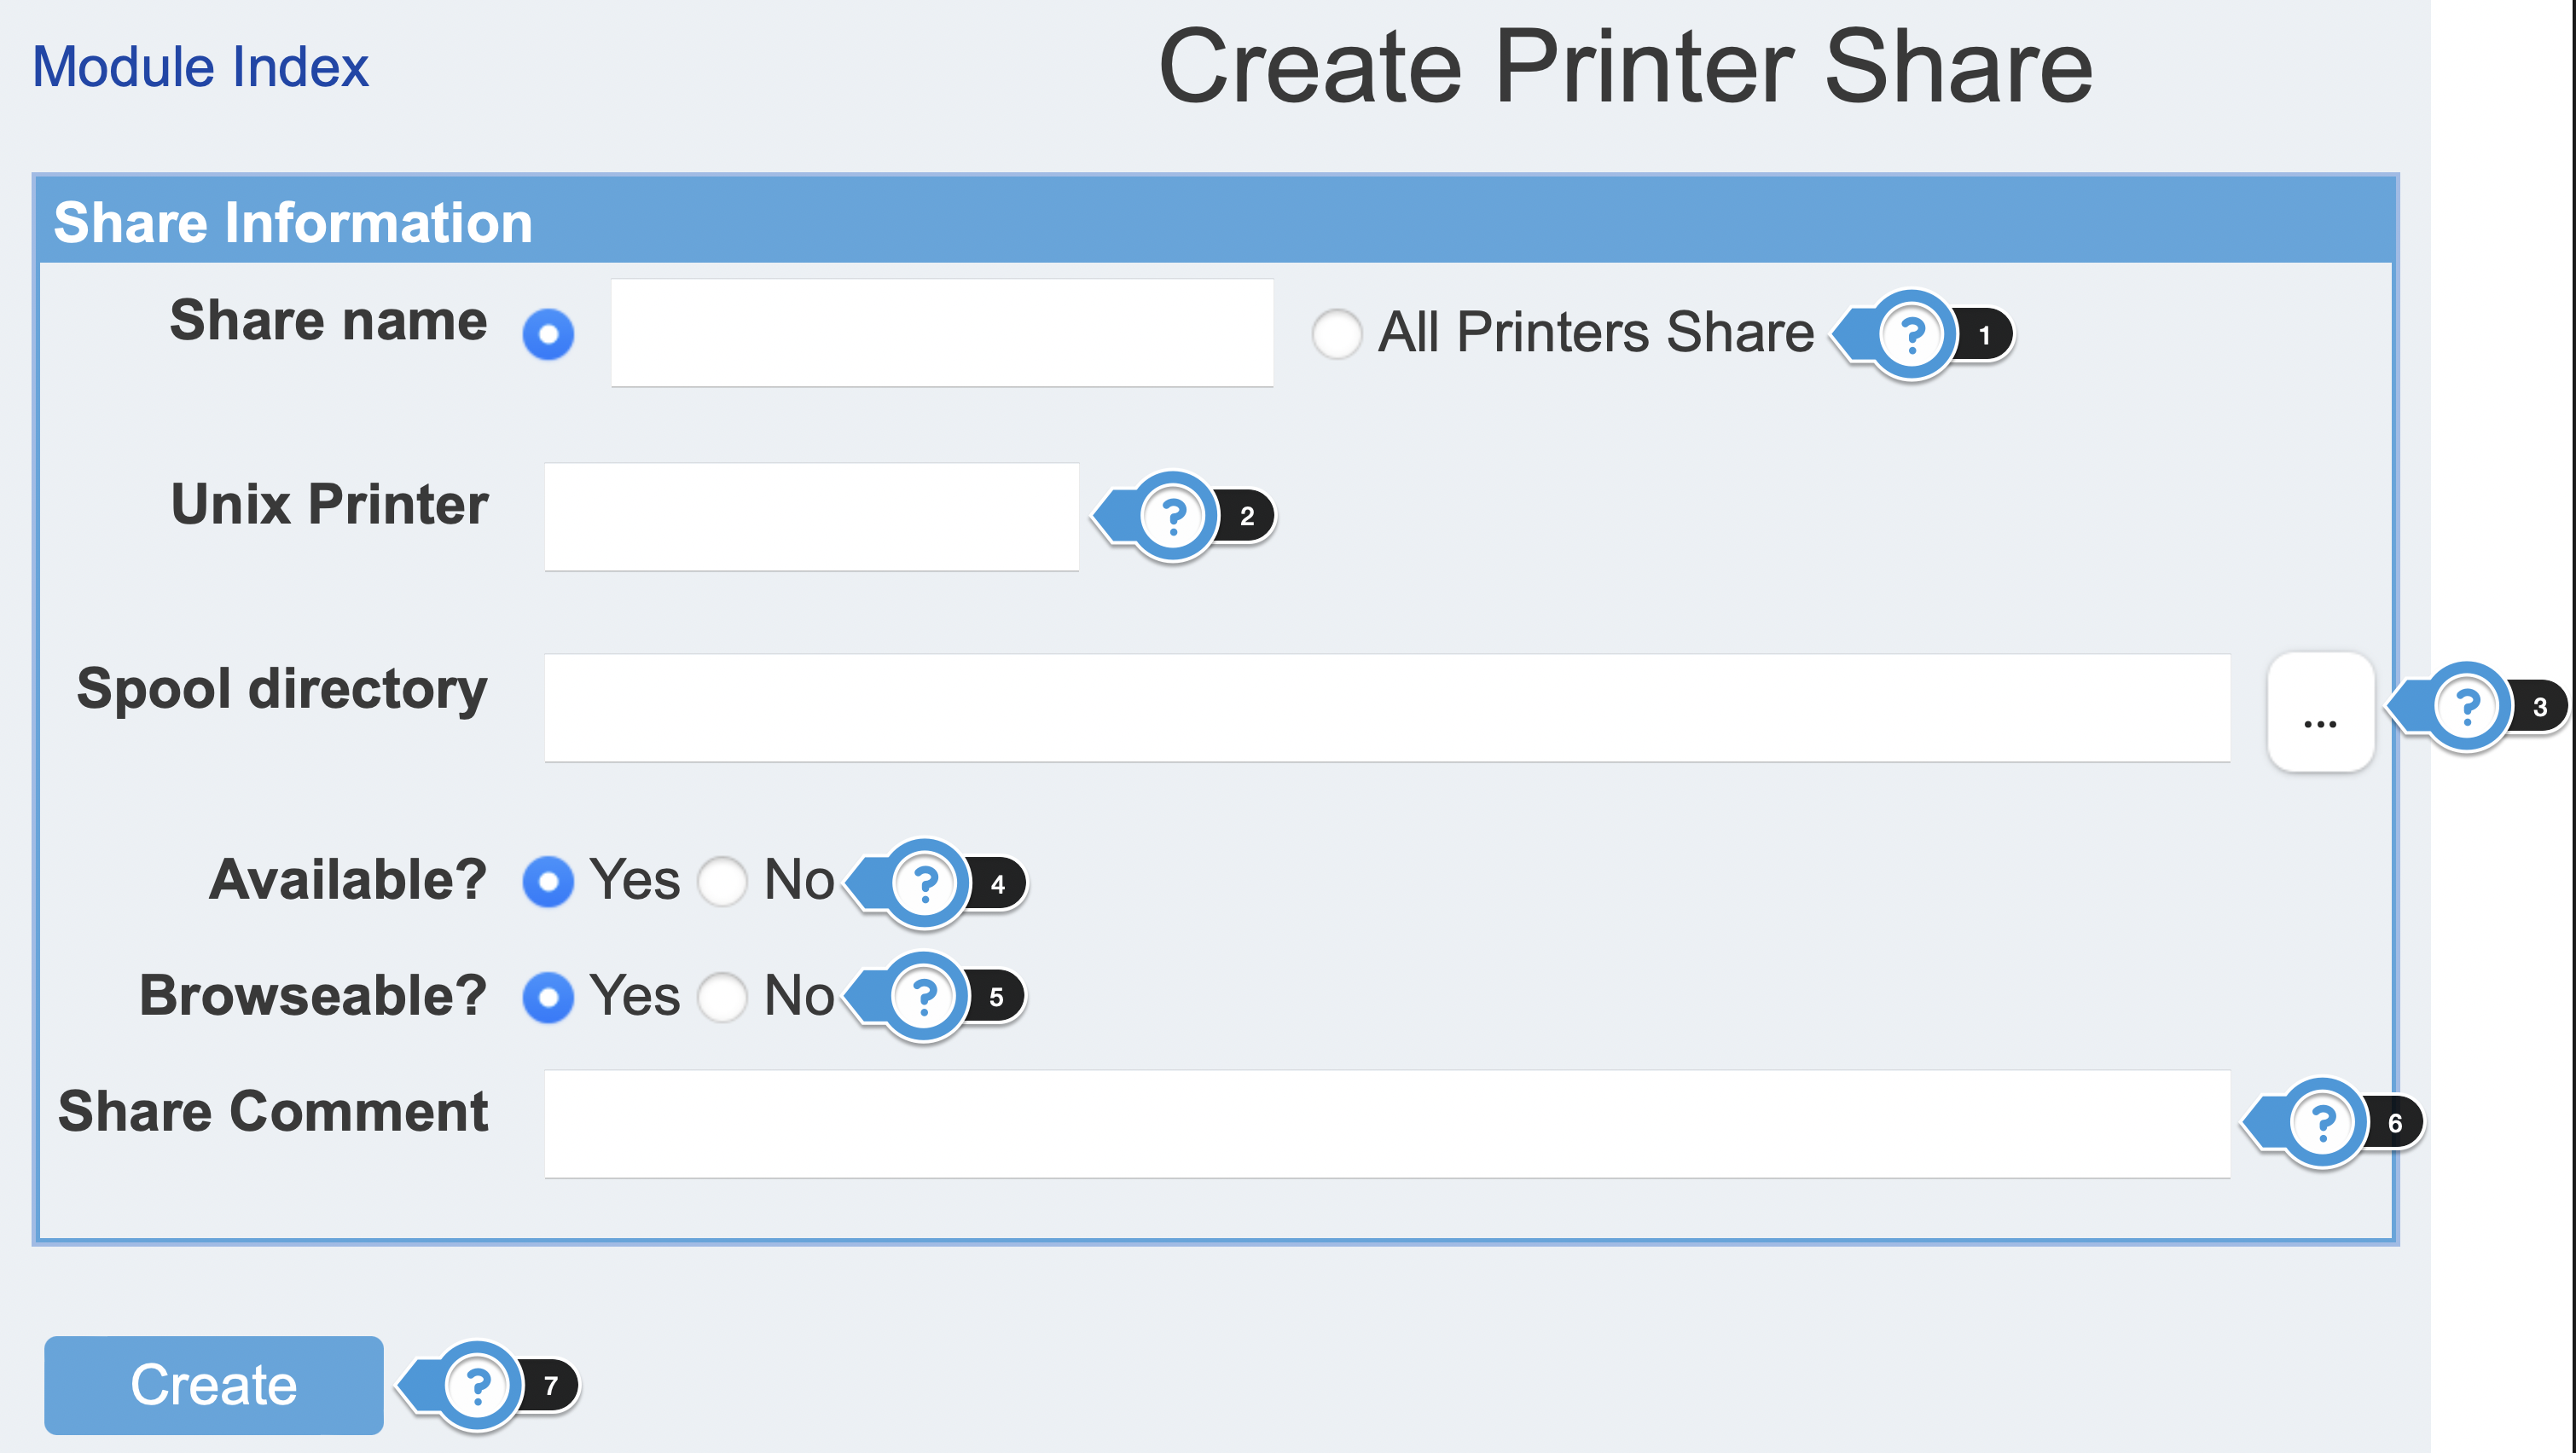
5. Creating a New Printer Share
Located along the top of the Samba File Sharing Wizard.
- On the CIFS Shares panel, click the Create a New Printer Share link. The Create Printer Share page will be displayed.
In the Share name field, make sure the first button is selected and enter a unique alphanumeric name for your share into the text box.
This should be the same as the name of the Unix printer you select in the next step to avoid confusion. If an automatically created printer share with the same name already exists, this new one will override it.- From the Unix Printer field, select the printer to make available to SMB clients.
- In the Spool directory field, enter or browse for the name of a directory in which temporary files for printing are stored.
- To disable this printer so that it cannot be used, change the Available field to No.
To hide this printer from the list that appears when the server is browsed, change the Browseable field to No.
It will still be directly accessible using a \\servername\printername path.- In the Share Comment field, enter a short description for this printer.
- Once done, click the Create button.
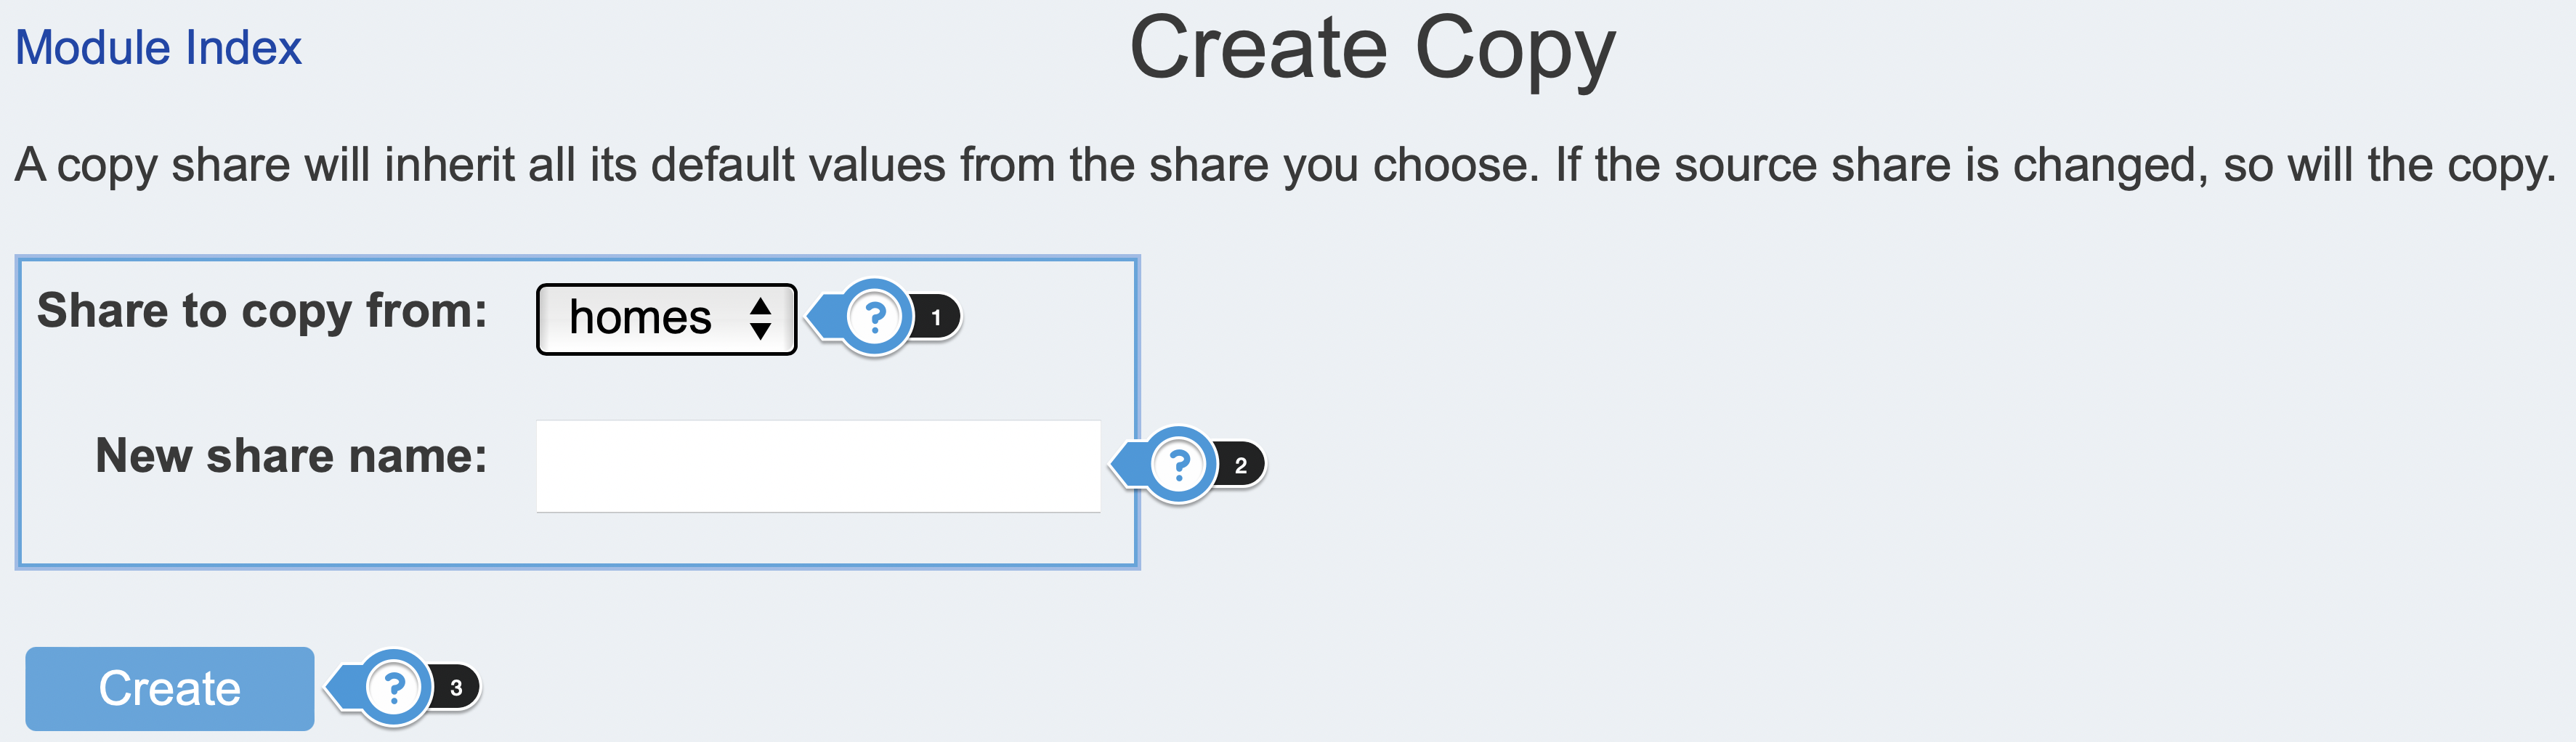
6. Creating a New Copy
Located along the top of the Samba File Sharing Wizard.
- Click the Create a New Copy link. The Create Copy page will be displayed.
- Select the name of the share from the Share to copy from drop down list.
- Enter the new name for the share in the New share name text entry box.
- Once done, click the Create button.
7. Viewing All Connections
Located along the top of the Samba File Sharing Wizard.
- Click the View all connections link to view all users and their connections through file sharing.
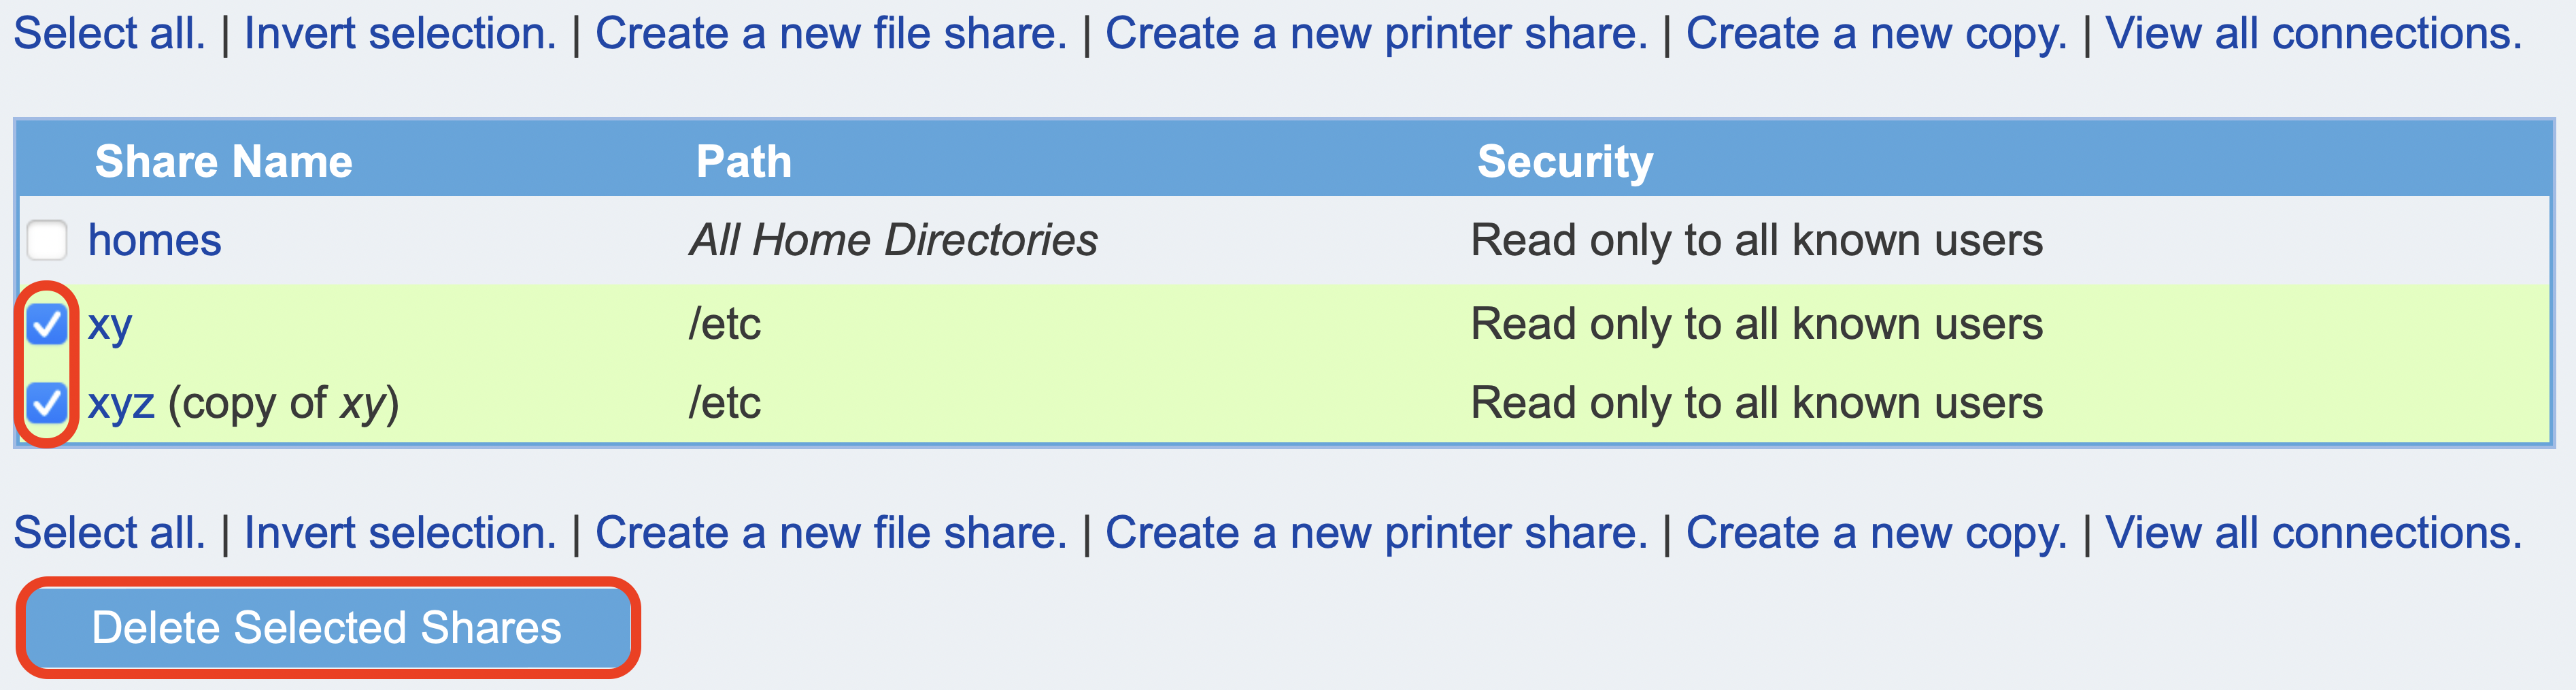
8. Deleting Selected Shares
Located under the Shared Files Grid
- Select the shares that you wish to delete from the list of shares.
- Click the Delete Selected Shares button.
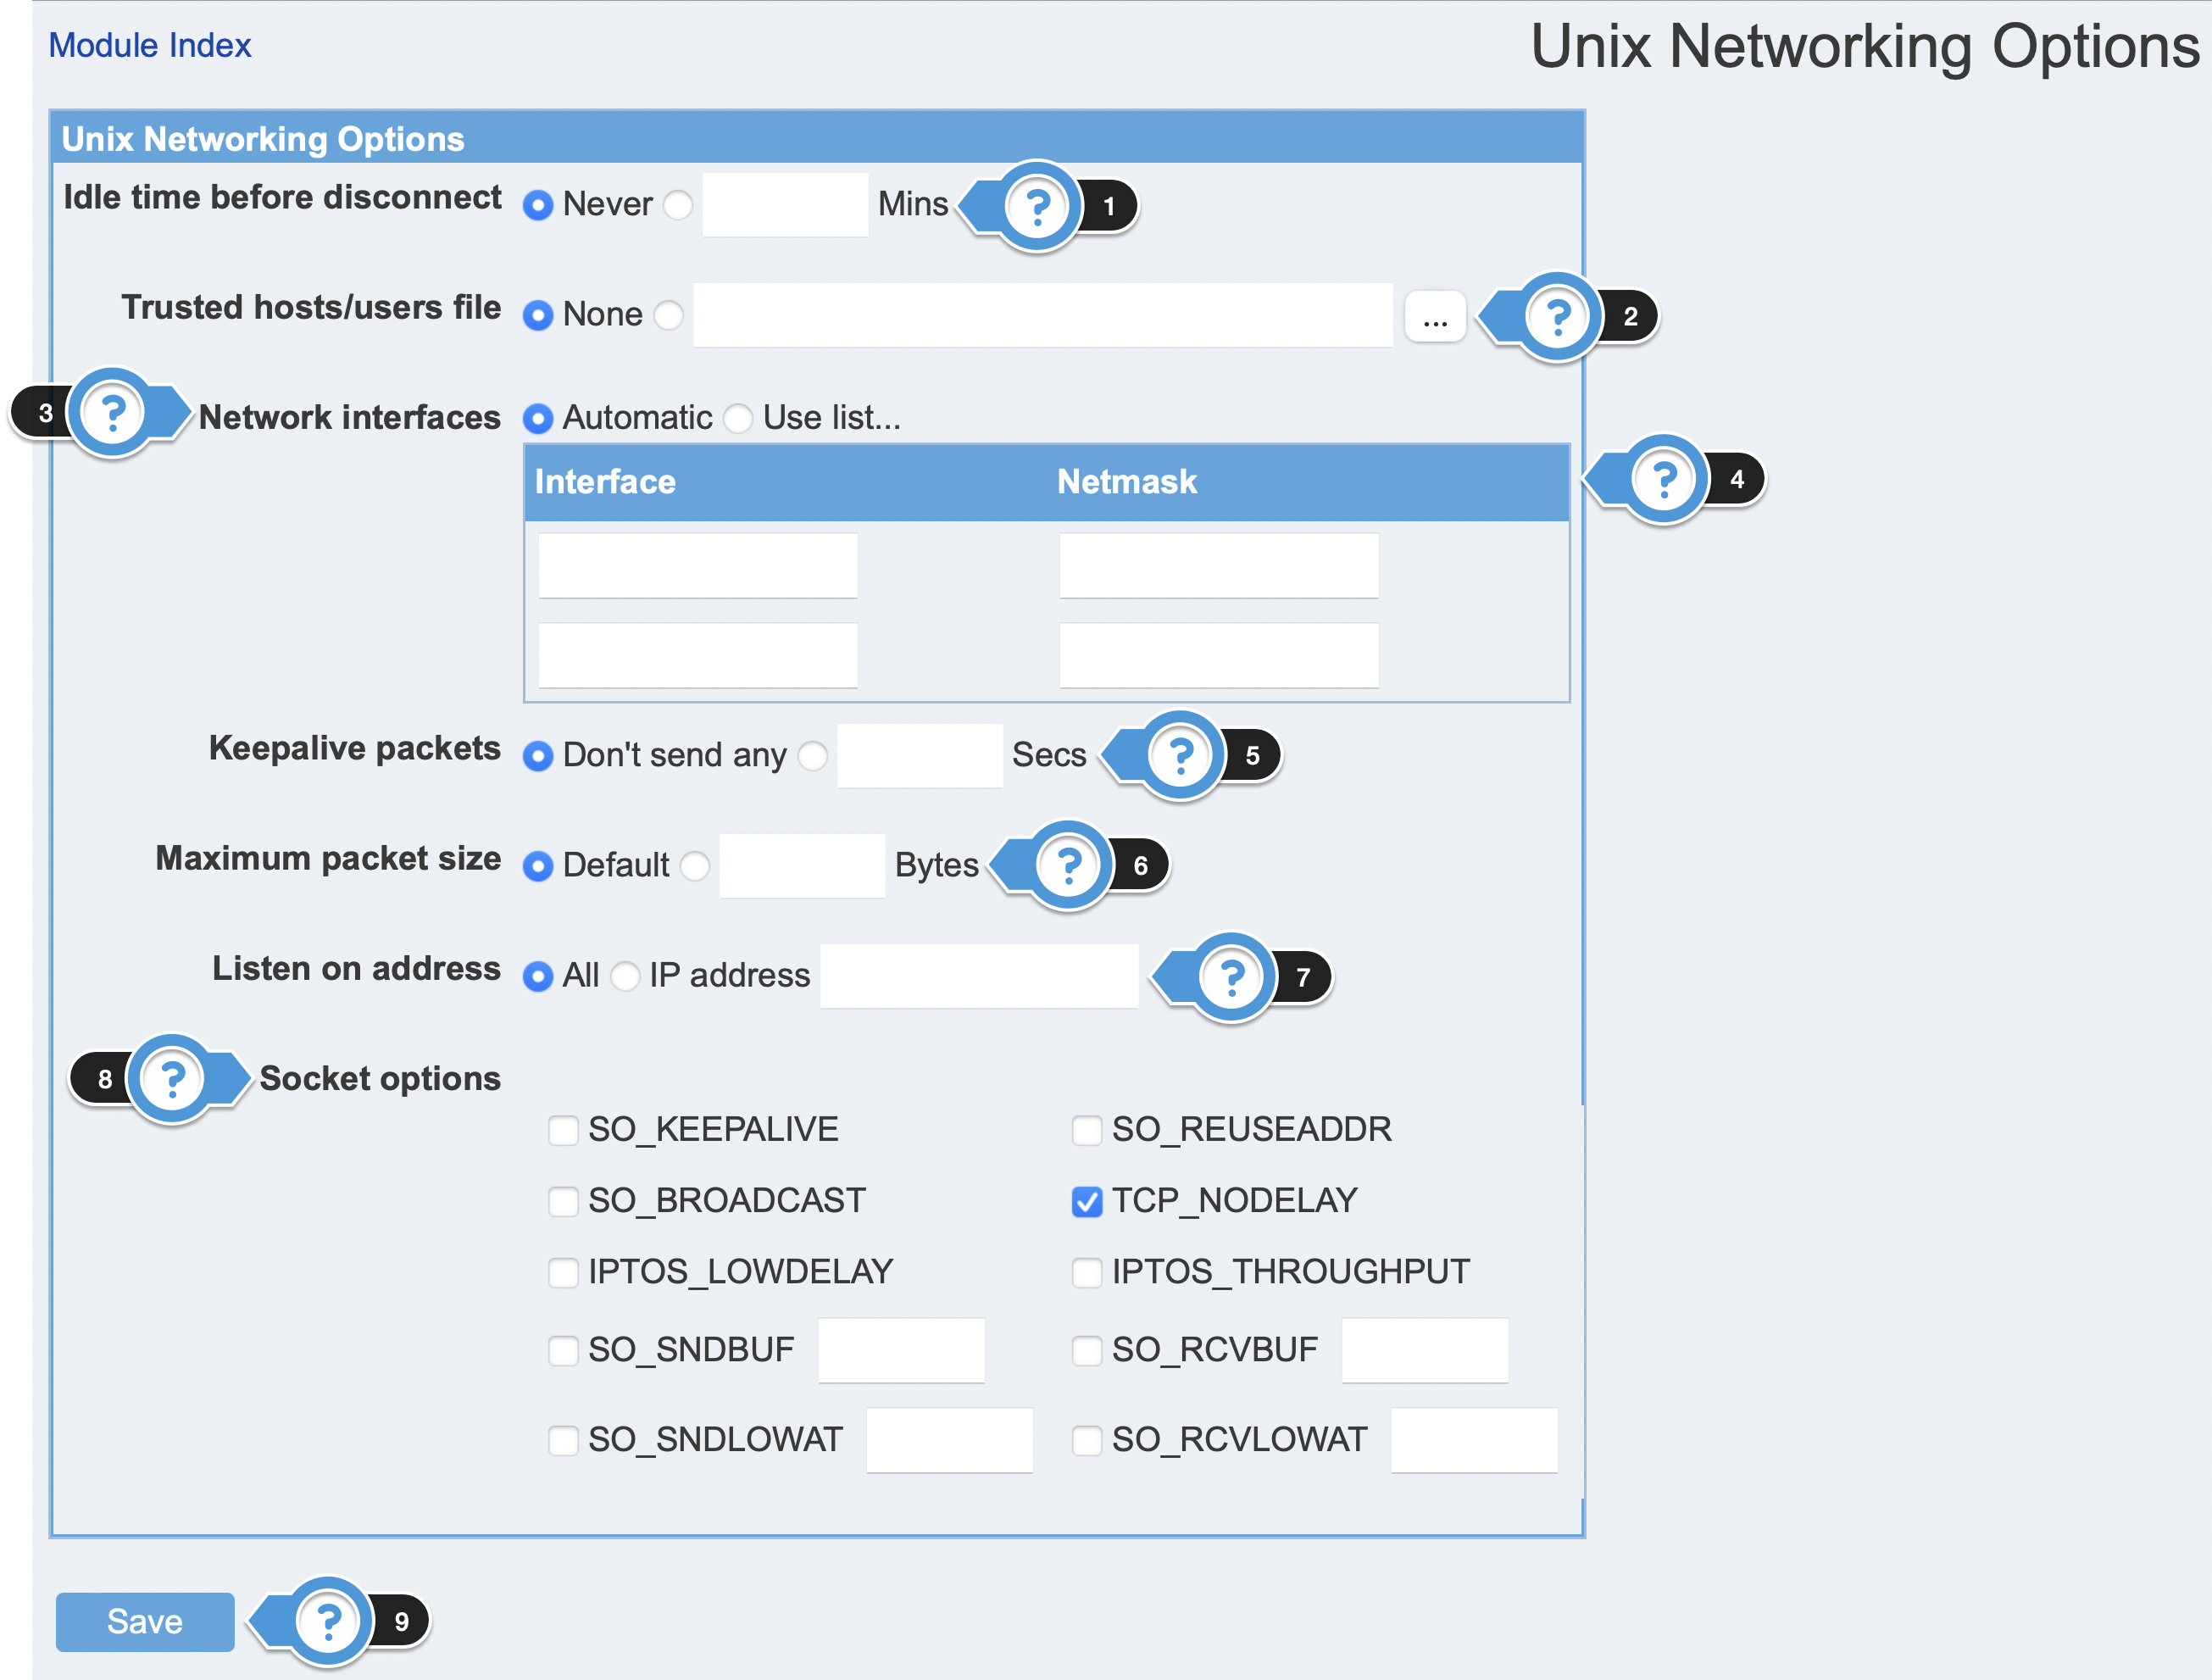
8. Configuring Unix Networking
- Click the Unix Networking icon in the Global Configuration section. The Unix Networking Options page will be displayed.
- Specify the Idle time before disconnect in the field. The default is Never.
- Specify the Trusted hosts/users file in the field. The default is None.
- Specify the Network interfaces.
- If using list, enter the Interface and Netmask details.
- Specify the Keep alive packets in the field. The default is Don't send any.
- Specify the Maximum packet size in the field.
- Specify the Listen on address in the field. The default is All.
- Specify the Socket options details.
- Once done, click the Save button.
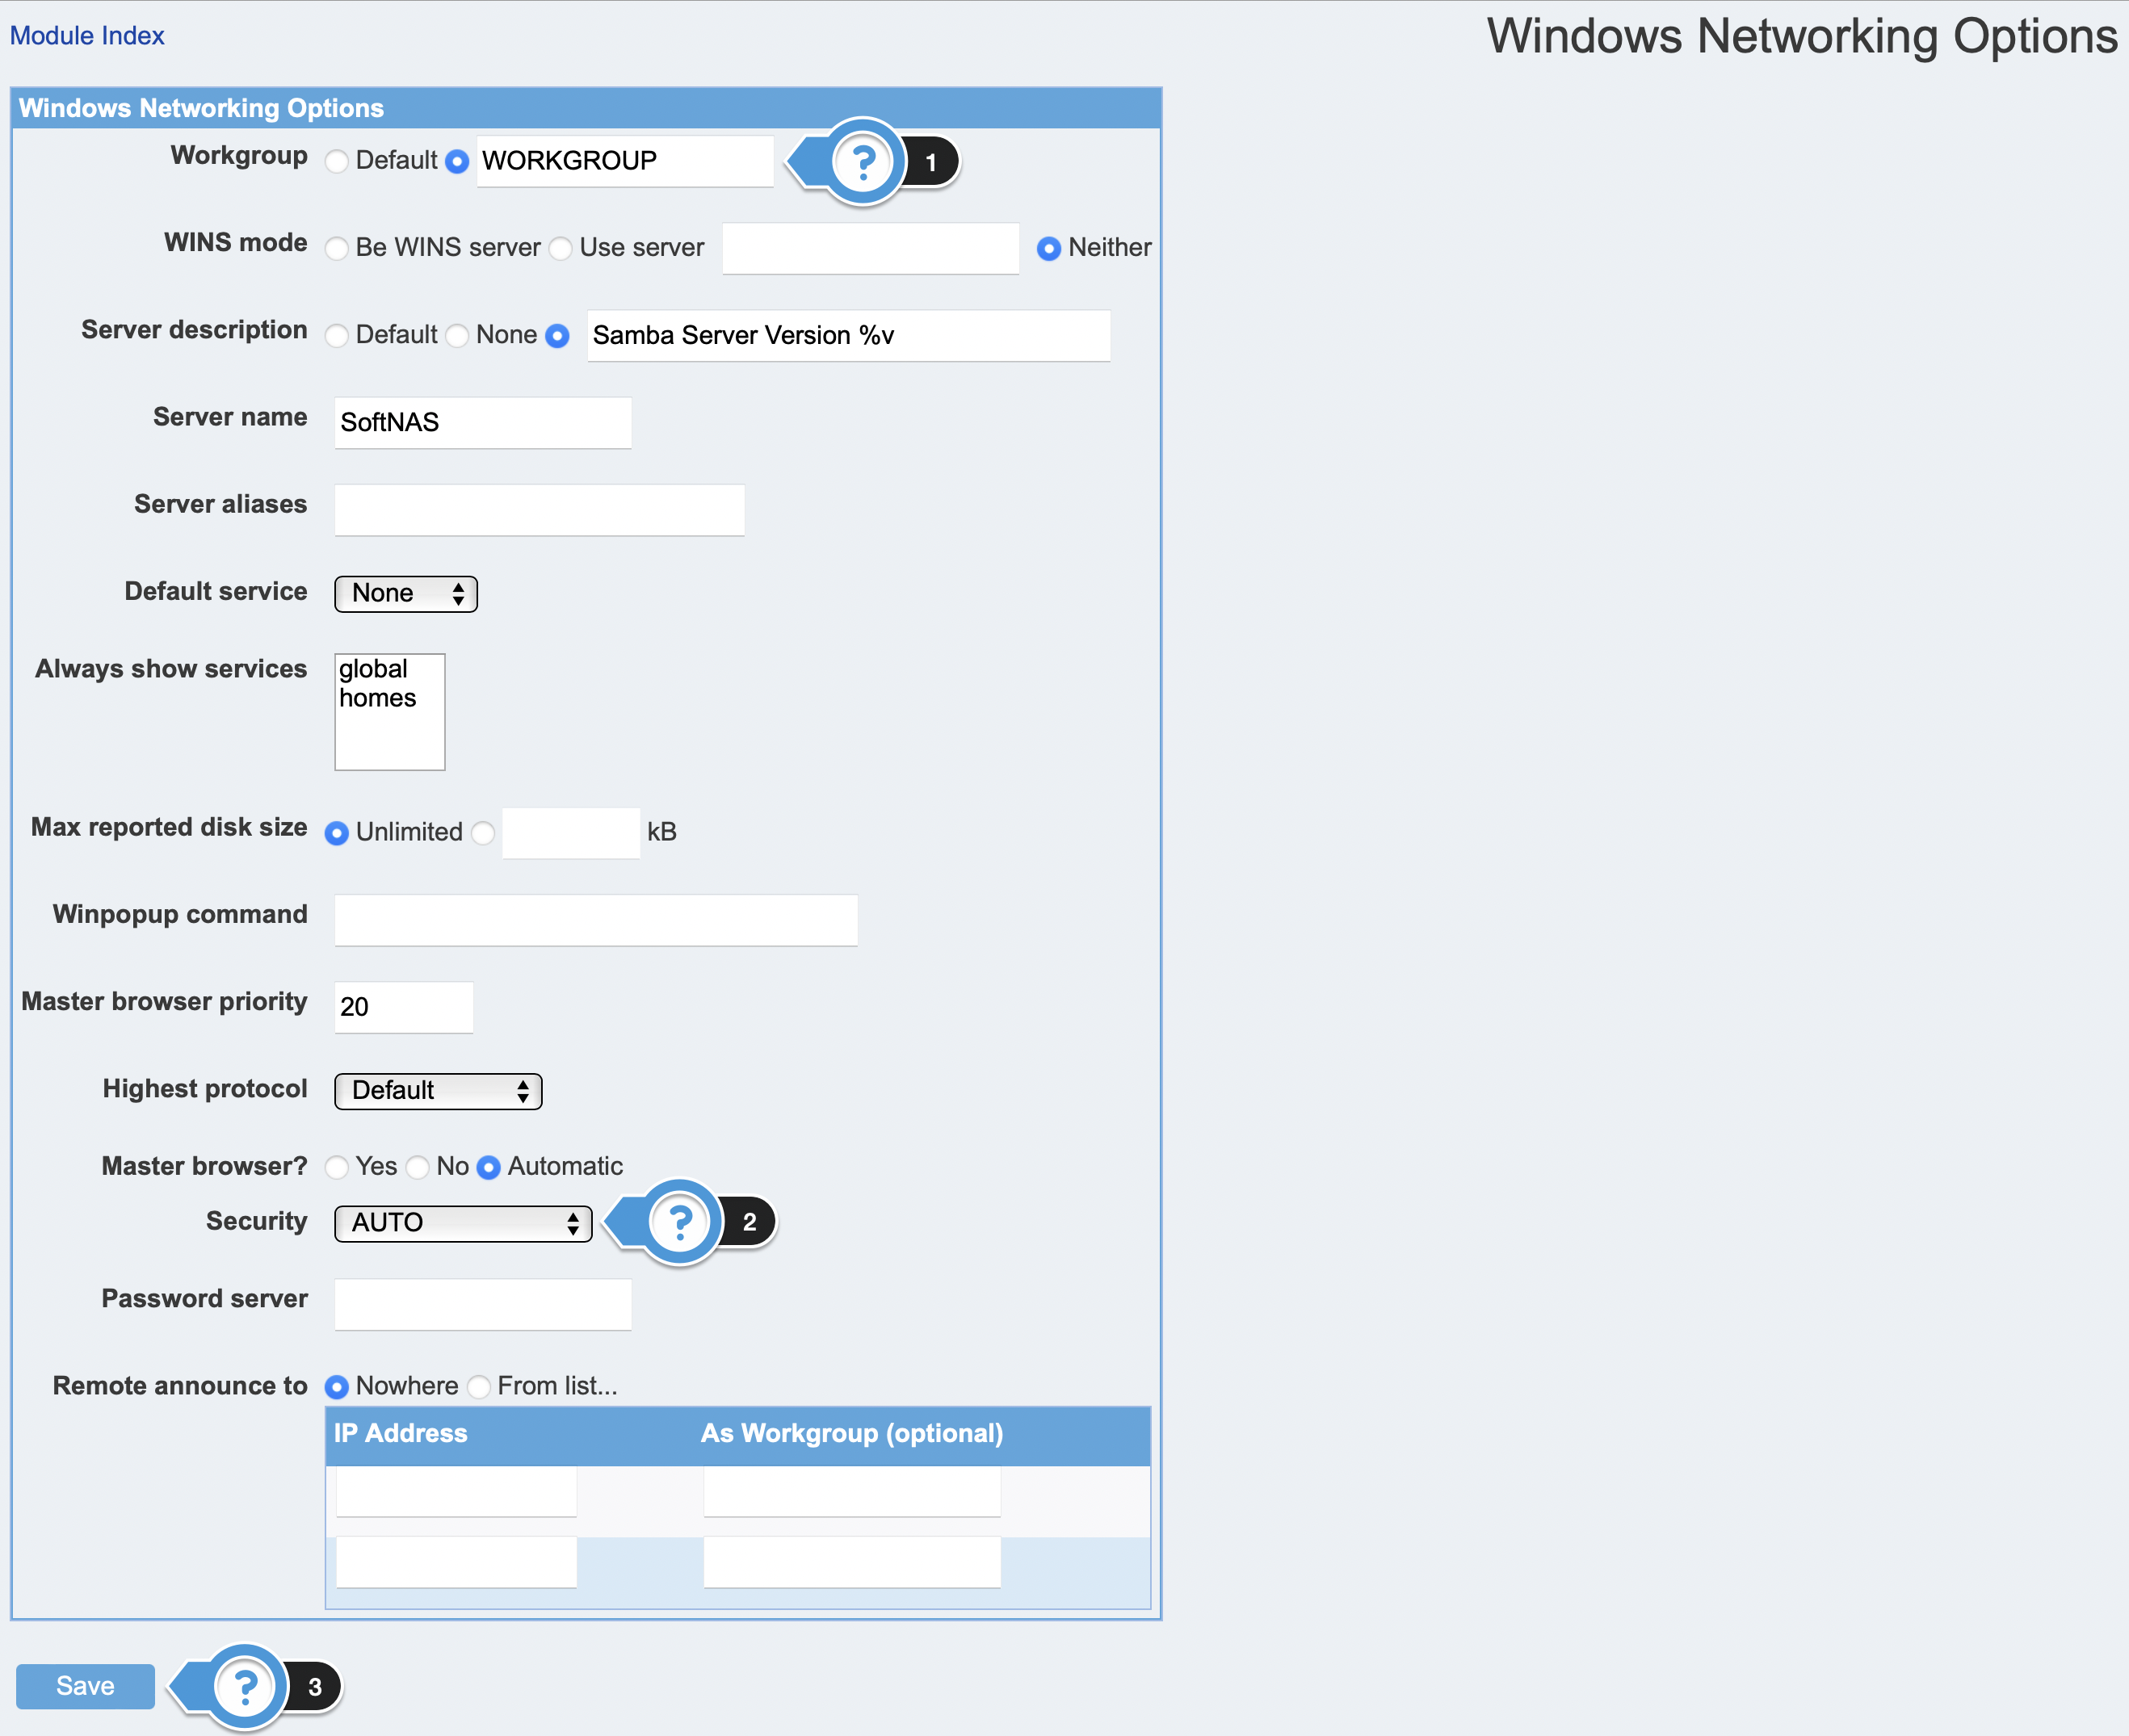
10. Configuring Windows Networking
- Click the Windows Networking icon in the Global Configuration section. The Windows Networking Options page will be displayed.
Set the name of the workgroup in the Workgroup field.
This setting should be appropriate to your environment.
It should match your Windows workgroup or domain environment.
Select the appropriate security option for your particular environment from the Security drop down list.
Available options include:
- Default
- Share Level
- User Level
- Password Server
- Domain
- Active Directory
Configuring other settings in the Windows Networking Options dialog is optional.- Once done, click the Save button.
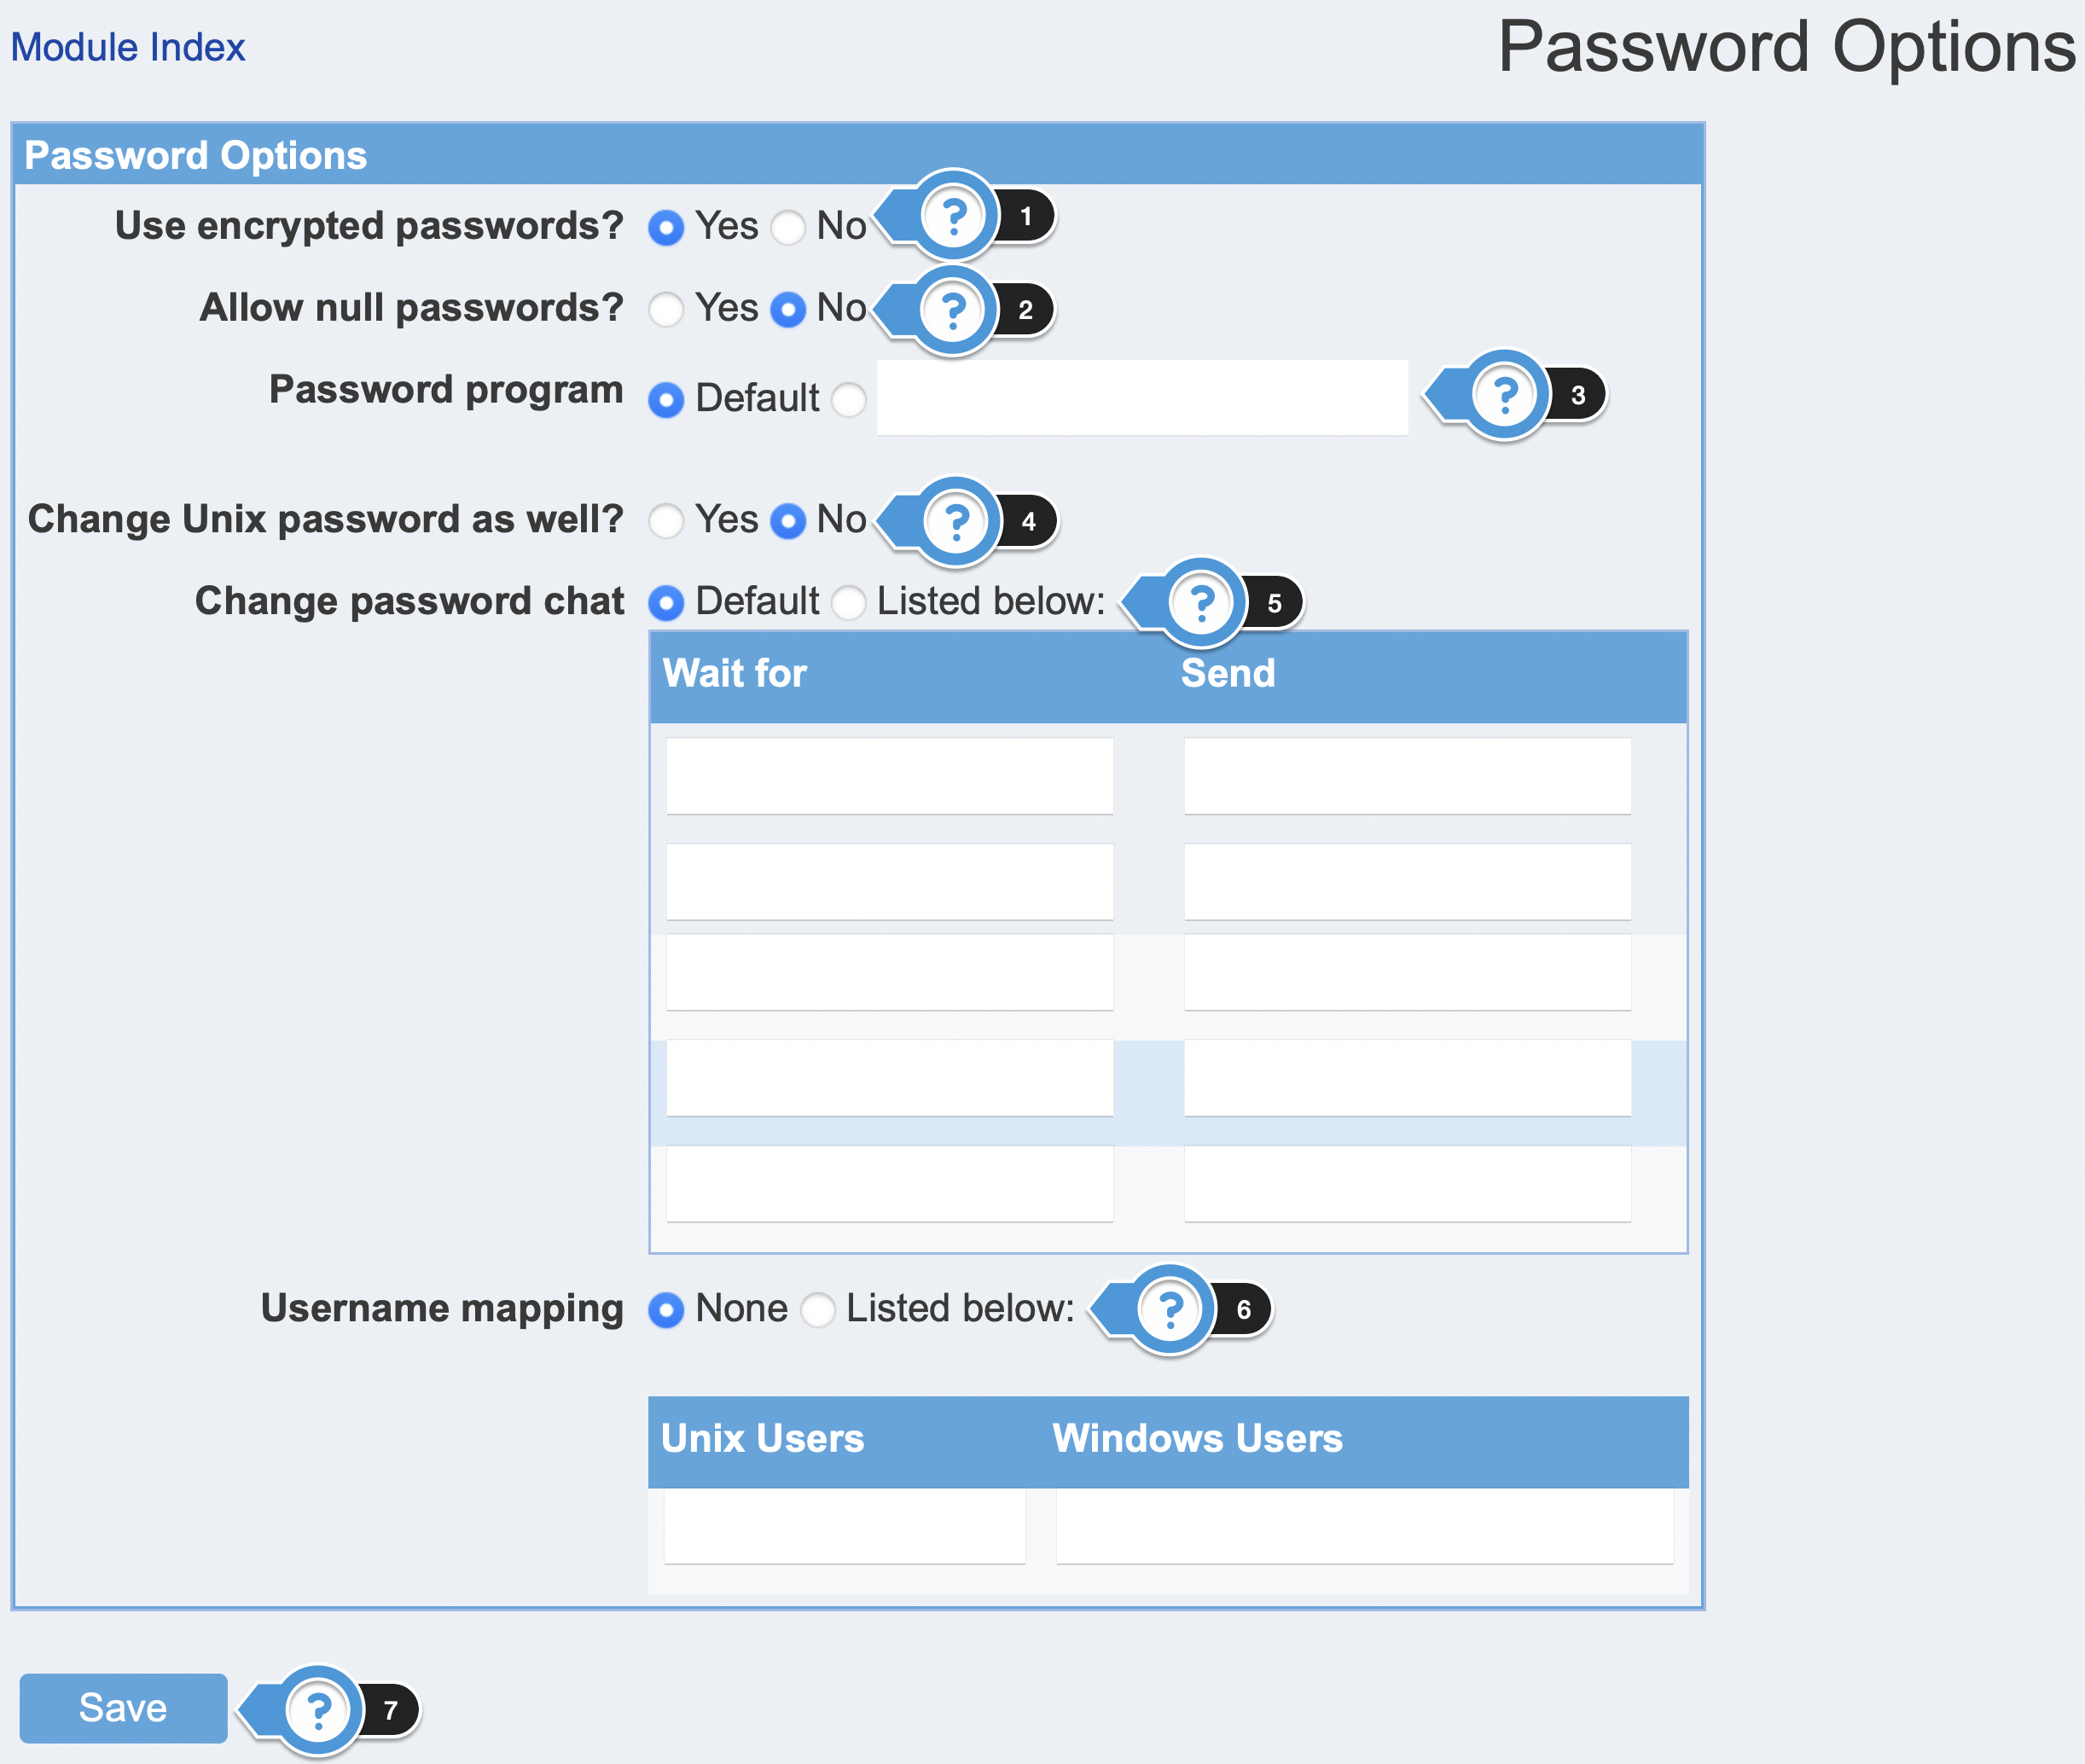
11. Configuring Authentication
- 1. To do so, click the Authentication icon in the Global Configuration section. The Password Options page will be displayed.
The Use encrypted passwords field should generally be set to Yes because all recent versions of Windows use a password encryption format that is incompatible with the Unix format.
This determines if Samba uses its own separate password file or the standard Unix user database.- To allow logins by users who have no password set, select Yes for the Allow null passwords field. The default is No.
- The Password program field sets the program that Samba will use to change a user's Unix password if synchronization is enabled. If Default is selected, /bin/passwd will be used.
- To change a user's Unix password when his SMB password is changed over the network, set the Change Unix password as well field to Yes.
- Similarly specify password in the Change Password Chat field.
- To define fake SMB accounts, select Listed below in the Username mapping field. Enter a valid Unix username, and an SMB login name of your choice.
- Once done, click the Save button.
12. Configuring Windows to Unix Printing
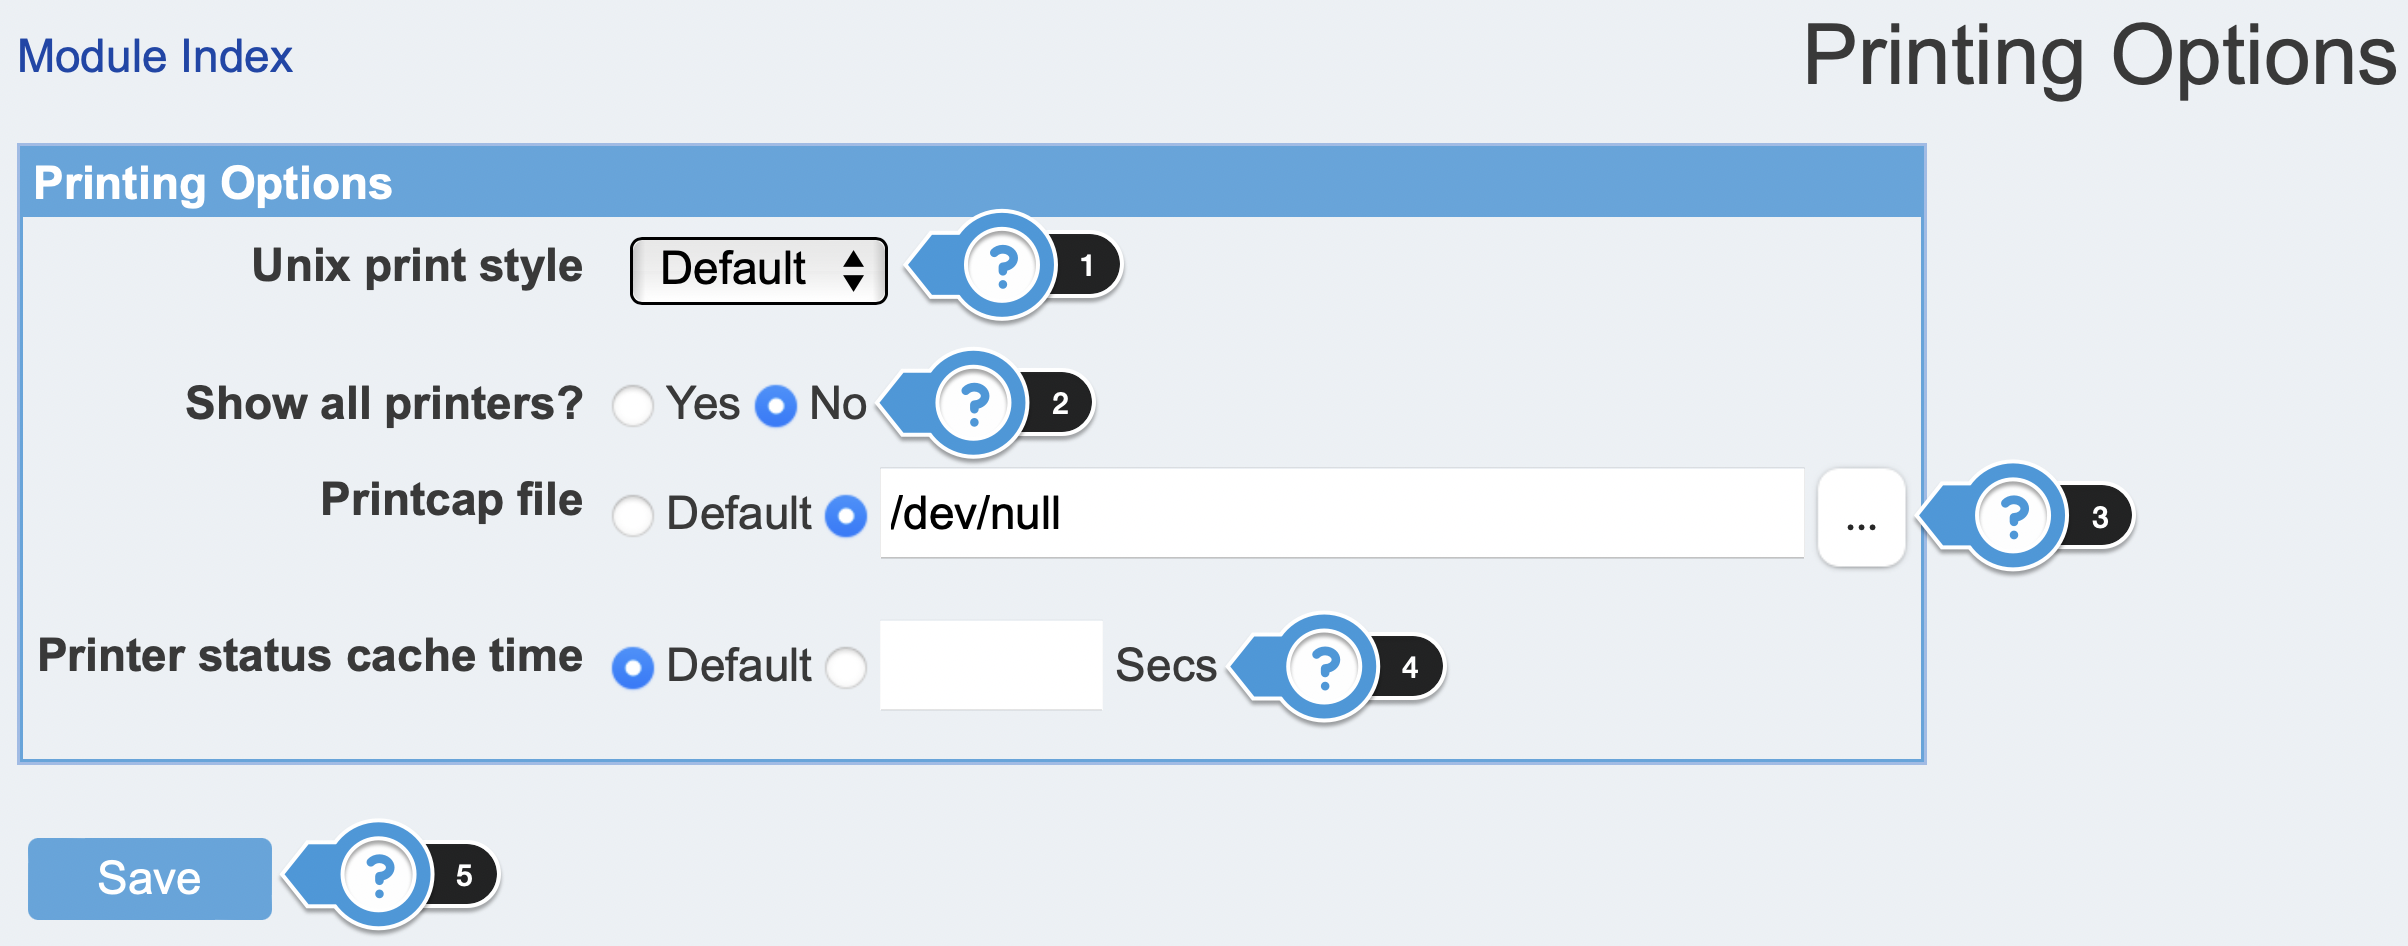
- Click the Windows to Unix Printing icon in the Global Configuration section. The Printing Options page will be displayed.
Select the type of print system in use on your box from the Unix print style drop down list.
Available options include:
- BSD
- SYSV
- HPUX
- AIX
- QNX
- PLP
- CUPS
- LPRNG
- SOFTQ
- Samba will typically find all the printers on your system and make them visible to clients when the special printers share exists. To disable this, change the Show all printers field to No.
- When the Printcap file field is set to Default, Samba will get the list of printers available on your system from the standard /etc/printcap file.
- Samba caches the output from whatever command is used to list waiting print jobs (such as lpq) in order to reduce the frequency with which it is run. The Default cache time is 10 seconds, but you can increase or decrease it using the Printer status cache time field.
- Once done, click the Save button
13. Configuring Winbind Options
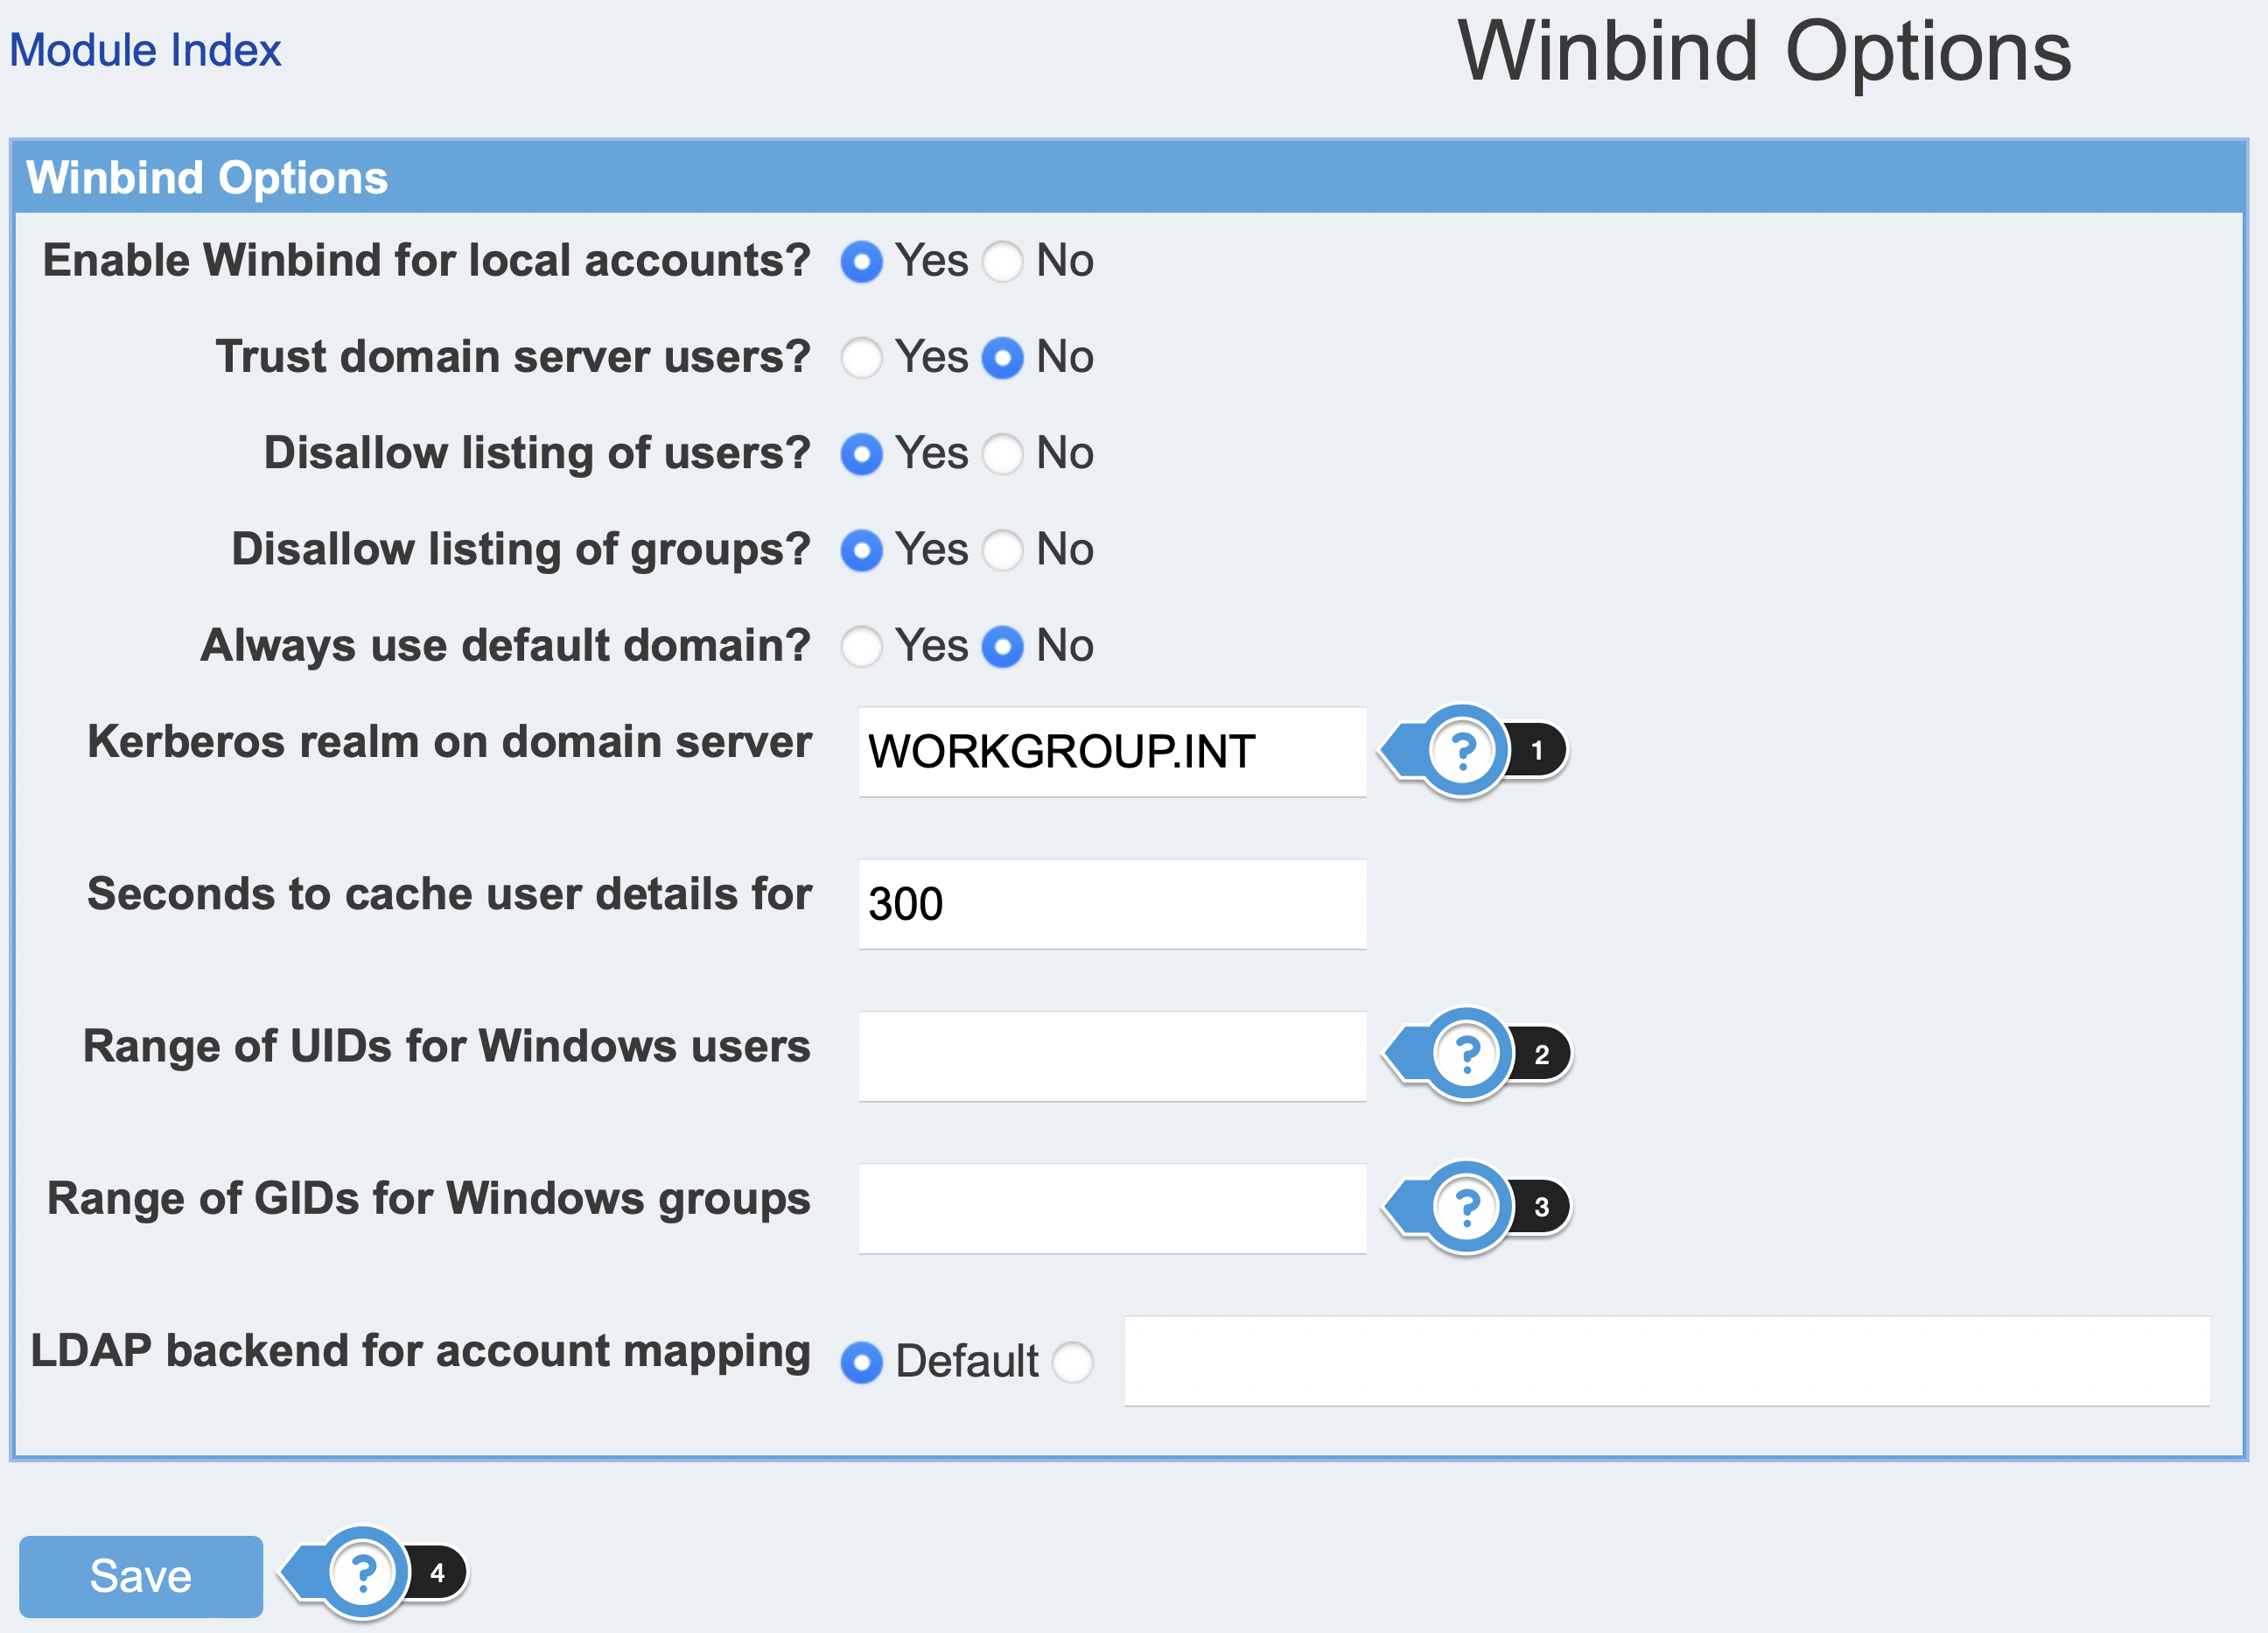
- Click the Winbind Options icon in the Global Configuration section. The Winbind Options page will be displayed.
Enter the full domain name of your Windows domain in the Kerberos Realm on Domain Server text entry box. Examples are SOFTNAS.LOCAL or MYDOMAIN.COM.
Enter the range as 10000-30000 in the Range of UIDs for Windows Users text entry box.
Using this numeric range, the mapping of Windows user ID's to Linux UID's occurs dynamically.- Enter the range as 10000-30000 in the Range of UIDs for Windows Groups text entry box for mapping of groups.
- Once done, click the Save button.
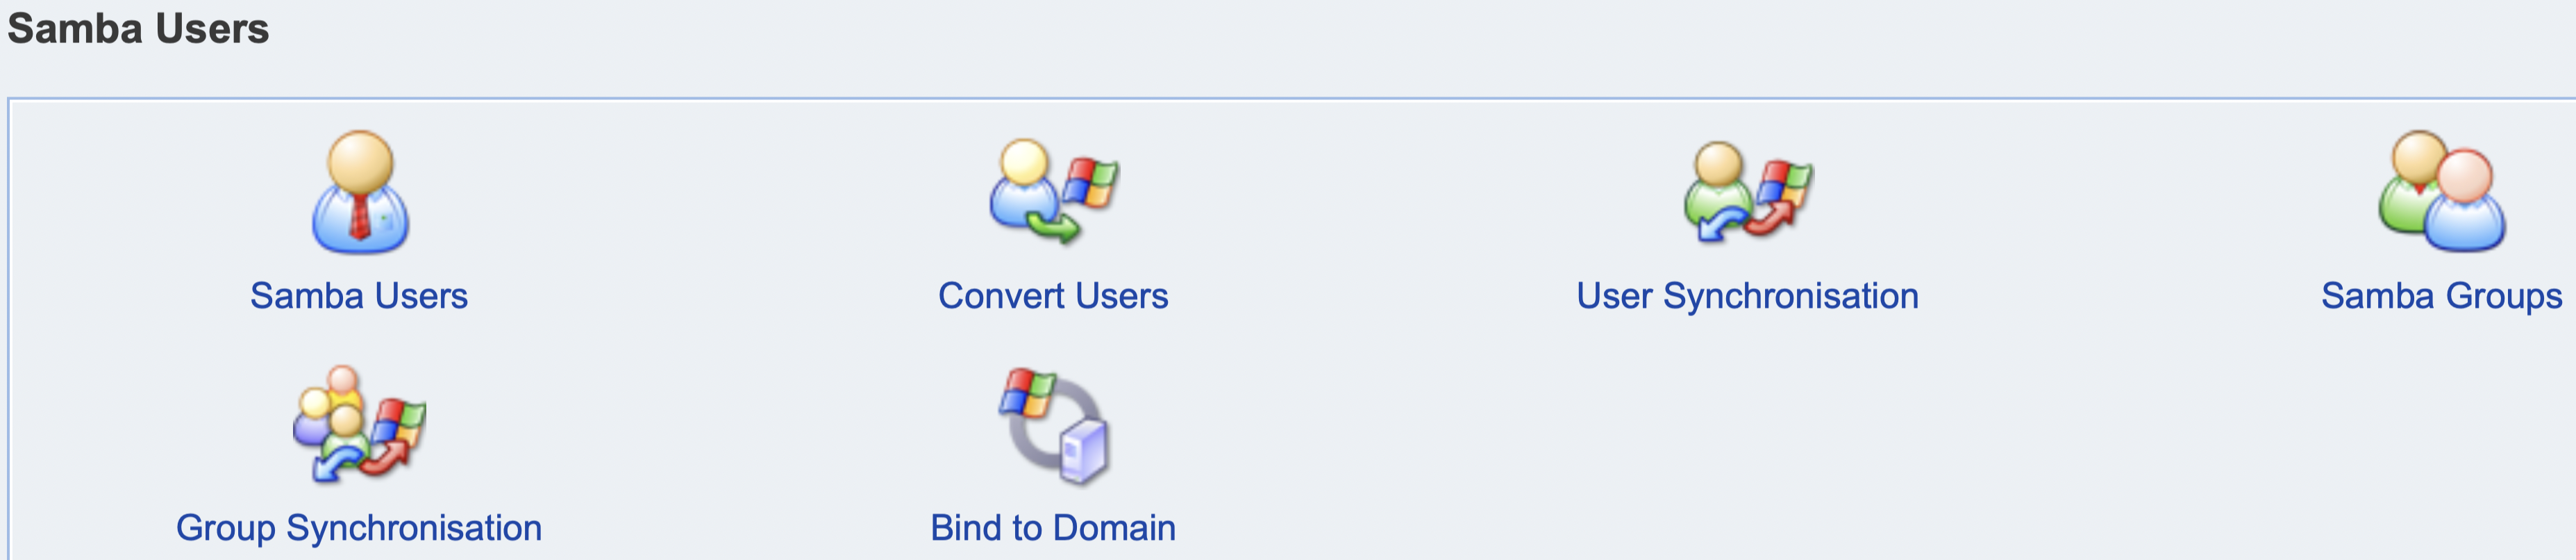
14. Managing Samba Users
The Managing Samba Users section allows you to create, edit, delete and synchronize Samba users.
- Samba Users – It allows you to define Samba users.
- Convert Users – It allows you to synchronize the Unix and Samba user list.
- User Synchronization - It allows you to configure Webmin so that changes to the Unix user list will automatically applies to the Samba user list also.
- Samba Groups – It allows you to define Samba groups.
- Group Synchronization – It allows you to synchronize all Unix user groups and Samba user groups.
- Bind to Domain –It allows to bind Samba server to Windows domain typically managed by a different server.
15. Restarting Samba Servers
Click the Restart Samba Servers button. This will force the current configuration to be applied and also all the connections to the server will be disconnected.
16. Stopping Samba Servers
Click the Stop Samba Servers button. This will force the samba servers running on your system to shut down and also all the connections to the server will be disconnected.
17. Restart Winbind Servers
Click the Restart Winbind Servers button. This will force the current configuration to be applied and also all the connections to the server will be disconnected.
18. Stop Winbind Servers
Click the Stop Winbind Servers button. This will force the samba servers running on your system to shut down and also all the connections to the server will be disconnected.
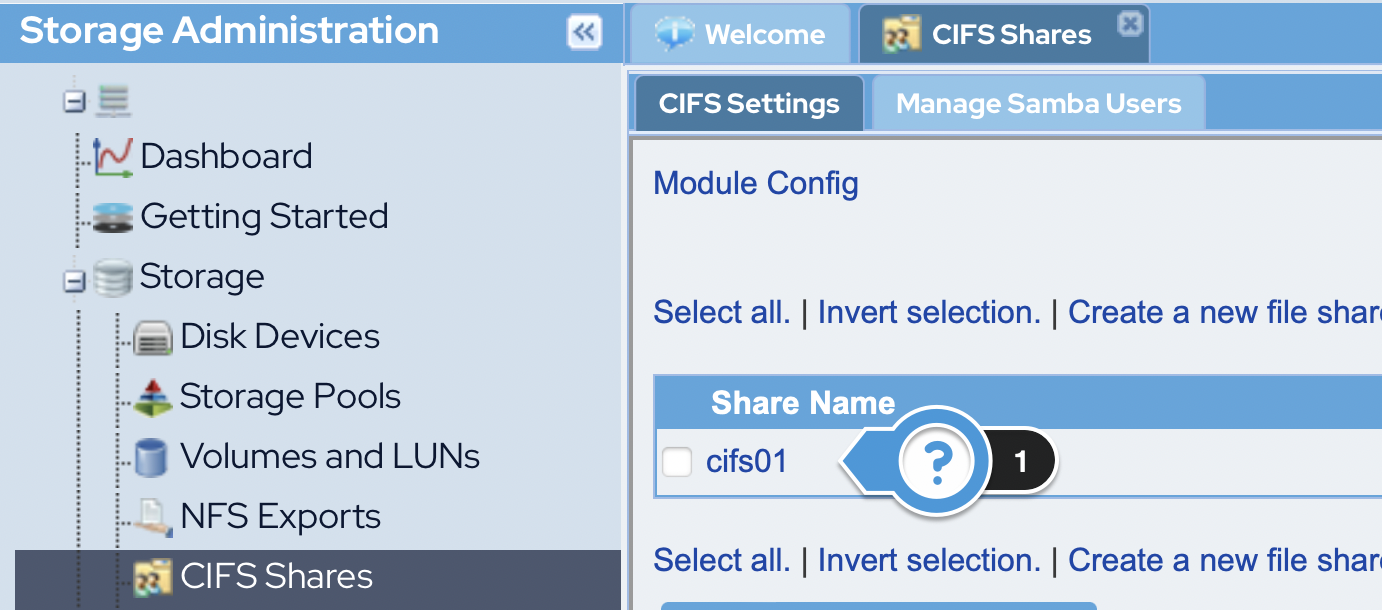
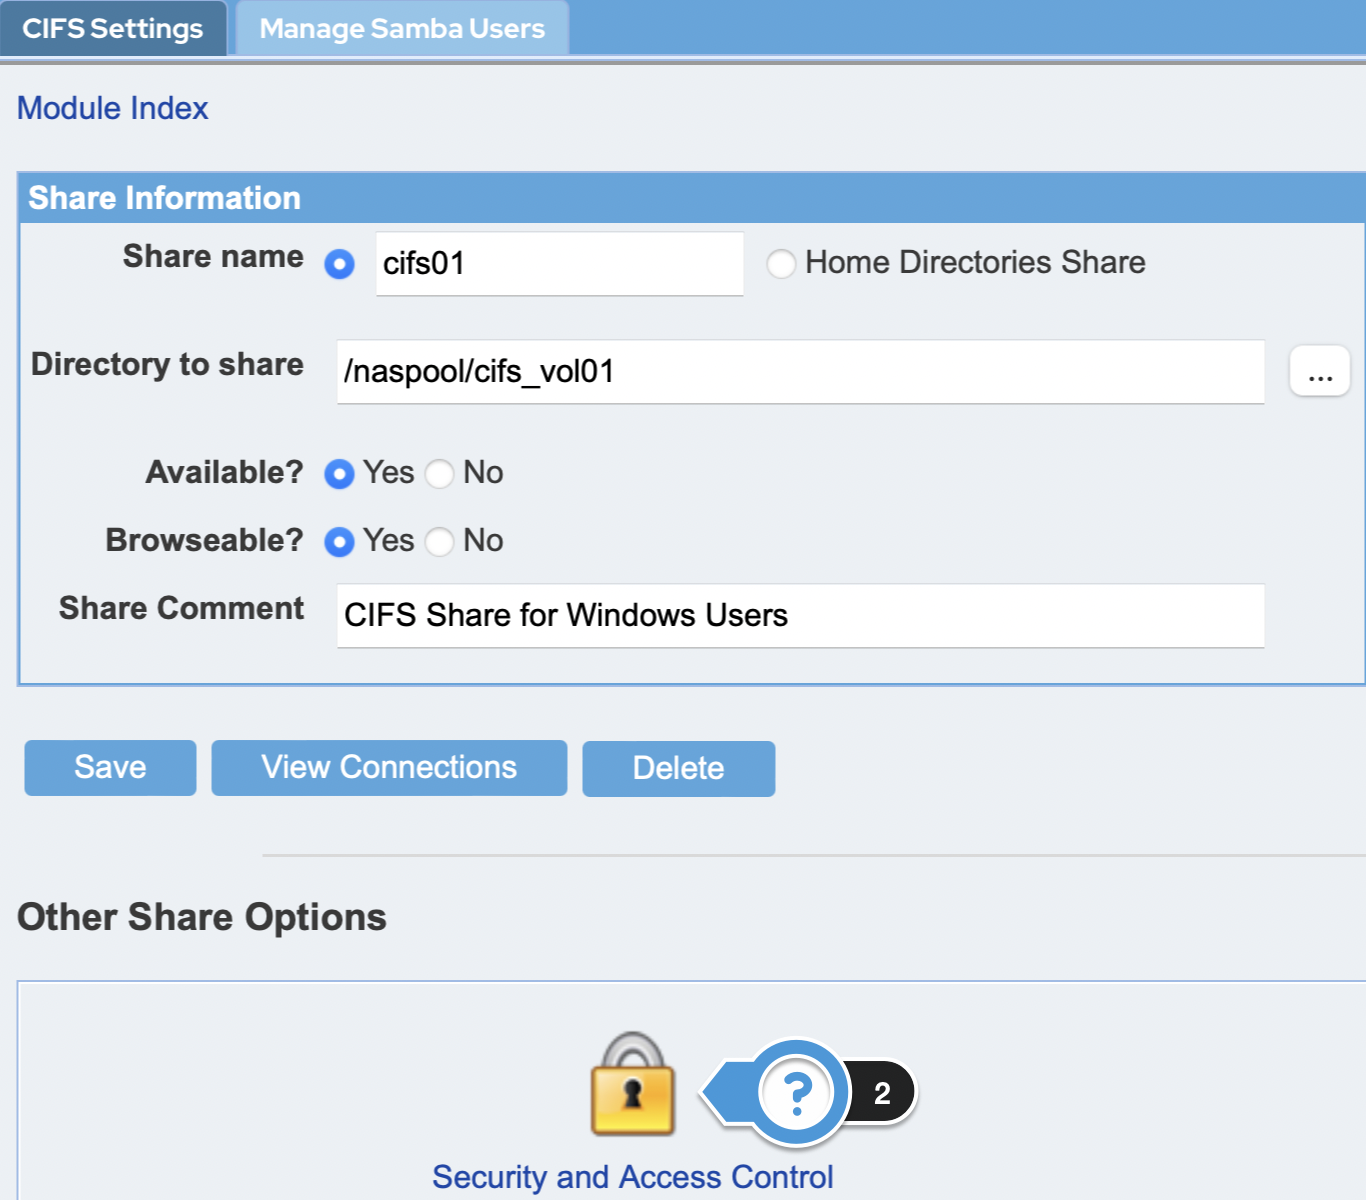
19. Manage Security and Access Control in a CIFS Share
- On the CIFS Shares panel, click the name of the CIFS share link. The Share Information dialog will be displayed.
To configure and manage security and access control, click the Security and Access Control icon.
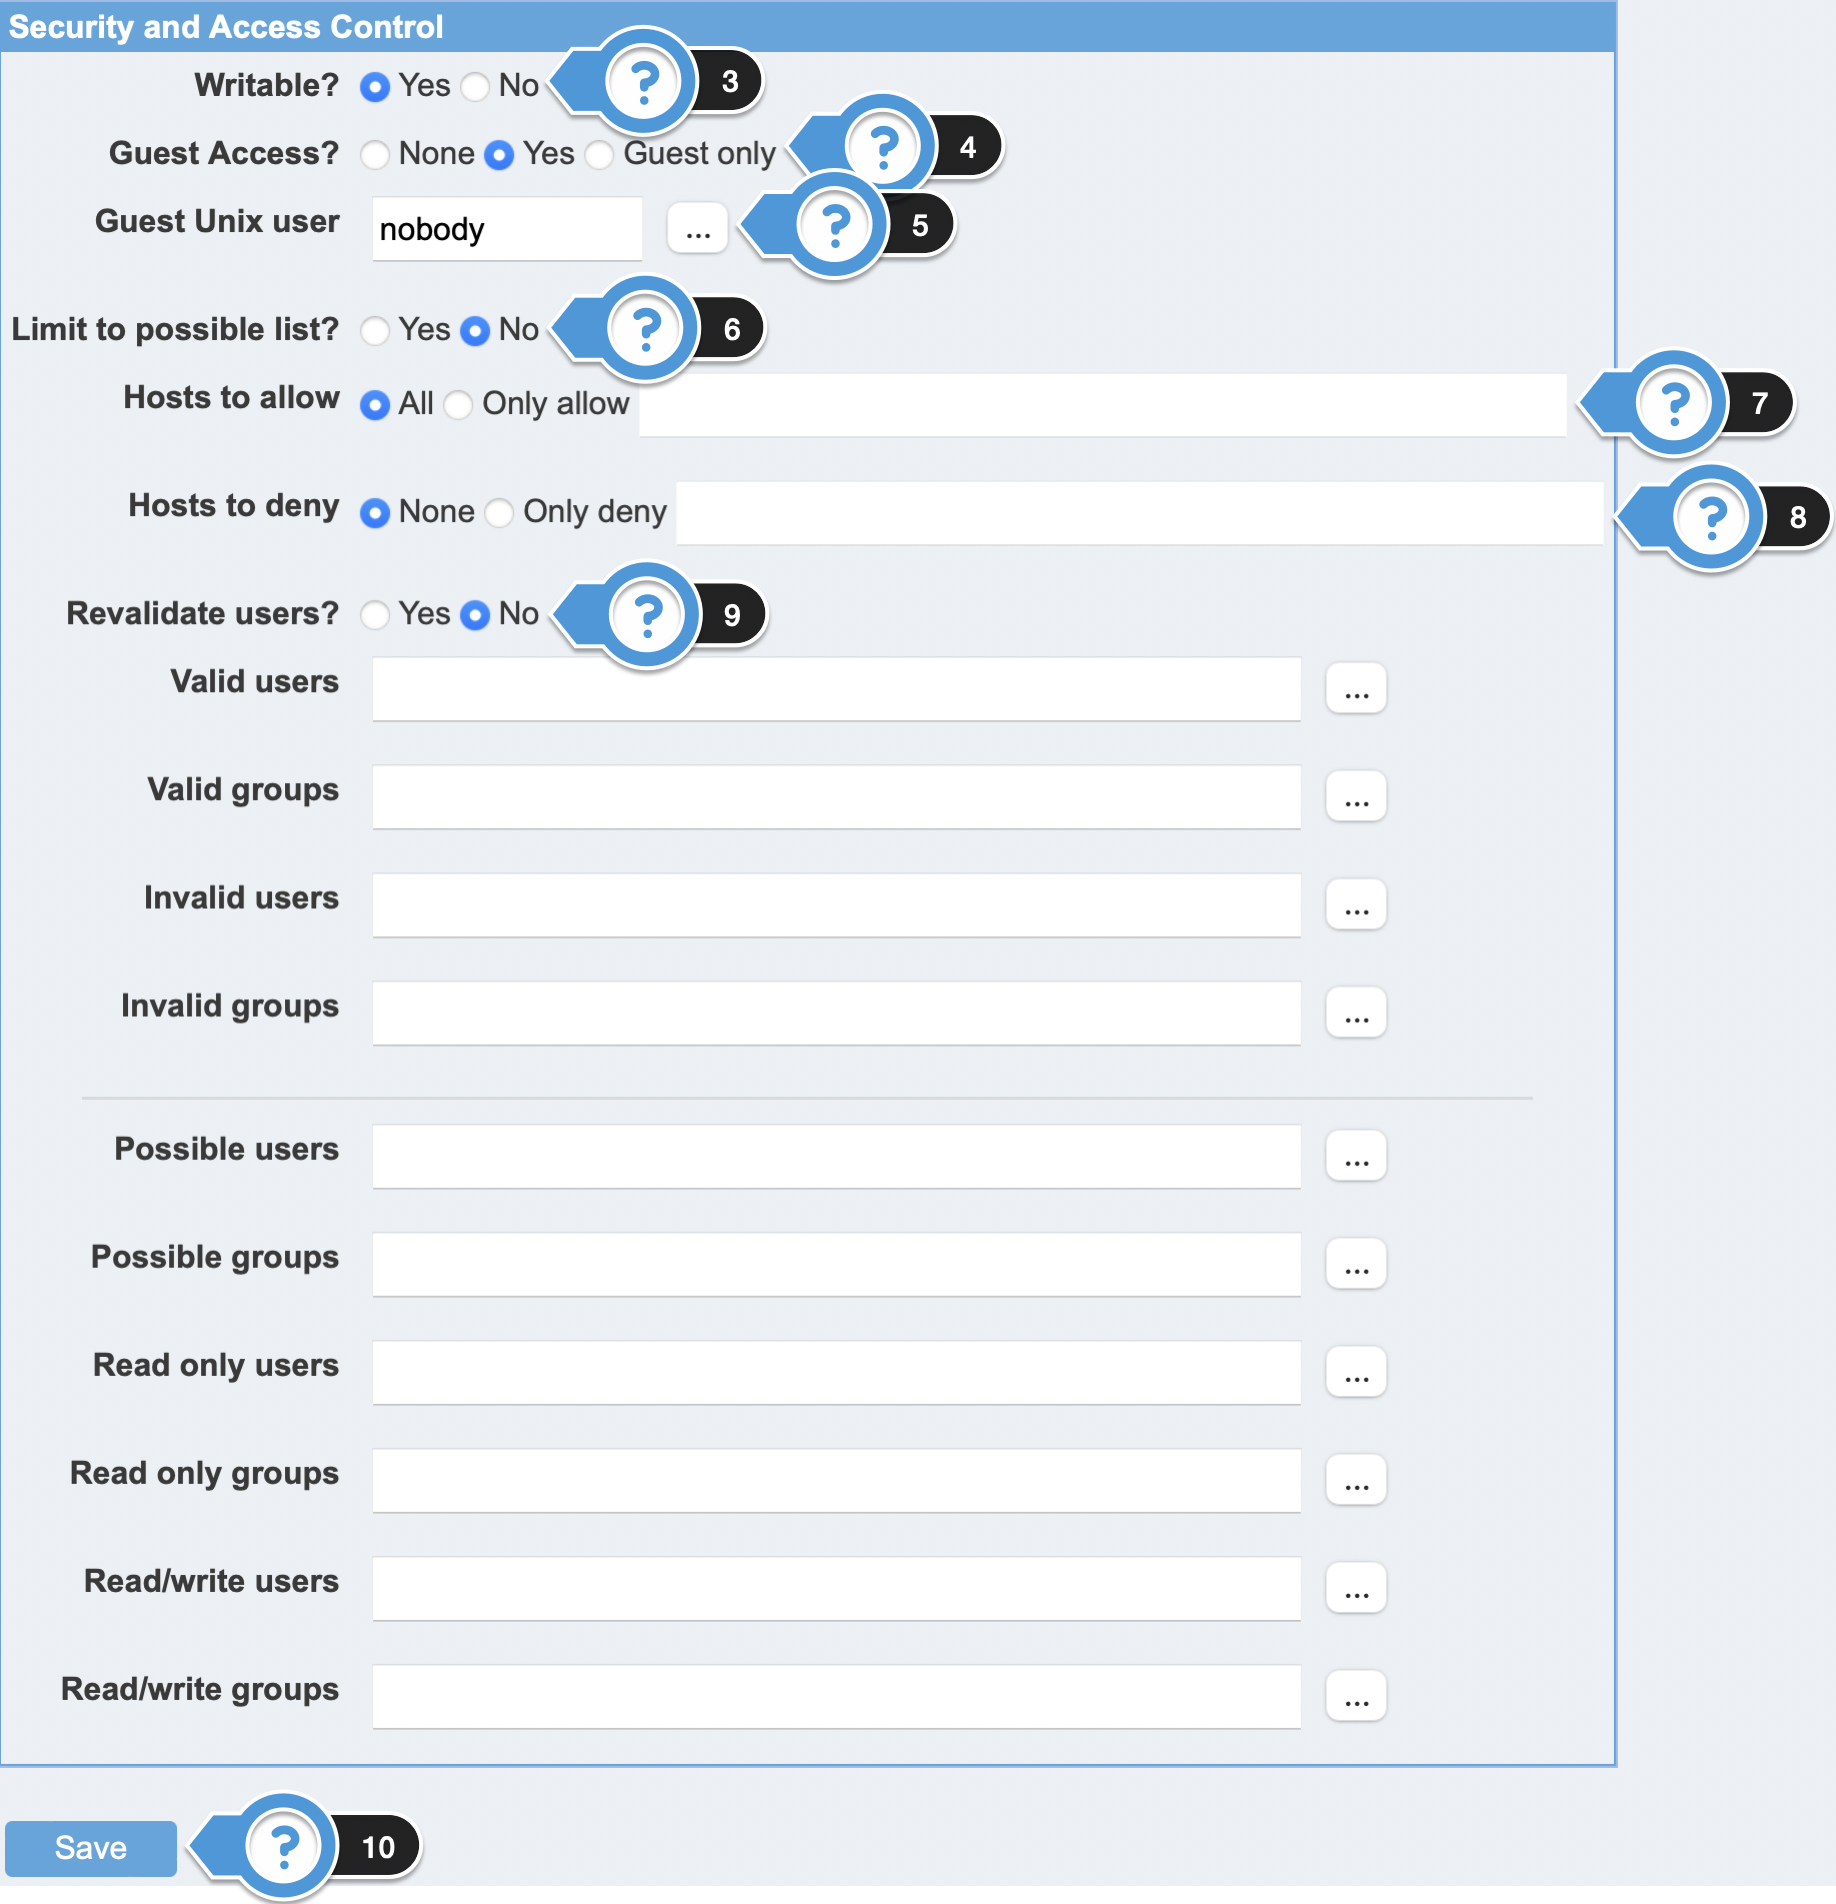
The Security and Access Control dialog will be displayed. Choose the settings that best match the needs and use case for this share.Settings Note
The settings shown below allow full read/write access by all users.- Set the Writable field to Yes so that writing is allowed in the files that are shared.
- Set the Guest Access field to Yes in order to allow the guest users to access the files.
- Set the Guest Unix User to Nobody so that other guest unix users are not allowed to access the file sharing.
- Set the Limit to Possible List to No in order to allow unlimited sharing.
- Set the Hosts to Allow to All in order to allow all hosts access file sharing.
- Accordingly, set the Hosts to Deny to None.
- The Revalidate Users share-level option tells Samba to force users to authenticate with passwords each time they connect to a different share on a machine, no matter what level of security is in place on the Samba server. The default value is
no, which allows users to be trusted once they successfully authenticate themselves. - Once configurations are complete, click Save. The share security permission settings are now configured.
20. Verifying Access to the CIFS Share
- To verify access the CIFS share, navigate to Windows System > Windows Explorer.
- Enter the UNC path of the SoftNAS® server (or the DNS hostname if one has been assigned to SoftNAS®).
- Click on the Share icon and verify access permissions are set correctly from the Windows perspective.
- Create a folder or text file and then right-click on the file/folder to verify that the Security permissions are as expected.
The CIFS share that was created is now available and ready for use.

![]()