Create a Storage Pool
- Former user (Deleted)
- Sean Hastert
- Tom Sheffield (Unlicensed)
Before implementing the instructions in this section, ensure several EBS volumes have already been created for a AWS SoftNAS® instance, or block storage volumes for Azure, or several VHDs for a VMware vSphere based SoftNAS® VM.
These EBS volumes or VHDs provide the underlying storage for SoftNAS® storage pools. Whenever a volume or VHD is added, it begins as a raw disk which means that the disk has no partitions.
Create a Storage Pool
- Click the Storage Pools option under the Storage section in the Storage Administration Panel (on the left) or you can select Step 7 - Create Storage Pool - from the Getting Started Checklist located in the center of the StorageCenter Administrative Interface.
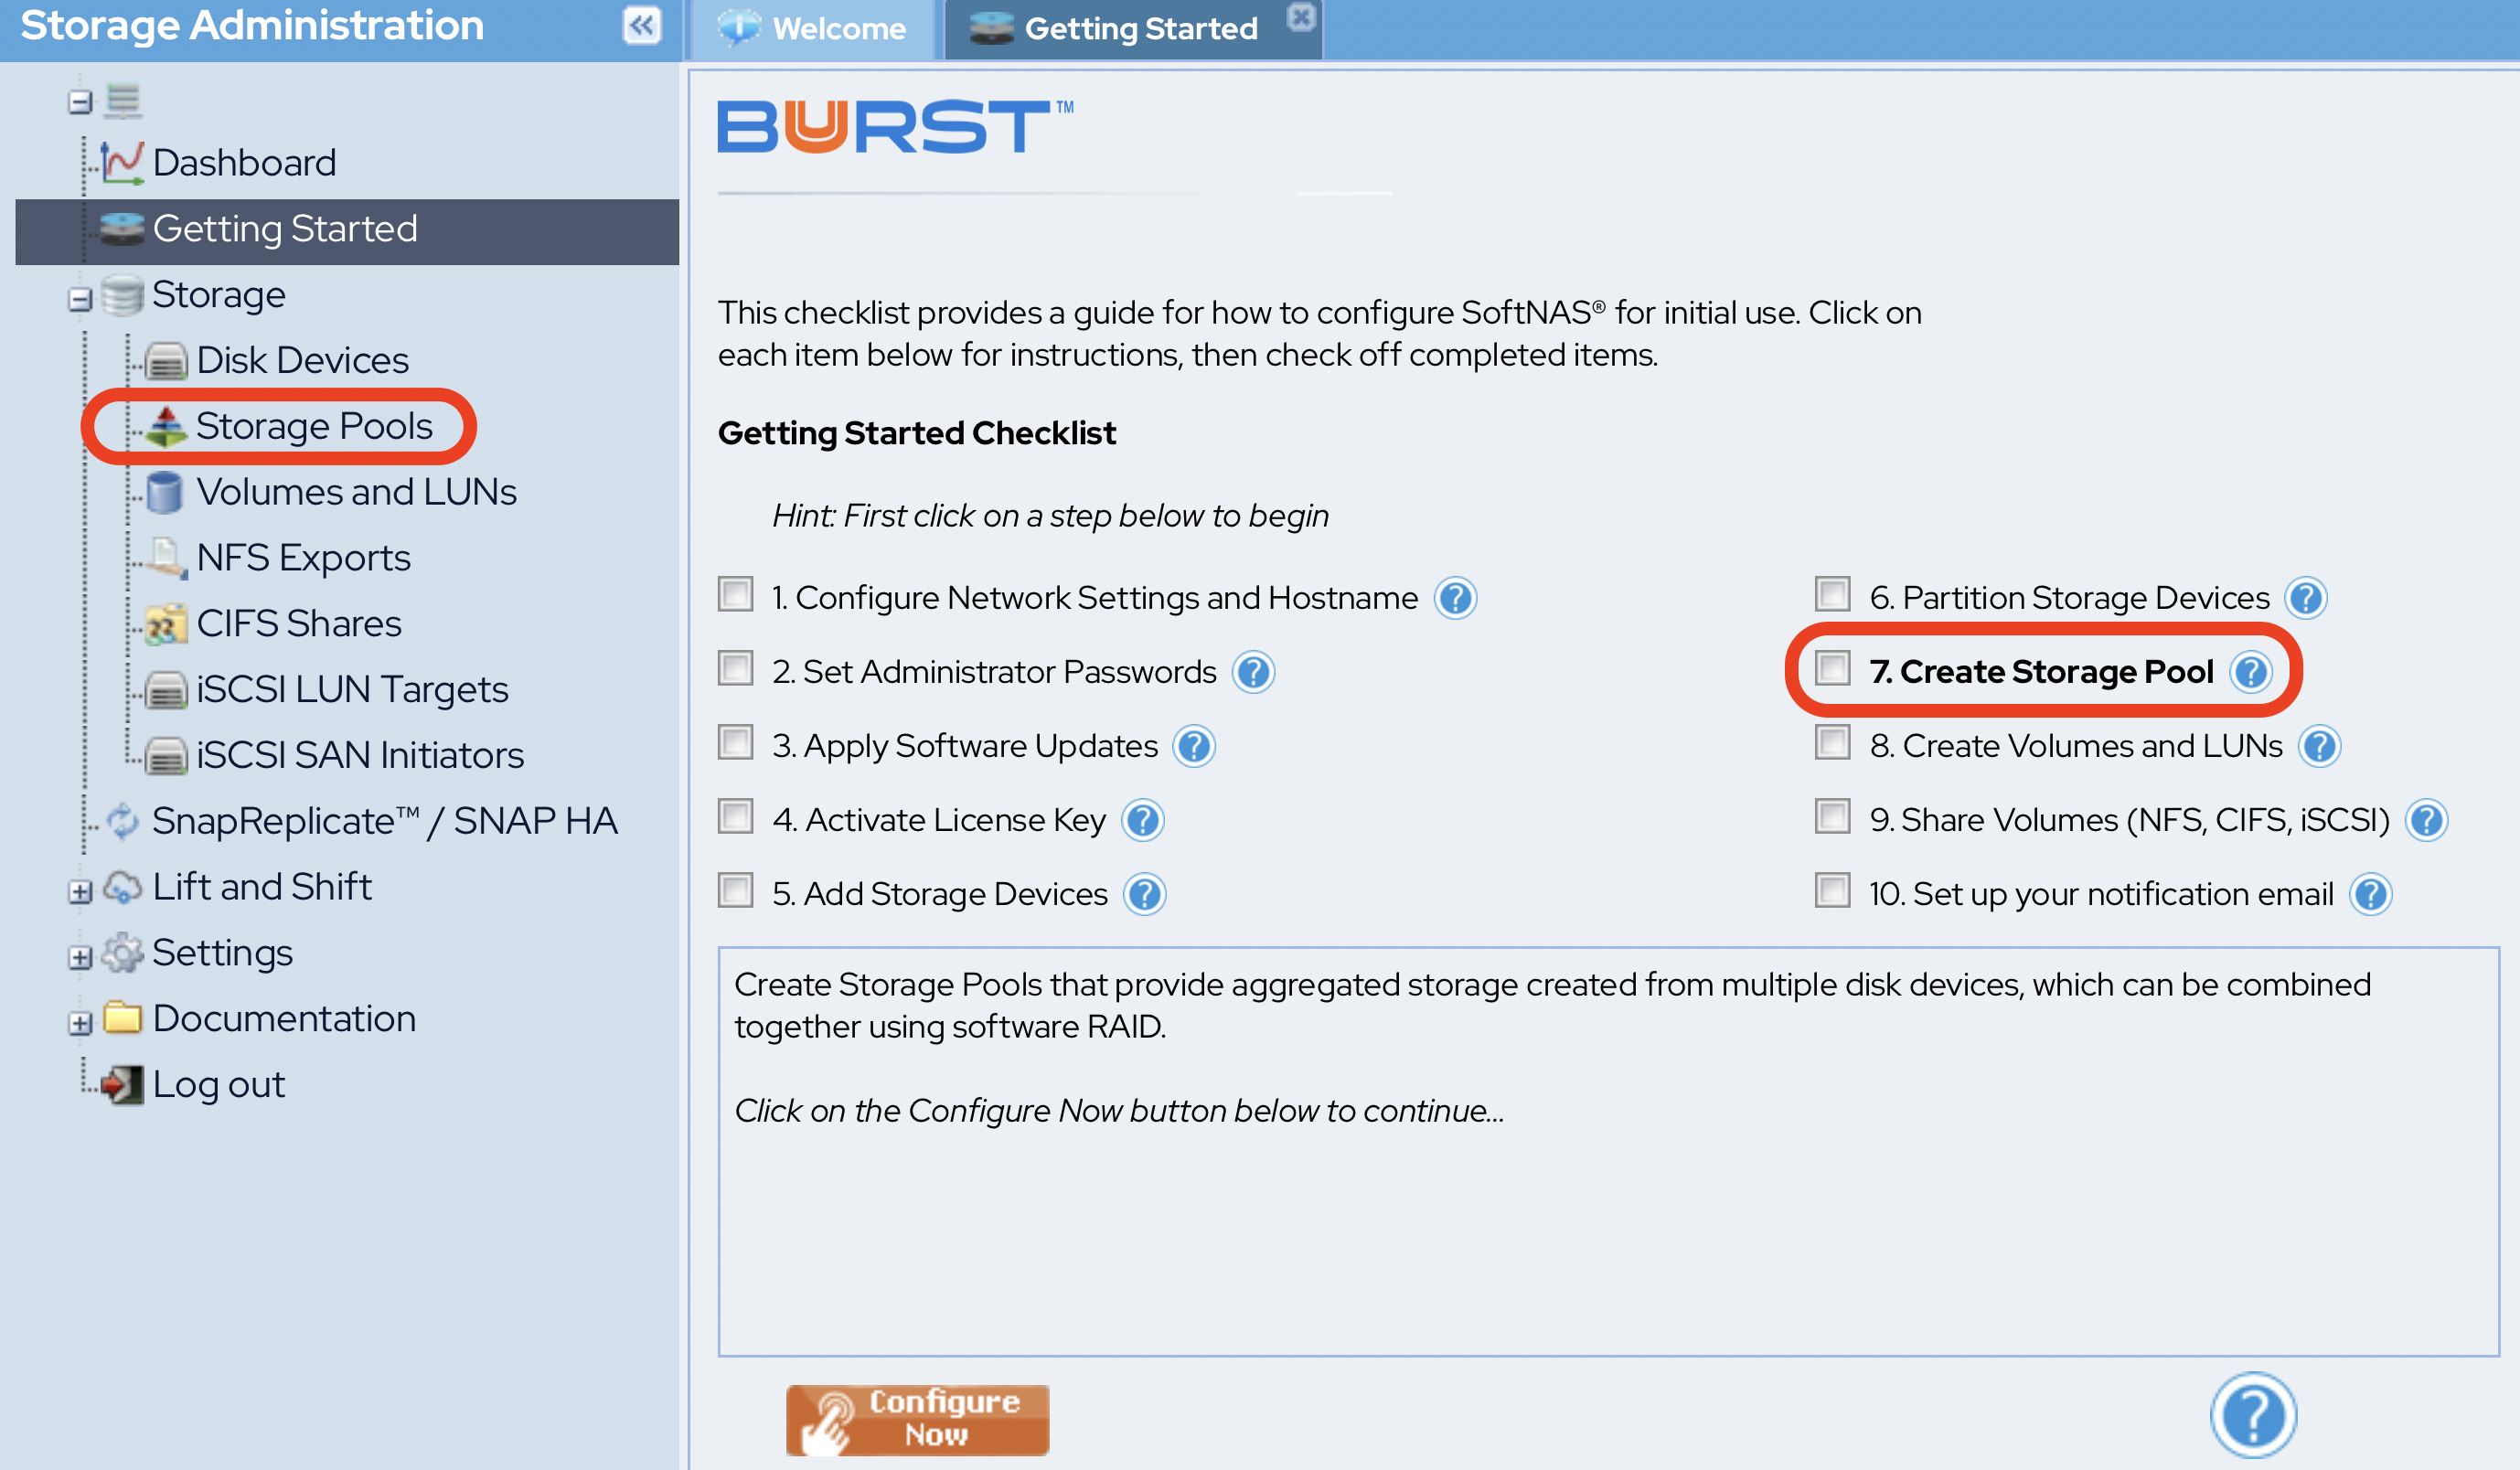
Create a Storage Pool
- Click the Storage Pools option under the Storage section in the Storage Administration Panel (on the left).
- The Storage Pools panel will be displayed with the list of all the existing storage pools that are already allocated. To create a new storage pool, click Create.
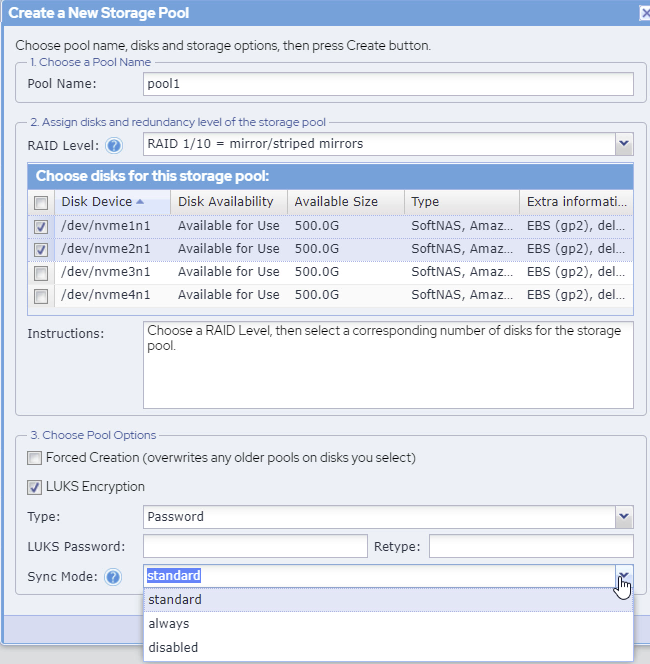
The Create a New Storage Pool dialog will be displayed.

- Enter the name for the storage pool to be created in the Pool Name text entry box.
Some example storage pool naming schemes might include:- Generic naming: naspool1, naspool2, …
- Disk-type naming: SAS1, SAS2, SATA1, SATA2
- Use-case naming: OS1, OS2, Exchange1, SQLData1, UserData1, Geology, Accounting, IT, R&D, QA, Corp01, etc.
Select the redundancy level from the RAID Level drop down list.
If using hardware RAID at the disk controller level and have a single data disk presented to SoftNAS® for a storage pool, then software RAID may not be required; in such case, select No RAID/JBOD, as the RAID is implemented at a lower level and have no need for software RAID.Select the disks to be allocated to this storage pool.
Each of the devices show the Disk Availability status as Available for Use. This implies that these disks are already partitioned. New disk devices must be partitioned before use. See Partitioning Disks for more information.In the Choose Pool Options step, check the box in the Forced Creation field to overwrite any older pools on the disks selected.
If any of the disk devices chosen have been used as a part of another storage pool in the past (e.g., one that was deleted), use the Forced Creation option to overwrite the previous data in order to use the disk in a different pool (a precaution to prevent accidental data loss).- Decide whether you wish to add LUKS Encryption (optional).
Adding LUKS Encryption
LUKS (Linux Unified Key Setup) encryption is an encryption platform created by Clemens Fruhwirth in 2004 and developed for Linux, but which offers a platform-independent standard on-disk format for use in various tools. This ensures interoperability and compatibility between different programs and ensures password management between these programs in a secure and documented manner.
LUKS encryption allows you to add a layer of security to your SoftNAS volumes and pools, and if implemented along with Data-In-Flight encryption via SMB3 for CIFS, or by tunneling through SSH for NFS, can protect your data both at rest and in-flight.
To add LUKS encryption check the box.- In the Type dropdown, select Password.
- Provide a password and confirm.
Choose the required Sync Mode
Sync Mode is an important decision, directly affecting either performance or data integrity. SoftNAS' ZFS based solution provides a great deal of protection to ensure that your data is fully protected, but in a fail-over situation, default settings can potentially result in uncached write bursts not being committed to the target volumes. Sync Mode is one way to prevent this from occurring. Depending on your requirements, choose the required Sync Mode:
| Mode | Description |
|---|---|
| Standard | This is the default option. Synchronous file system transactions (fsync, O_DSYNC, O_SYNC, etc) are written out (to the intent log) and then secondly all devices written are flushed to ensure the data is stable (not cached by device controllers). For use cases where performance and data integrity are of equal importance, this is the best option. |
| Always | For the ultra-cautious, every file system transaction is written and flushed to stable storage by a system call return. This obviously has a big performance penalty. However, if data loss of any kind is unacceptable for your use case, this should be your choice. |
| Disabled | Synchronous requests are disabled. File system transactions only commit to stable storage on the next DMU transaction group commit which can be many seconds. This option gives the highest performance. However, it is very dangerous as ZFS is ignoring the synchronous transaction demands of applications such as databases or NFS. Setting sync=disabled on the currently active root or /var file system may result in out-of-spec behavior, application data loss and increased vulnerability to replay attacks. This option does NOT affect ZFS on-disk consistency. Administrators should only use this when these risks are understood. |

If the pool is to be shared (accessed by more than one person at a time), check the box for Shared.
- Click Create at the end.
The new storage pool is created and is ready for use.