/
Adding Block Storage via the SoftNAS UI
Adding Block Storage via the SoftNAS UI
- Former user (Deleted)
- Tom Sheffield (Unlicensed)
Owned by Former user (Deleted)
You can add disks quickly and easily from the SoftNAS UI. Users can add Microsoft block storage disks, allowing you to leverage them for pools and volumes.
- Enter the IP address of your instance in order to call upon the SoftNAS login screen.
- Enter your username and password and click Login.
SoftNAS StorageCenter will open. If this is your first login, you will be greeted by the End User License Agreement, then the Getting Started Checklist.
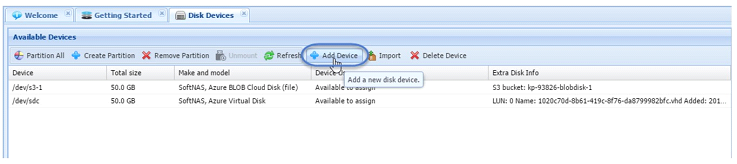
- To add storage, select Add Storage Devices from the checklist, then click Configure Now, or select Disk Devices from the Storage Administration pane.

- The Disk Devices tab will open.
- Click Add Device.
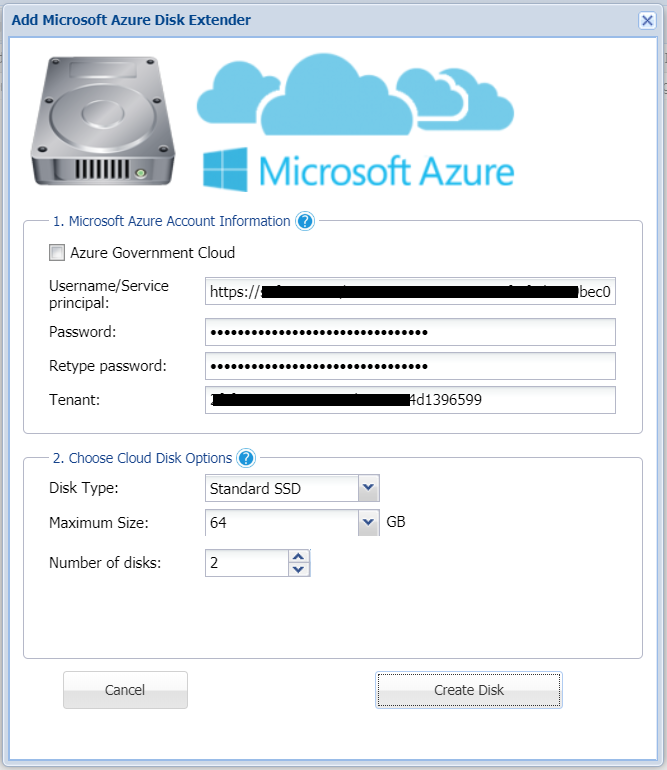
- From the Add Disk Device wizard, select Microsoft Cloud Disk Extender.
- Click Next.

- Provide the service principal information (Application ID URL created earlier, to provide access to both the subscription and the storage accounts within the resource group.
- Set the disk size.
- the number of disks you wish to create.
- Click Create Disk.
SoftNAS displays "Creating..." in the Device Usage column until the Adding Disk process is complete.

The process is complete when Device Usage reads 'Available to Assign'.
It is very simple to add a new disk to your SoftNAS instance using the SoftNAS UI. You can now use your newly added disks to create pools and volumes.

, multiple selections available,
Related content
Adding Storage
Adding Storage
More like this
Create Your Storage Account
Create Your Storage Account
More like this
Adding Storage: Microsoft Azure
Adding Storage: Microsoft Azure
More like this
Adding Storage: Azure Block Disk
Adding Storage: Azure Block Disk
More like this
Creating Blob Storage Accounts
Creating Blob Storage Accounts
More like this
Adding Cloud Disk Extenders
Adding Cloud Disk Extenders
More like this