/
HA iSCSI on VMware
HA iSCSI on VMware
- Former user (Deleted)
Owned by Former user (Deleted)
iSCSI HA VMware Setup
To configure iSCSI for HA operation with VMware, use the following instructions.
- Locate the Virtual IP address assigned during SNAP HA™ installation.
Note: The example for this guide will use 172.16.150.234.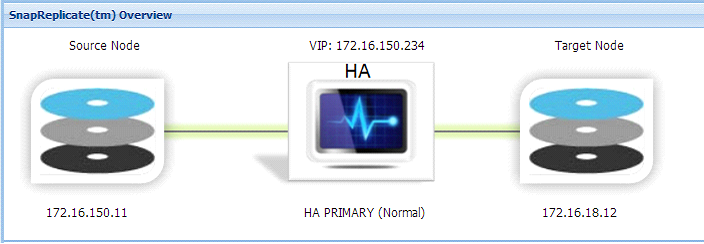
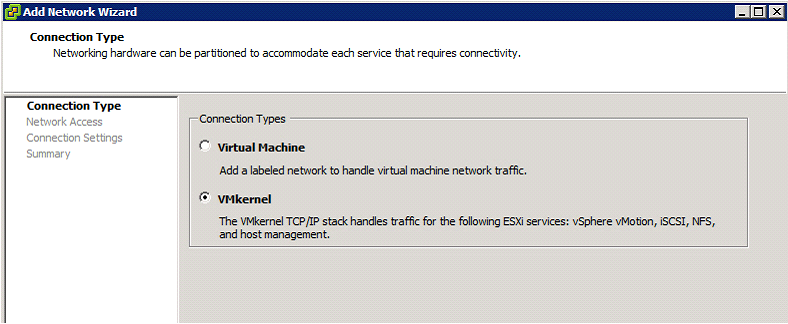
- Go to the ESXi host through VI client and create a new standard switch with a new vmkernel. Align the IP with the same subnet of the existing VIP.
Note: Ensure a free physical NIC on the ESXi host. - Within the ESXi host: Configuration > Networking > Add Networking

- Choose VMkernel and click Next.
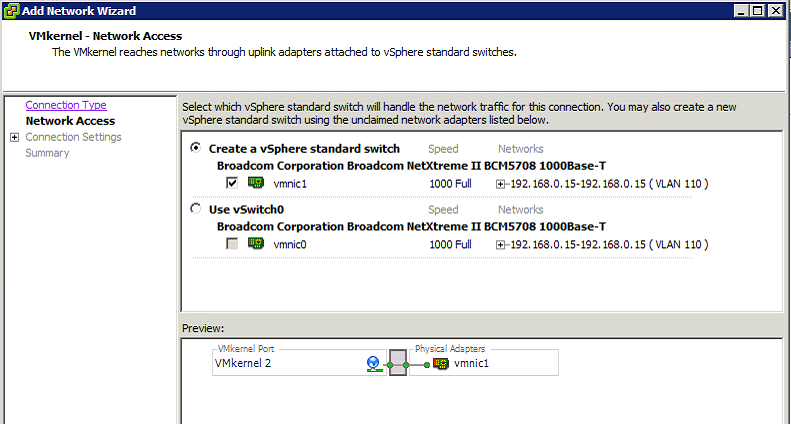
- Choose an available physical NIC. Click Next.
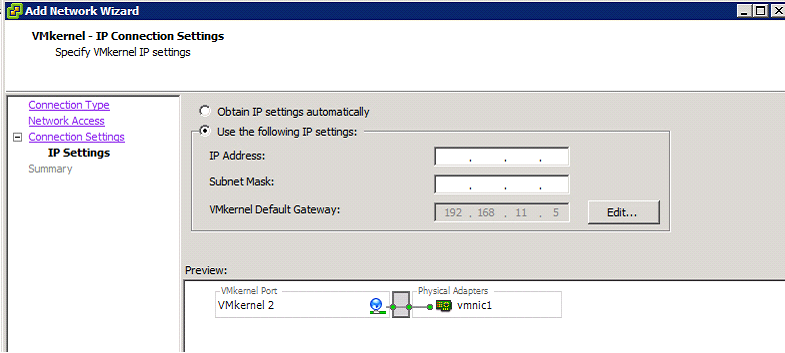
- Enter an IP that corresponds to the existing VIP's subnet. Click Next and then OK.

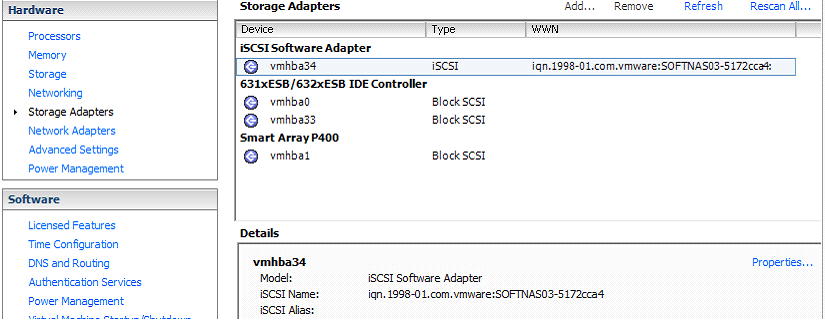
- Next go to configuration tab – > storage adapters and click properties
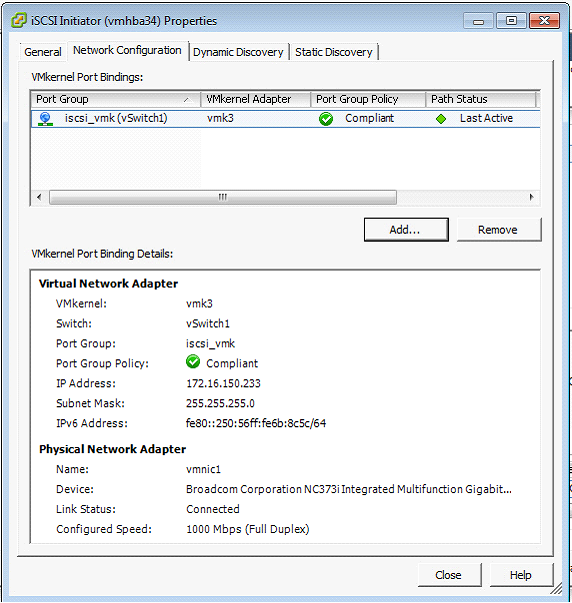
- On the network configuration tab click add to add the vmkernel which we will use for iscsi port binding.
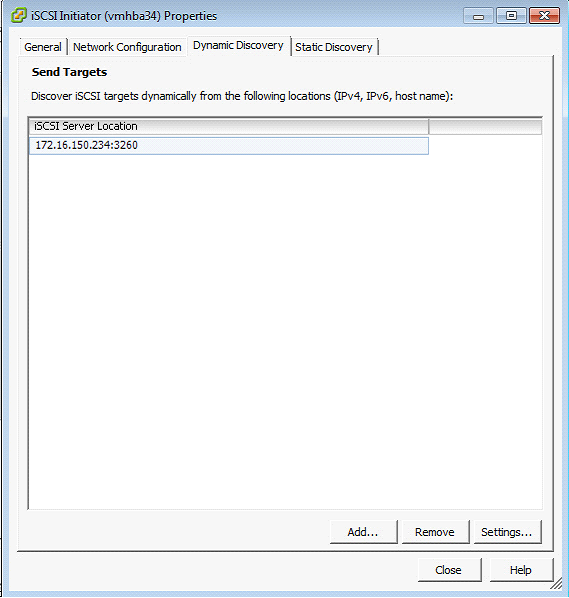
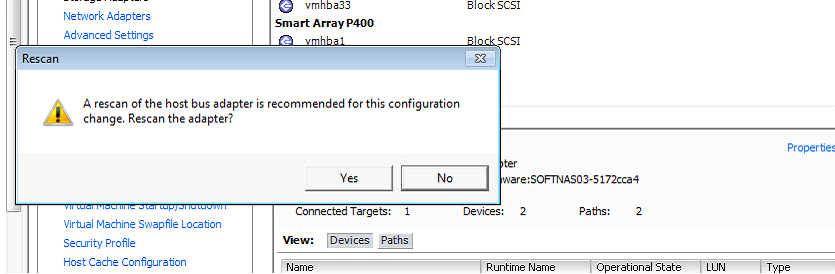
- Then on "Dynamic discovery" click "Add" to put our VIP address press OK and on rescan choose Yes.
- ESXi has now found the iSCSi controller. Add the Datastore and follow the prompts.
Configuration > Storage > Add Storage > Disk LUN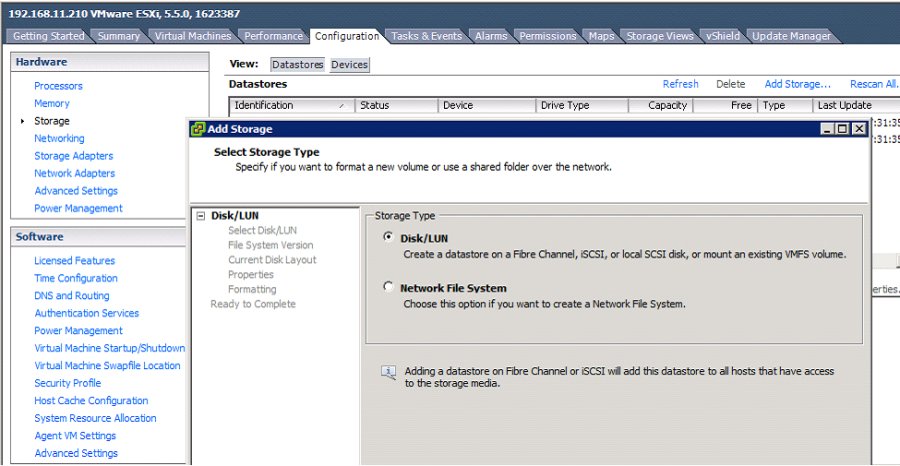
, multiple selections available,
Related content
Best Practices
Best Practices
Read with this
iSCSI CHAP Authentication
iSCSI CHAP Authentication
More like this
VMware Getting Started - HA Considerations
VMware Getting Started - HA Considerations
More like this
VMware Getting Started - Networking Tips
VMware Getting Started - Networking Tips
More like this
Configuring iSCSI SAN Initiators
Configuring iSCSI SAN Initiators
More like this
Add RAW Device Mapping in VMware
Add RAW Device Mapping in VMware
More like this