[SoftNAS KB]: Using Microsoft Previous Versions with SoftNAS
- Former user (Deleted)
Introduction to Microsoft Previous Versions
Previous versions is a feature included in Windows OS’ for both server and PC that copies changes to files and folders created by Windows Backup or System Restore. It was first implemented in Windows XP and Server 2003, but has seen several improvements since. Originally, the solution was to copy files to a separate location the moment a change was made, and could be ‘called back’ in the event of an issue with the current file or document. The first version also specifically excluded areas of frequent change such as anything in the user profile and My Documents folder. Since Server 2008, Vista, Windows 7 and beyond, Previous Versions uses Volume Shadow Copies, which operates at the block level, and is incremental in nature, allowing you full protection for files and folders, but without significant overhead. You can use previous versions to restore files and folders that were accidentally modified or deleted, or damaged. Depending on the type of file or folder, you can open, save to a different location, or restore a previous version.
The Volume Shadow Copy Service integrates with hardware and software VSS providers, backup applications and application level writers, enabling point-in-time, application level backup. The backup tool in question does not require any knowledge of the internals of each file or application. In other words, backup storage solutions, such as SoftNAS can integrate with Previous Versions, and mirror the OS level capability, even with external network storage. SoftNAS provides seamless integration for Previous Versions.
Benefits
With SoftNAS and Previous Versions, users can:
- Restore individual files and images to a previous uncorrupted or unchanged state.
- Recover lost or deleted items by selecting Previous Versions at the folder level.
- Only blocks of data that are about to be over-written are backed up, allowing your data to be recovered without significant overhead.
Accessing Previous Versions from within your Windows PC or VM
In order to access Previous Versions of an individual file or image, simply right-click the file in question and select Properties. In properties, you will see a tab labelled Previous Versions.
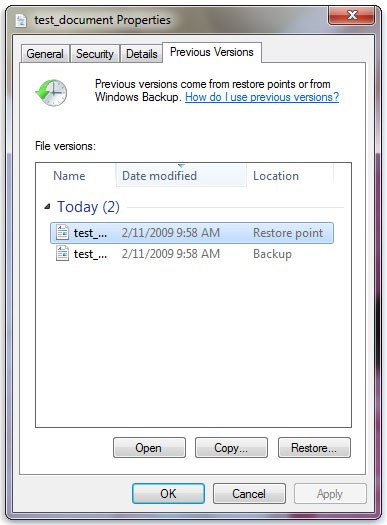
Select the point to which you wish to restore the file in question, and click Restore.
To recover a lost file or image, you must know where the image or file was stored. Select the folder in which the file was stored, right-click, and select Restore Previous Versions.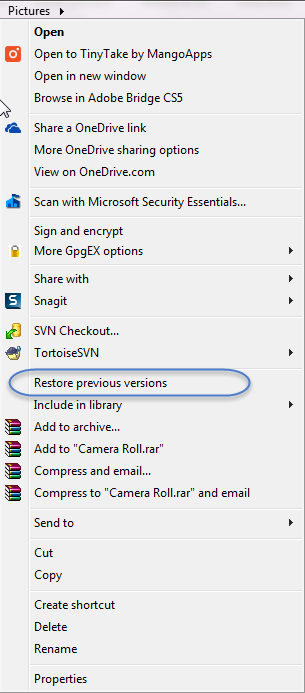
Snapshots
Snapshots as a Backup Tool
The most reliable industry-standard alternative to high cost data storage rollback options is to take periodic snapshots and restore the most recent snapshot. This is an effective, storage efficient, low cost option, and built into \ SoftNAS®.
Snapshots can be set as part of the regular maintenance settings in SoftNAS StorageCenter (recommended best practice) or taken manually (one at a time, not recommended).
If a schedule is set up, volume snapshots are automatically created based upon the chosen schedule. A maximum number of snapshot copies can be set to determine when older snapshots are pruned and eliminated.
Integration of Previous Versions with SoftNAS Snapshots
SoftNAS provides CIFS to share volumes with Windows operating systems. SoftNAS snapshots natively support the Windows Previous Versions API, functioning in the same manner as Restore Points or Backups on the native volume/OS.
- First, log into SoftNAS StorageCenter.
- In the Storage Administration panel, select Disk Devices.
- If only one disk is available, Select the available disk, and click Create Partition, in order to split the drive into two available volumes, allowing you to create a pool.
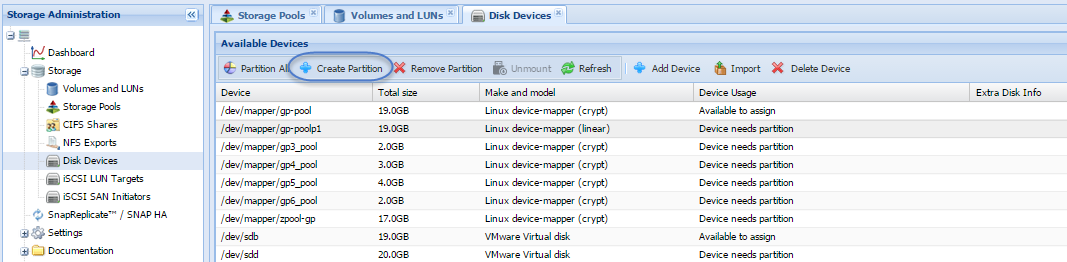
Click Yes, in the confirmation box.
- Once the partition is created, select Storage Pools. Select Create.
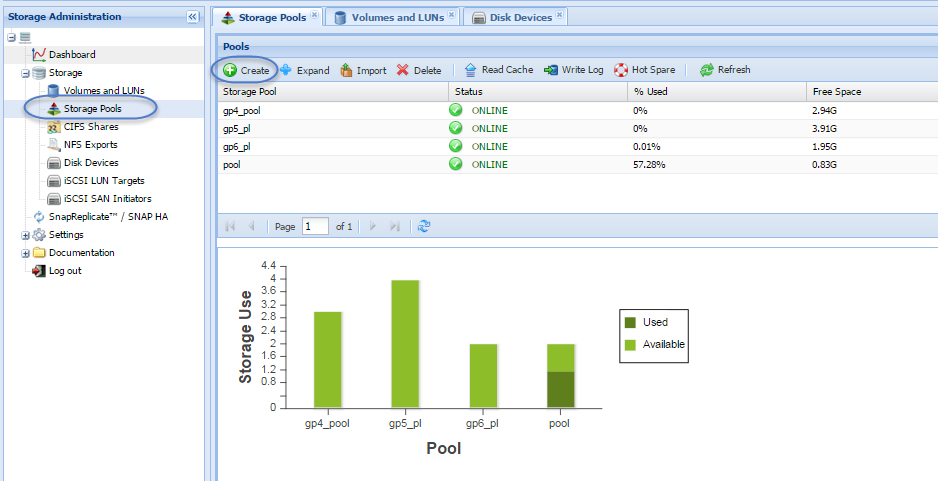
- In the Create a New Storage Pool wizard:
- Name the pool.
- Select RAID Level
- Select your volume/s. Be sure you select the number of volumes required for the RAID level selected.
- Click Create.

- If you elect not to include RAID level protection, click the confirmation to continue.
- Once the pool is created, move to Volumes and LUNs from the Storage Administration panel.
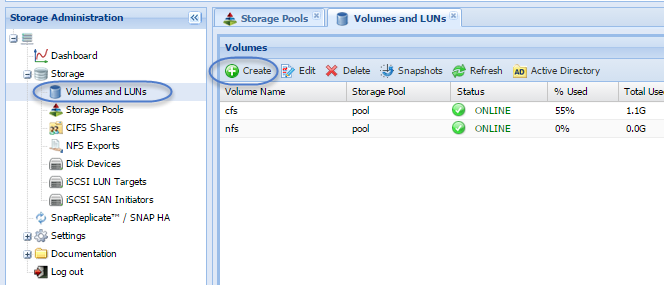
- In Volumes and LUNs, click Create.
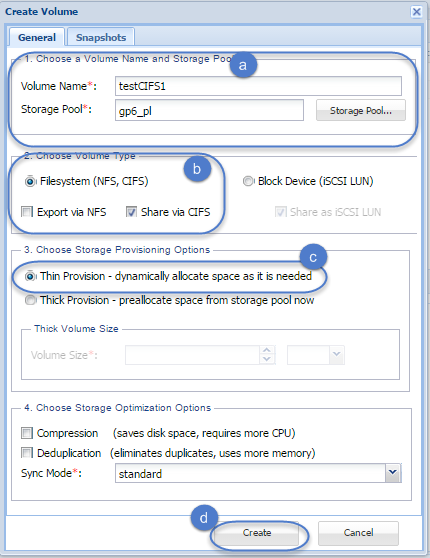
- In the Create Volume menu:
- Type the name of the volume you are creating. Select the Storage Pool.
- Select the CIFS Volume Type (in order to be compatible with Previous Versions, it must be a CIFS volume)
- Select the Provisioning type.
- Click Create.
You can also determine your Snapshot schedule upon Volume Creation. Simply select Snapshots, and follow the instructions found below for Setting up a Snapshot Policy.
CIFS
The Common Internet File System (CIFS) is the standard way that computer users share files across corporate intranets and the Internet. It provides users with seamless file and print interoperability between VMs and Windows-based clients. CIFS allows multiple clients to access and update the same file while preventing conflicts by providing file sharing and file locking.
SoftNAS uses Samba Windows File Sharing for secure, stable, and fast file sharing and print services. Samba integrates Linux/Unix Servers and Desktops into Active Directory environments using the winbind daemon.
Note: Before creating a new file share, configure the default Windows network environment settings.
See our Installation Guide and Reference Guide for more information on Creating CIFS Shares and Configuring CIFS Shares.
Setting up a Snapshot Policy
- Snapshot schedule can be managed on a per volume basis. Simply select the volume for which you wish to edit Snapshot policy, and click Edit.
- Click the Snapshots tab to select your desired schedule.
- In the Volume Snapshot Configuration section, you can enable scheduled Snapshots, by checking the box. You can then select from the available pre-configured schedules in the Snapshot Schedule drop-down. The available options included are Default, 24 x 7, MaximumSnapshots and Business. You can also click Schedules in order to create your own schedule.
- In the Scheduled Snapshot Retention Policy section, set the maximum number of scheduled snapshot copies to maintain in the Hourly, Daily and Weekly fields by either manually entering the value or by using the scroll bar to increase or decrease the value.
- Hourly snapshots occur on the hour at the hourly times specified in the schedule.
- Daily snapshots occur at 1:00 a.m. each day on the days specified.
- Weekly snapshots occur at 2:00 a.m. once per week on the day of the week specified
- In the Volume Snapshot Configuration section, you can enable scheduled Snapshots, by checking the box. You can then select from the available pre-configured schedules in the Snapshot Schedule drop-down. The available options included are Default, 24 x 7, MaximumSnapshots and Business. You can also click Schedules in order to create your own schedule.
- Click Save.
Note: SoftNAS’ integration with Previous Versions is only compatible with hourly snapshots, not daily or weekly or manual snapshots. Support for these are planned for a future release.
Managing Snapshots and Previous Versions
Previous Versions (and VSS) are not a substitute for a true backup system, nor is it a true versioning system, for the following reasons:
- Backups and restore points must be triggered or scheduled, and may not recognize data changes (corruption) resulting from low-level hardware corruption, and may not trigger a backup automatically.
- Shadow copies are typically stored on the same volume as the data itself, meaning that if the volume fails, all data is lost.
- VSS only saves at set intervals, and only restores changes based on these set intervals. This means that if you have written several pages of content since last Monday for a dissertation, and your last restore point was the preceding Sunday, these pages are lost.
- VSS is incremental. This means that if you have two or more backup versions to choose from, for example one taken Monday, one on Tuesday, if you roll back to Monday, Tuesday’s changes are lost as well. You cannot eliminate a subset of changes.
With these limitations in mind, regularly scheduled Snapshots through SoftNAS Storage center can reduce risks greatly, by providing multiple restore points to choose from, and by triggering snapshots on a far more regular basis than native Windows System Restore and Backup features do by default. Integration of Previous Versions functionality improves user experience by allowing our users to manage individual files or folders, rather than logging into SoftNAS and rolling back the entire volume via our Snapshot functionality (or contacting support and having an administrator for the instance do so). In addition, the familiarity of Windows Previous Versions means that users do not need to learn a new interface to restore their files.