VMware Getting Started - Configuring High Availability
- Former user (Deleted)
- Tom Sheffield (Unlicensed)
Configuring SnapReplicate™
Having prepared the environment on both SoftNAS AWS instances, we can now set up high availability. The first step towards high availability in SoftNAS is to establish replication. SnapReplicate™ makes this as simple as completing a quick wizard.
To establish the secure SnapReplicate relationship between two SoftNAS nodes, simply follow the steps given below:
- Log into the source controller's (the first instance within which you created the CIFS enabled volume) SoftNAS StorageCenter administrator interface using a web browser.
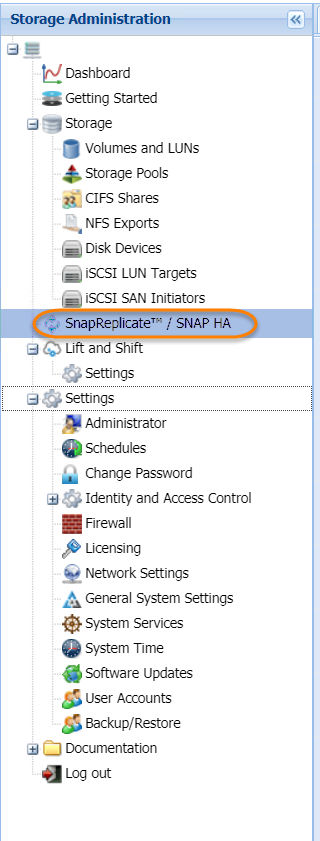
- In the Left Navigation Pane, select the SnapReplicate™/SNAP HA™ option.
The SnapReplicate/SNAP HA page will be displayed.
Click the Add Replication button in the Replication Control Panel.
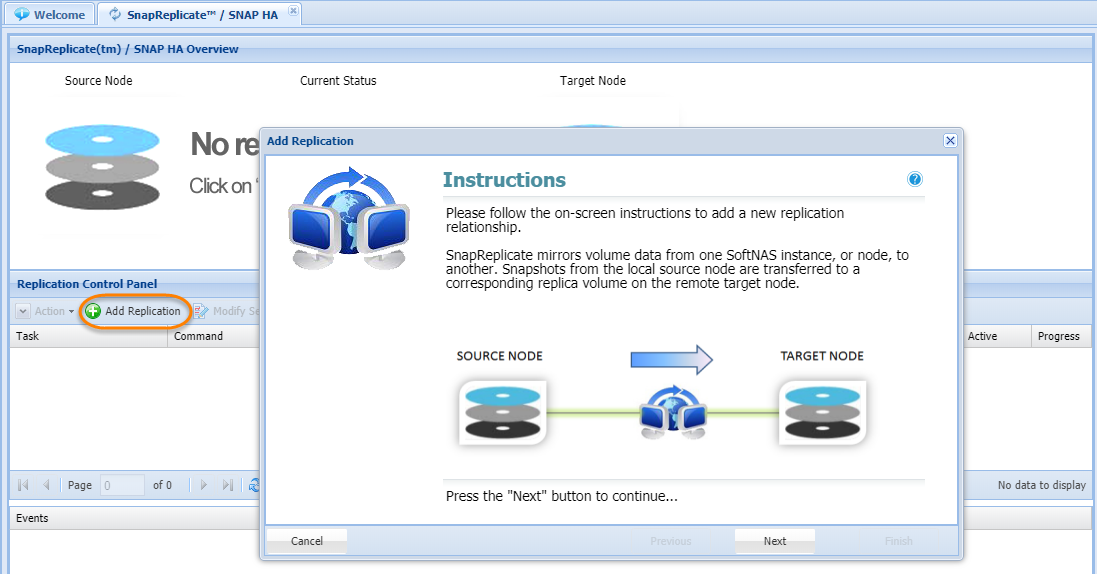
The Add Replication wizard will be displayed. Read the instructions on the screen and then click the Next button.In the next step, enter the IP address or DNS name of the remote, target SoftNAS controller node in the Hostname or IP Address text entry box. Note that by specifying the replication target's IP address, you are specifying the network path the SnapReplicate™ traffic will take.

- The source node must be able to connect via HTTPS to the target node (similar to how the browser user logs into StorageCenter using HTTPS). HTTPS is used to create the initial SnapReplicate configuration. Next, several SSH sessions are established to ensure two-way communications between the nodes is possible. Ensure that any firewall that may interfere in the connectivity between your two nodes are configured to allow SSH and HTTPS traffic from the IP addresses of the nodes.
Provide the username (softnas) and the password (if default, this is the instance id) of the target instance. Type the password again to verify, then click Next.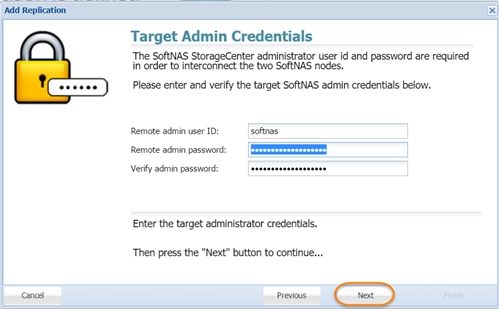
The IP address/DNS name and login credentials of the target node will be verified. If there is a problem, an error message will be displayed. Click the Previous button to make the necessary corrections and then click the Next button to continue. - Read the final instructions and then click the Finish button.
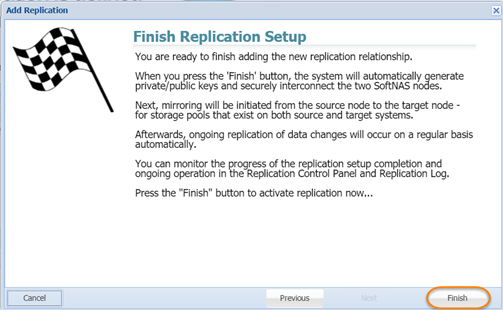
The SnapReplicate relationship between the two SoftNAS controller nodes will be established. The corresponding SyncImage of the SnapReplicate will be displayed.
After data from the volumes on the source node is mirrored to the target, once per minute SnapReplicate transfers keep the target node hot with data block changes from the source volumes.
The tasks and an event log will be displayed in the Replication Control Panel section. This indicates that a SnapReplicate relationship is established and that replication should be taking place.
Configuring SNAP HA™
SnapReplicate™ establishes a replication relationship, one that can be manually triggered or scheduled, but is not automated. For true high availability in a failover situation, SNAP HA™ must be configured as well.
- To configure SNAP HA™, complete the SNAP HA wizard, beginning by clicking Add SNAP HA™.
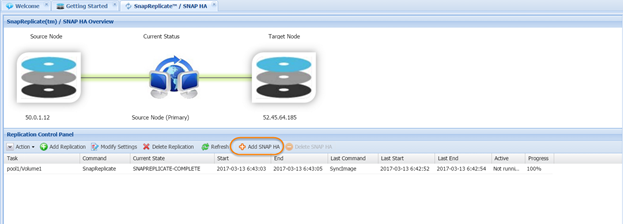
Note: Configuration of SnapReplicate™ is a prerequisite to setup of SNAP HA™. If SnapReplicate™ is not configured, the Add SNAP HA™ button will be grayed out.
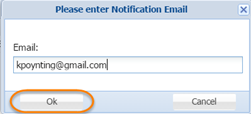
If you have not yet configured a notification email, the opportunity to provide one will be presented prior to continuing SNAP HA™. Provide an email address for support reports and logs to be sent to, and click OK.
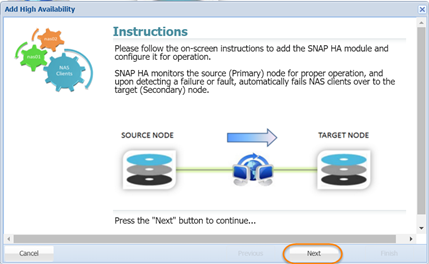
- Click Add SNAP HA™ once more if you had not yet provided a notification email. The Add High Availability wizard will begin.
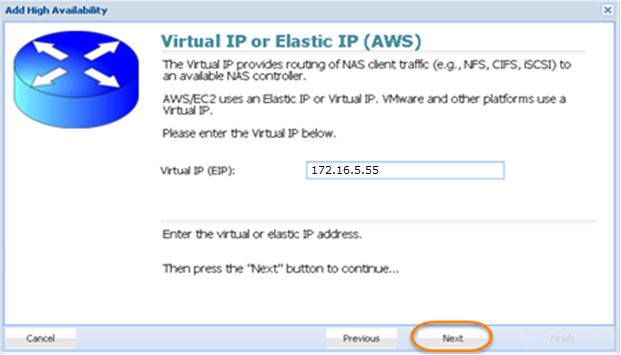
- Provide a Virtual IP address, and click Next. This is a third, human-configured (chosen by you) IP starting with a different octet. This 3rd IP address will be used to access the share. Starting with a different octet means that if your VPC range is 155.16.0.0/16, the VIP you select must not start with 155, it must start with something else, for example: 10 or 12 or 172.
- Next, you will provide the IP address of the HA Controller virtual machine created earlier.

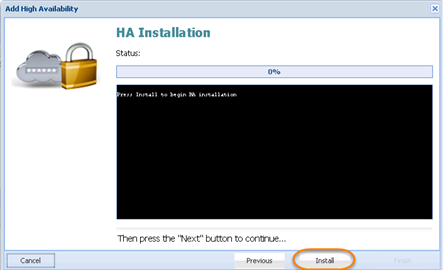
- Click Install to begin the HA installation.
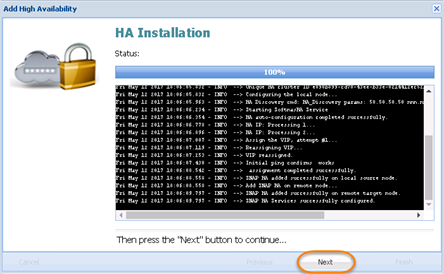
- Click Next once installation completes.
Click Finish to complete HA setup.
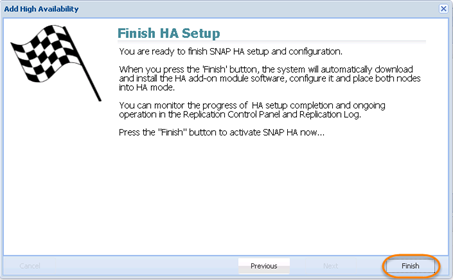
At this point SoftNAS will do all of the heavy lifting that is required to establish HA, without the need for any user intervention. The process may take several minutes.
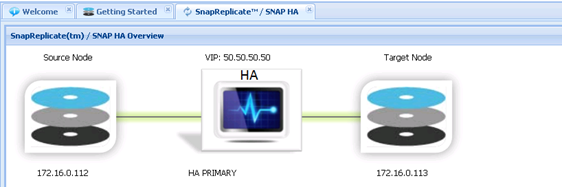
Once complete, you should see the SNAP HA™ status shown in the SnapReplicate™/ SNAP HA™ Overview.