...
...
...
...
In order to join your SoftNAS instance to Active Directory, you must first create a user with adequate permissions to perform the task.
...
Method 1:
...
Create a domain user with the appropriate credentials by creating a domain user, and adding it to the default group found in Windows Server domains called Account Operators. This group carries and provides its users with all the required permissions.
Method 2:
...
Assign the rights to the domain user or group by using the Default Domain Group policy.
...
- Login to the domain controller and launch the Group Policy Management console.
- Right-click the Default Domain Policy and click Edit.
...
- Navigate
...
- through Computer Configuration > Windows Settings > Security Settings > Local Policies > User Rights Assignment.
- Expand User Rights Assignment.
- On the right hand side double-click Add workstations to
...
- domain policy.
...
- Check the
...
- box Define these policy settings.
- Click Add User or Group and select the user or group.
- Click Apply and OK.
| Note |
|---|
...
| It is a good idea to also set up permissions using AD Users and Computers. |
- Open the Active Directory Users and Computers snap-in.
...
- Right-click the container under which you want the computers to be added (for example, the Computers container)
...
- .
- Click on Delegate Control.
...
- You will now see
...
- the Delegation of Control Wizard. Click Next.
- To add a user or group
...
- click the Add... button.
- Once done, click the Next button.
- In Tasks to Delegate, click Create a custom task to delegate.
...
- Once done, click the Next button.
...
...
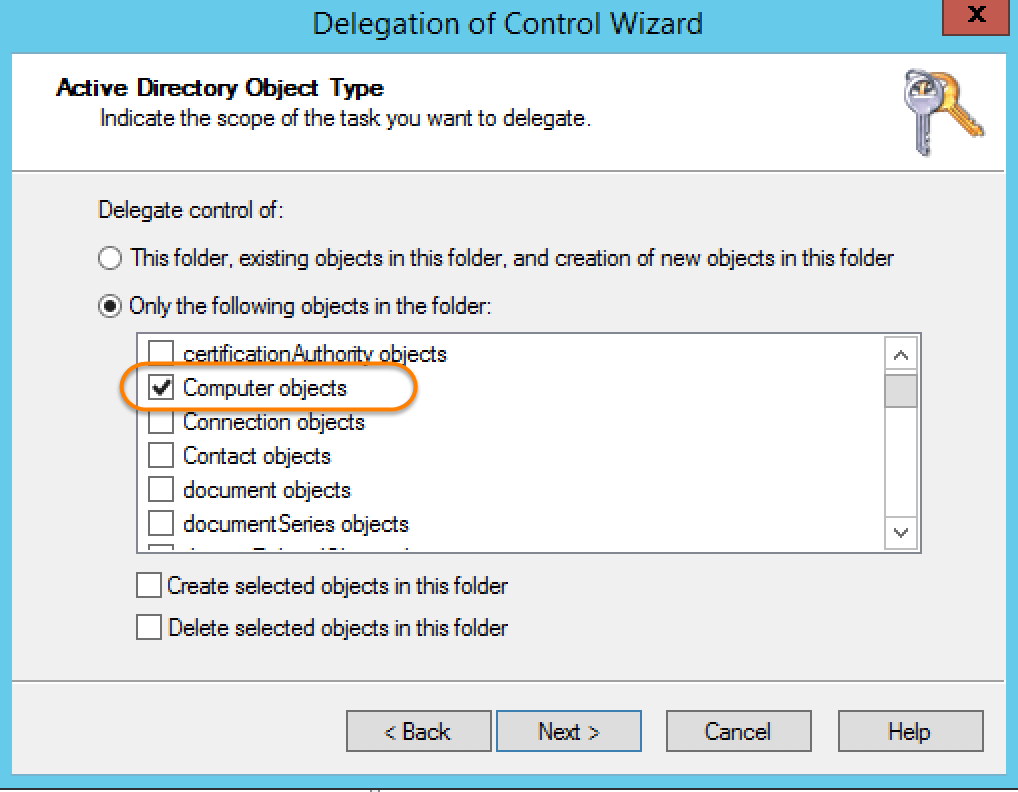
- Choose Only the following objects in the folder and check the box Computer Objects.
...
- Once done, click the Next button.
...
- In Show these permissions, check the Property-specific check-box
...
- .
- Under Permissions, check Read userPrincipalName and Write userPrincipalName
...
- .
...


